Manage Zones
Note
This feature is only available to users with an Admin role.
You will be able to zone your level according to your needs. Each level in a car park will be displayed with a Zones button which allows you to configure one or multiple zones per level.
Adding a new zone to a level
From the left-hand navigation bar, click the Manage Car Parks menu item.
Locate your car park and click its associated Levels button to display any levels currently configured for that car park.
Locate your level and click its associated Zones button to display any zones currently configured for that level
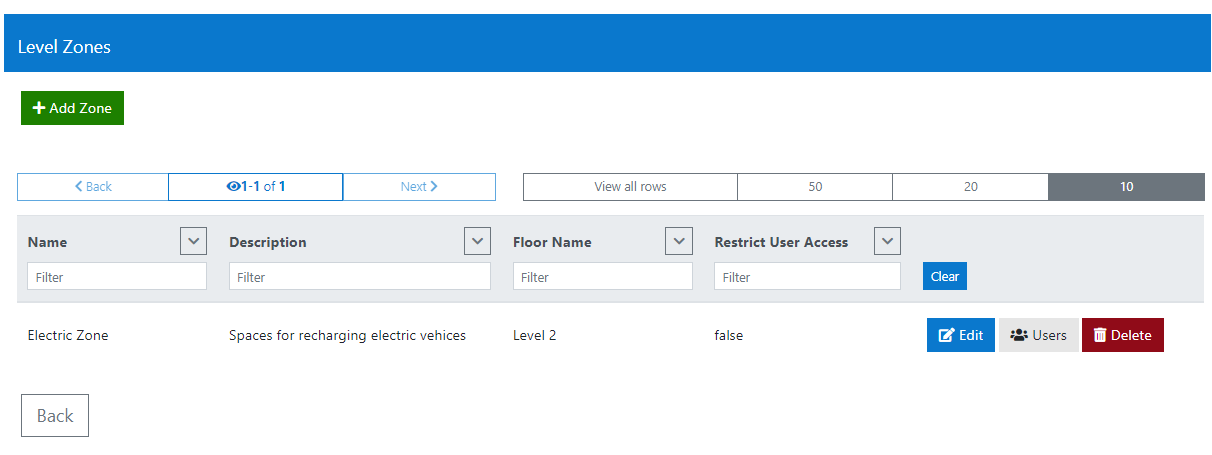
Clicking the Add Zone button will allow you to configure a new zone:
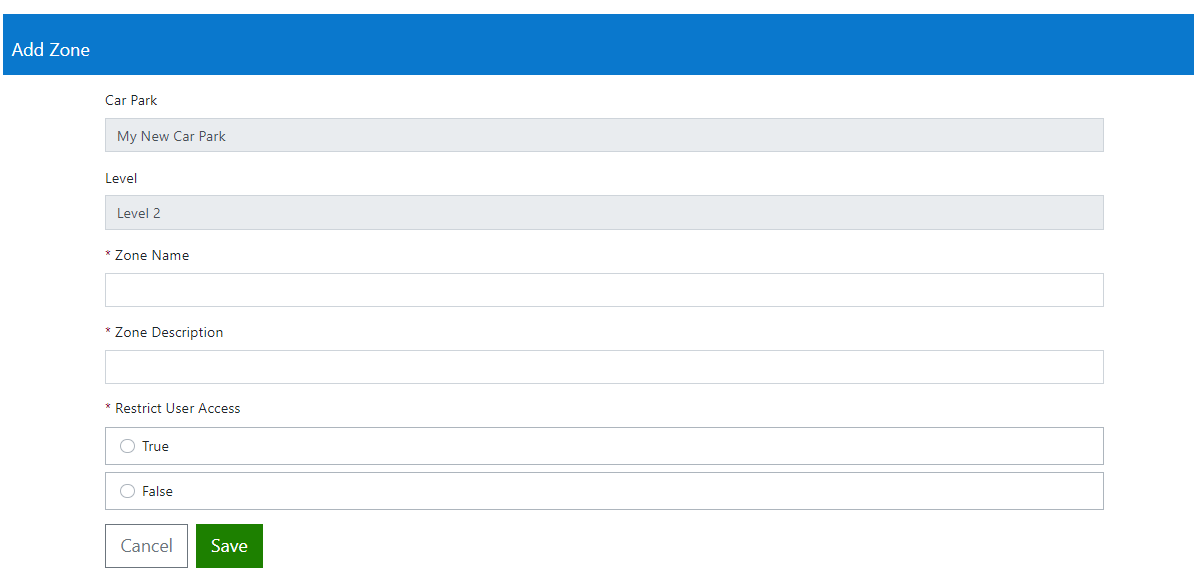
Note that the Car Park and Level fields will be pre-populated by the system
- enter a zone name
- enter a zone description
- like a level, a zone can be configured to restrict user access
- if set to True, you will be able to restrict zone access to specified users
- otherwise set to False, it will be available to all users of the service.
Clicking Save will add the zone to your level.
Editing a zone
Note that you will be able to edit your zone details at any point by using its associated Edit button, making your changes and clicking the Update button to save.
Any changes will be immediately available.
Scheduling the unavailability of a zone
You can schedule a period of unavailability to occur at a future date or date range. This can be applied to a car park, level or zone.
For full information on this feature, please refer to userguide - Holidays and Breaks.
Restricting access to a zone
As an admin, you will be able to restrict who is able to book parking spaces which have been associated to a specific zone.
It is important to note that a zone inherits any existing restrictions configured against its parent level. Therefore, you will only be able to further restrict only those users already permissioned on the level.
From the left-hand navigation bar, click the Manage Car Parks menu item.
Locate your car park in the list and click its associated Levels button to display any levels currently configured for that car park.
Locate your level in the list and click its associated Zones button to display any zones currently configured for that level.
Locate your zone in the list
- IF it has not already been set to restricted
- click its associated Edit button to display its details
- and set its Restrict User Access setting to True

- click the Update button to save the change.
You will now see that your zone has been set to restricted in the list of zones.
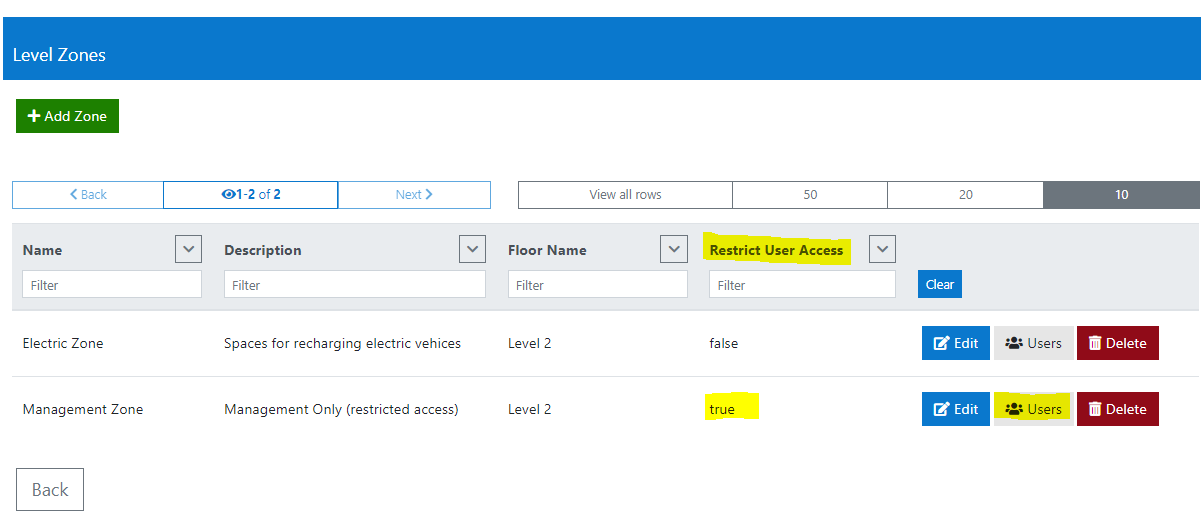
Now that your zone is restricted, you can now configure the users it is restricted to.
Click its associated Users button to display all the users currently with permission to access the parent level.
If the parent level has no restrictions, then you will see the full list of all users currently registered on the service
The users are listed in a sortable/filterable table to help you easily find the users you want to permission.
- click the user's associated Grant button to allow this person access to the zone - this will change the button from Grant to Revoke.
- click the user's associated Revoke button to remove their access to the zone - this will change the button from Revoke to Grant.
- click the Grant All button to grant permission to all the users in the list
- click the Revoke All button to remove permission from all the users in the list
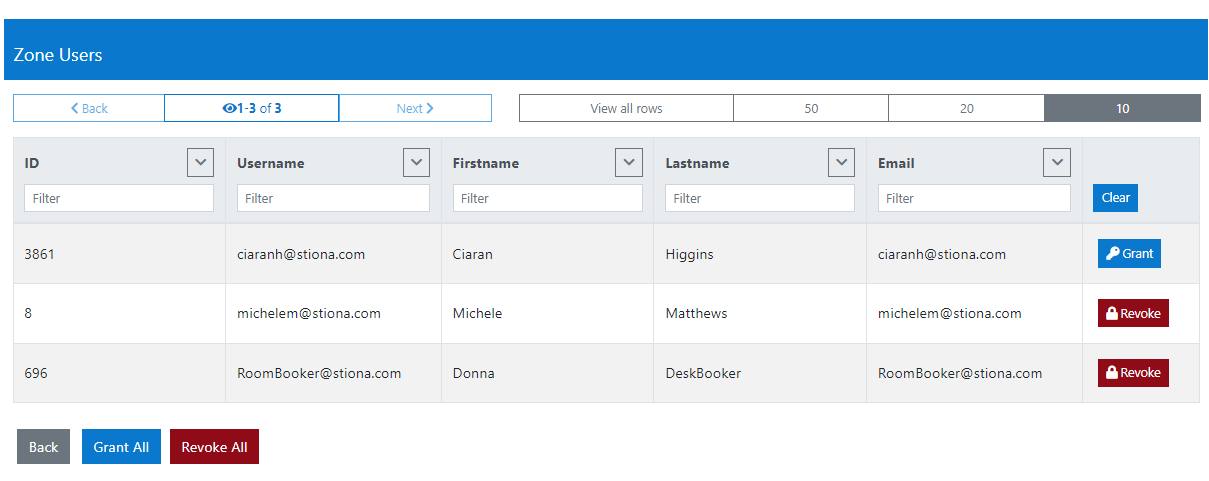
Once you have completed your user configuration, click the Back button to return to the previous page.
In the example above, the 3 users listed will be able to access the level, but only the 2 granted permission to the zone will be able to access and book parking spaces associated to this zone.