Notify Admin User Guide
Purpose
The purpose of this document is to provide guidance for the Notify Administration team to help them set up a new campaign on the Digital Transactional Toolkit Notify Service. The guidance is broken down into 2 main sections :
- GOV UK Notify Portal Set Up : this section provides guidance on the setup that is required on the GOV UK Notify portal and walks the user through the various configuration steps, highlighting the specific data that is required for the set up of the Notify service on the Digital Transactional Toolkit.
- DTT Notify Set Up : this section provides guidance on how to configure the notify service on the Digital Transactional Toolkit. It walks the user through the steps for setting up the Notify configuration data and then creating a new customer service and associated SMS campaign to allow citizens to be able to opt in and opt out.
Pre-requisites
- The client will need to have been set up and agreed to the T and C's for the Notify portal.
Platform URLs
The table below provides the details of the URLs for the Digital Transactional Toolkit (DTT) and the GOV Notify SMS service.
| Platform | URL |
|---|---|
| GOV Notify | https://www.notifications.service.gov.uk |
| Digital Transactional Toolkit | https://dttadmin.public.nics.gov.uk/DSSNotify/notify |
GOV UK Notify Portal Set Up
The following section describes the steps for setting up a Notify Service on GOV Notify. Once this has been completed then the steps to set the service up on the DTT as described in section 3 of this document can be completed.
The assumption is that the user has already registered an account with Gov Notify and has access to the GOV Notify services.
Select Notify Service
After logging in the user will be presented with the following screen :
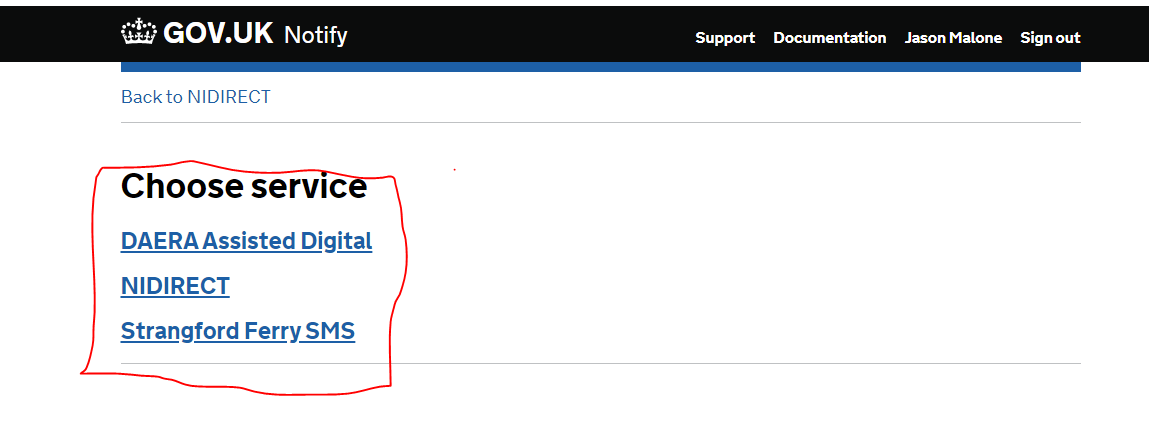
Screenshot 1
The screen will display a list of services that they have access to and the user should select the relevant Notify service that they wish to create on the DTT.
Notify Service Dashboard
Once a user has selected a service, they will be presented with the Notify dashboard as illustrated in the screen below:
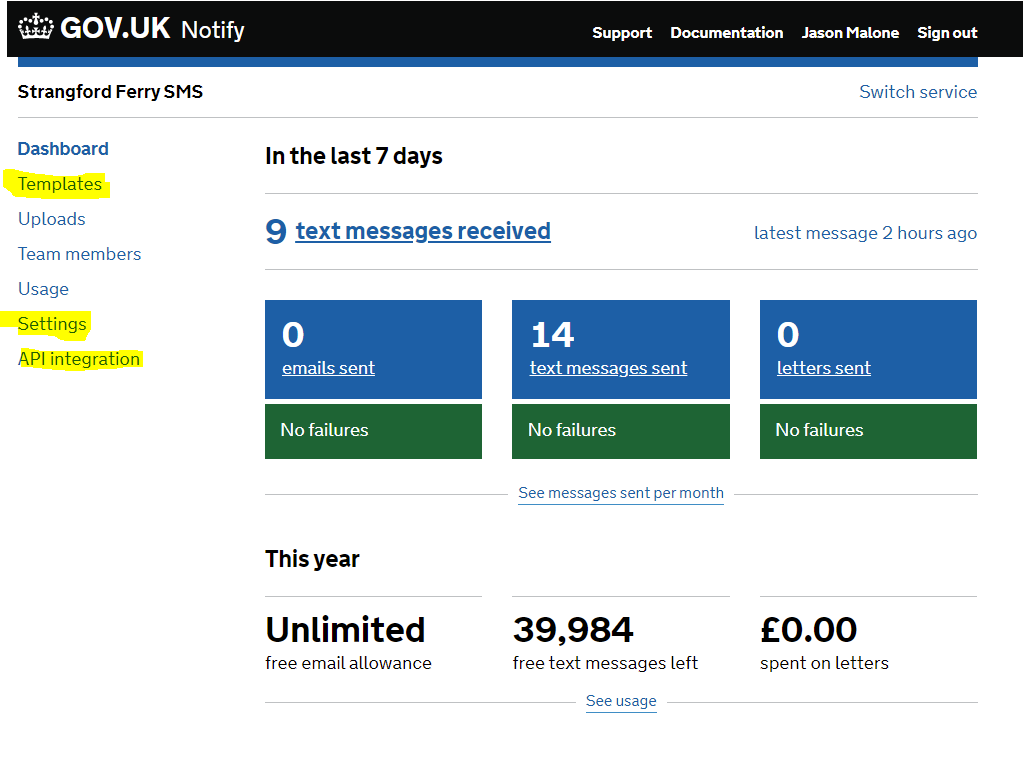
Screenshot 2
In order to set the service up, the user will be required to go into the sections highlighted in yellow. The actions required are described in the following sections of this document.
API Integration
In order for the DTT to integrate with the Notify service it requires an API integration key to be set up in Notify. On accessing the API Integration menu option they will be presented with the following screen.
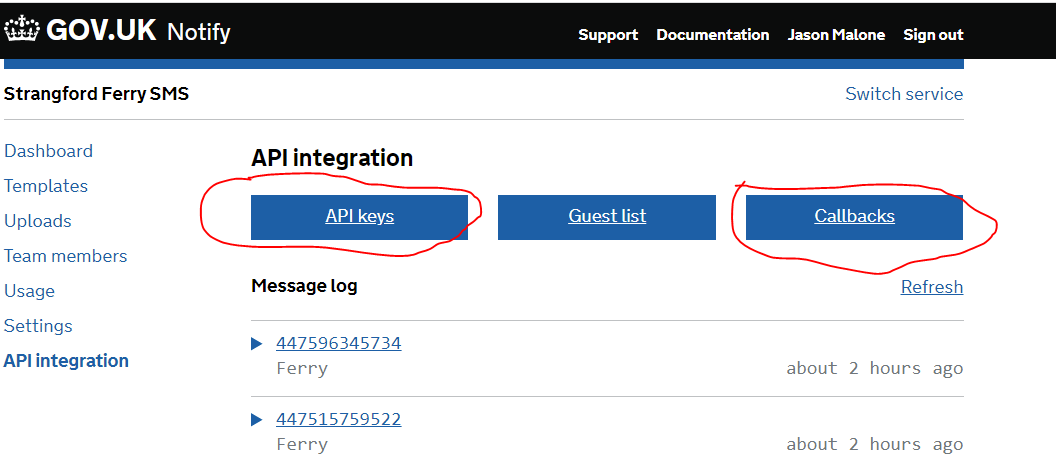
Screenshot 3
The first step is to set up the API Key by selecting the API Keys button which will present the following screen:
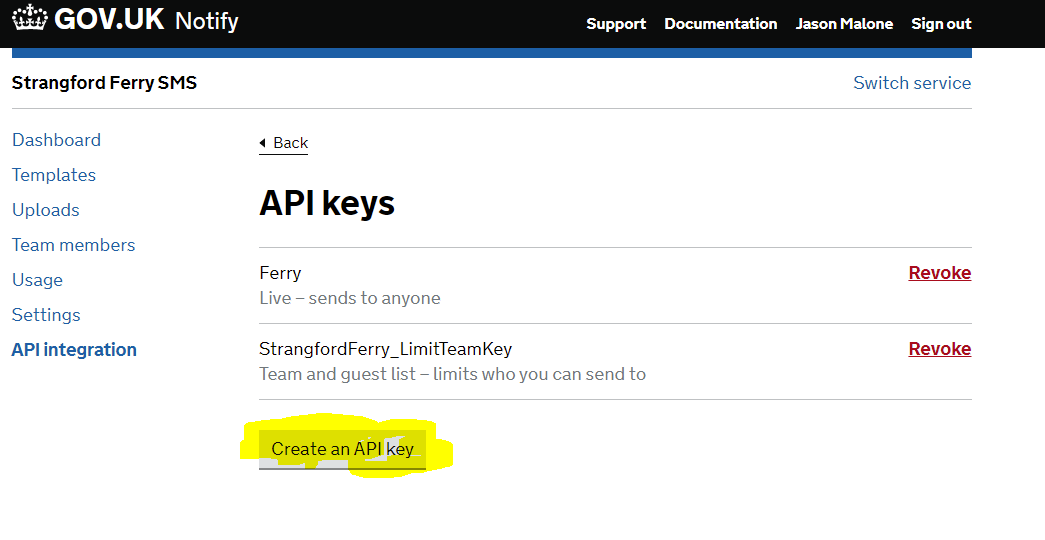
Screenshot 4
The next step is to click on the Create API Key button as highlighted above and this will then present the following screen:
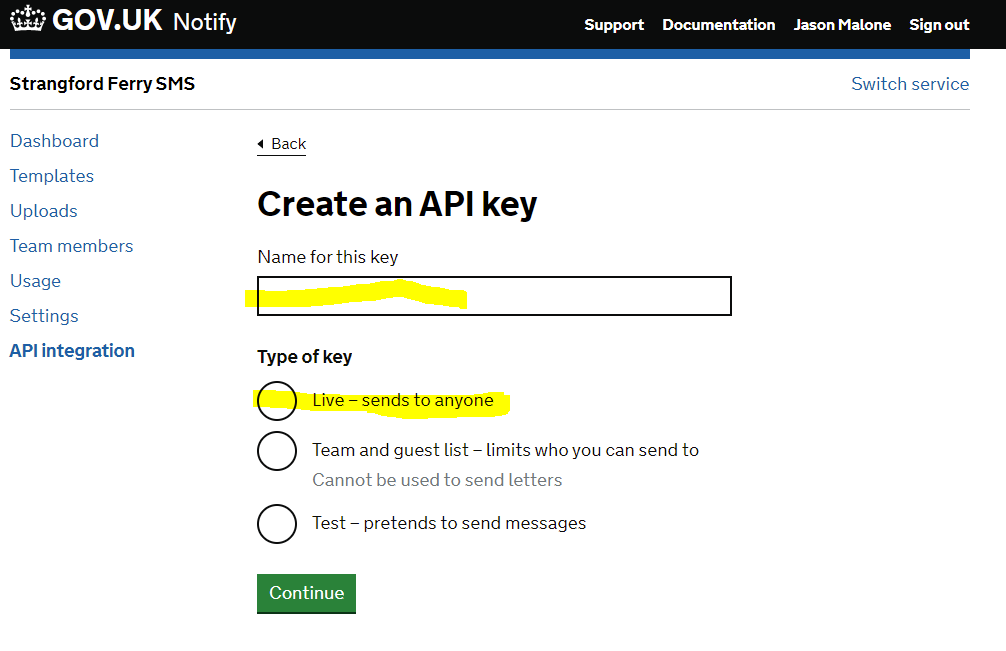
Screenshot 5
The user must fill in the items highlighted in yellow and click continue. This will generate an API key and allow the user to copy the key.
IT IS ESSENTIAL THAT THE KEY IS COPIED WHEN DISPLAYED AND PASTED SOMEWHERE IT CAN EASILY BE RETRIEVED AS THERE IS NO OTHER OPPORTUNITY TO SEE THE KEY AFTER THIS STEP.
2.4 Callbacks Setup
After completing the above steps, the user will navigate back to the API Integration screen and will select the Callbacks button as highlighted in Screenshot 3 at the beginning of this section. This will present the user with the following screen:
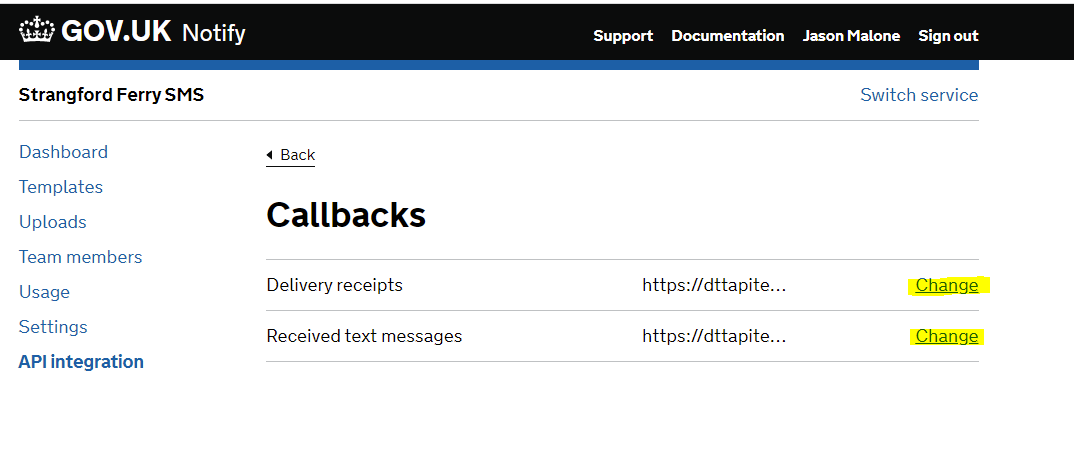
Screenshot 6
The user will set up the delivery receipts and received text messages configuration by accessing the links highlighted in yellow in the above screen shot.
Clicking on the delivery receipts change link will present the user with the following screen:
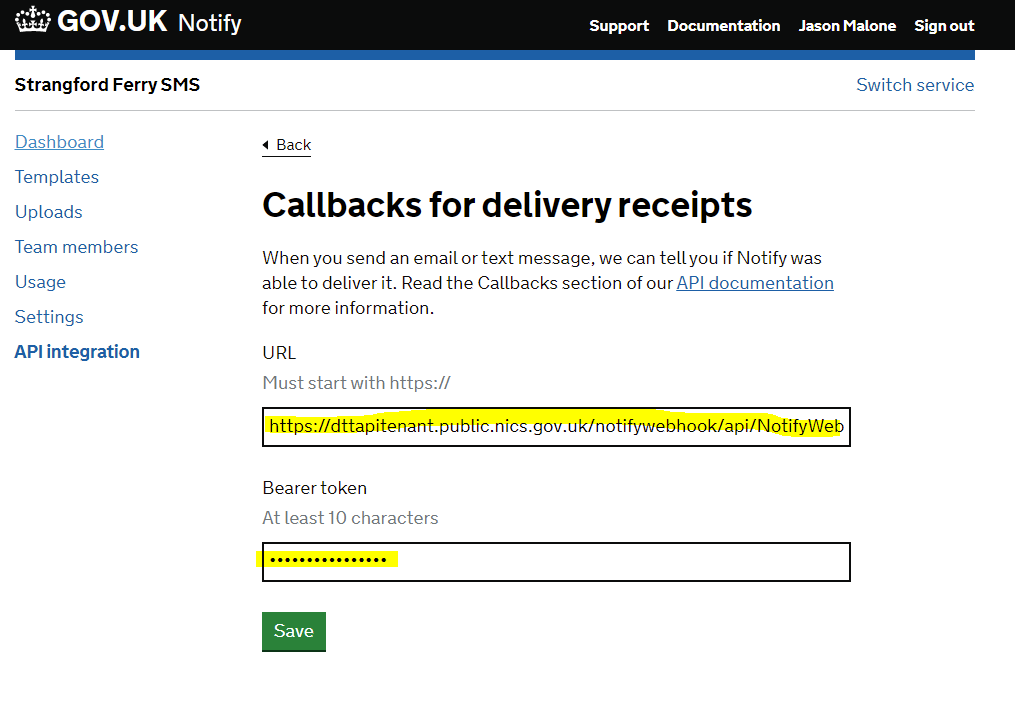
Screenshot 7
The user will enter the following URL and the bearer token values.
URL Value
https://dttapitenant.public.nics.gov.uk/notifywebhook/api/NotifyWebHook/Feedback
Bearer Token Value
+b9X44D0RAls+T6XsHhgEc8
These same two values are entered for the Received text messages screen. This screen is accessed by clicking the Change link alongside the Received Text Messages label in Screenshot 6 above.The screen will appear as below once the link has been clicked.
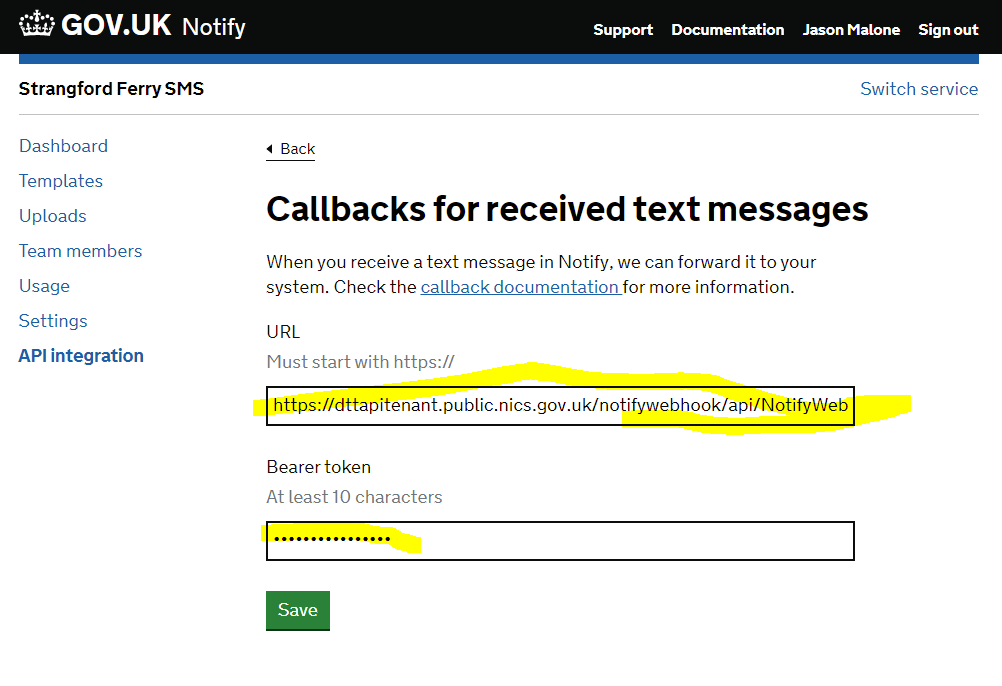
Screenshot 8
This completes the Call Back API.
Notify Settings
The next setup is to navigate to the following screen by clicking on the Settings menu option as highlighted in the screenshot below :
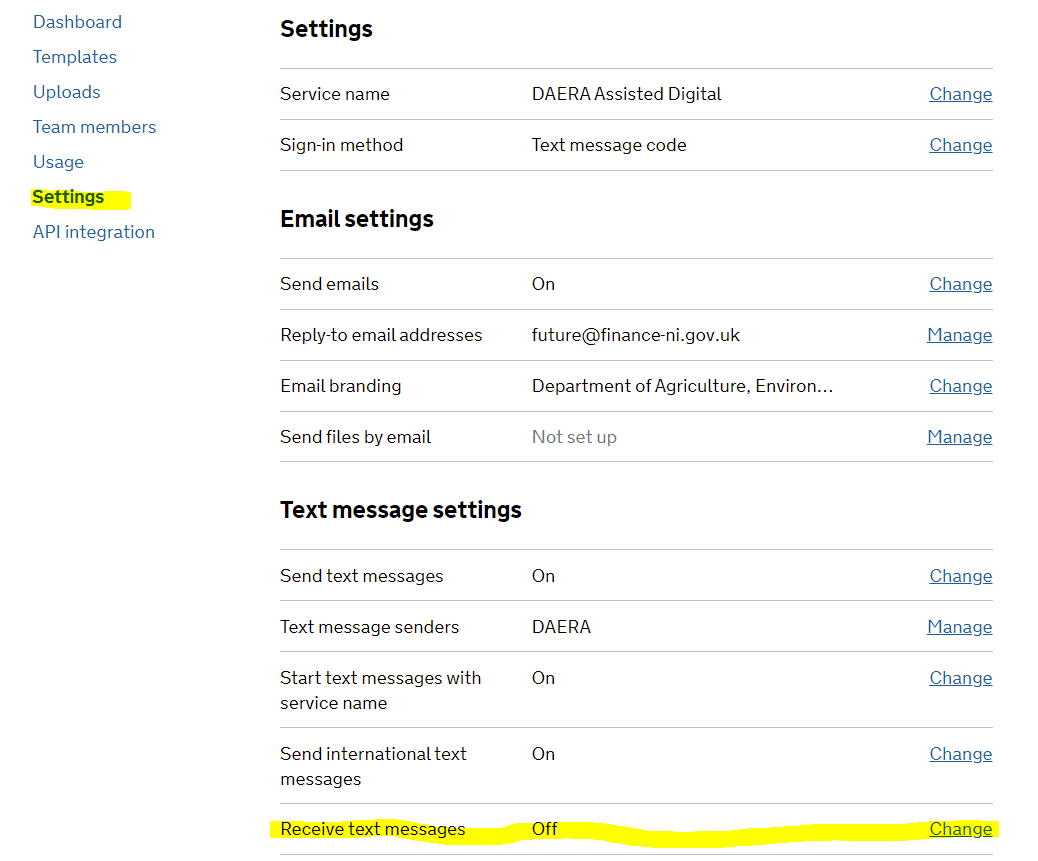
Screenshot 9
This screen allows the user to set up a mobile number to receive incoming text messages. This requires the user to contact GOV Notify to set up a number that can be used. Once this number has been created then this needs to be stored by the user as it will be required in the setup process for the DTT Notify service.
Templates
The final piece of setup required on the Notify Portal is the setup of a single dttTemplate. This is performed through accessing the templates menu option as highlighted on the following screenshot :
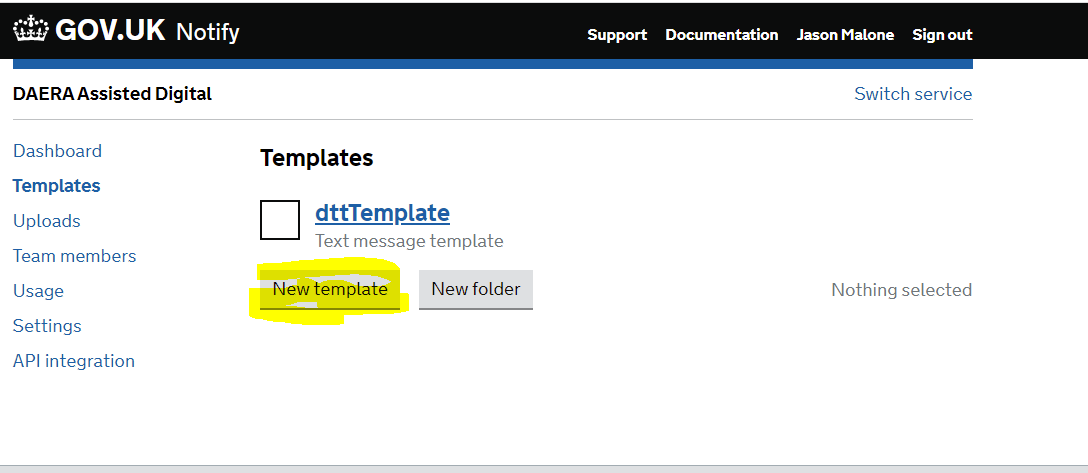
Screenshot 10
The user will create a new template by clicking on the New Template button which will present the following screen:
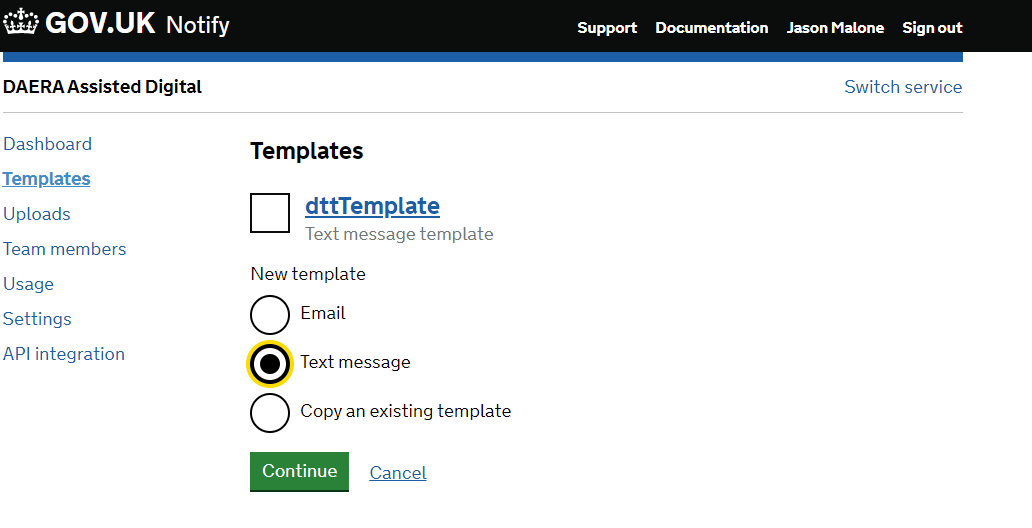
Screenshot 11
The user then selects the Text Message option and hits continue which allows brings them to the following screen where they can create the new template :
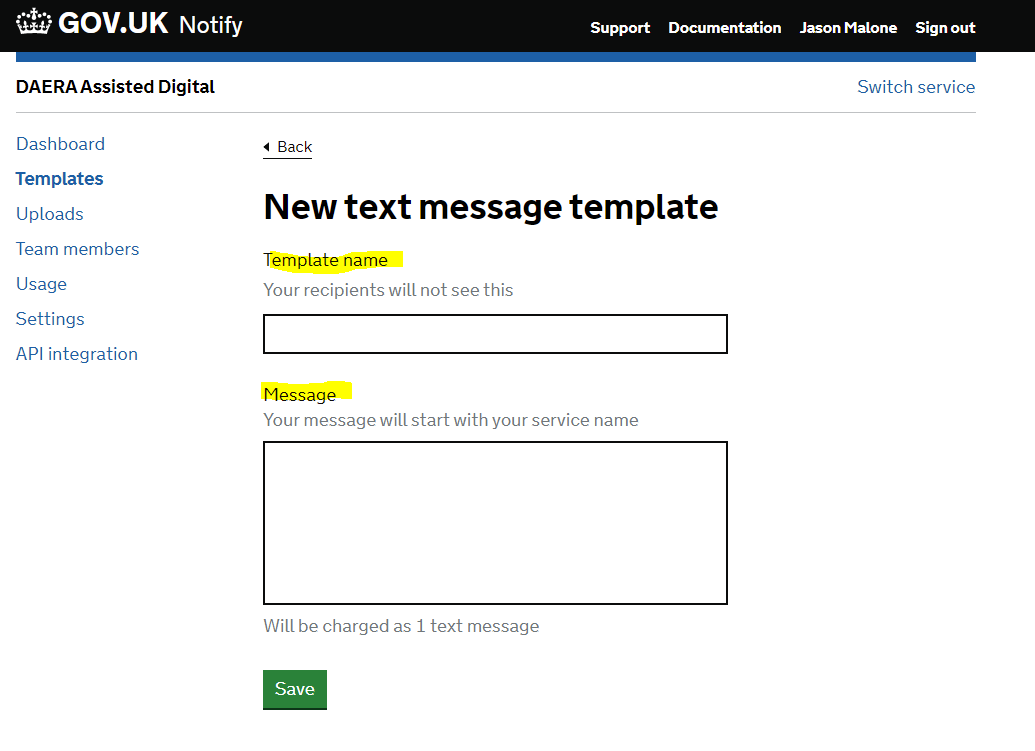
Screenshot 12
The user will enter the following Template Name and Message values.
Template Name
dttTemplate
Message
((smsmessage))
After the user clicks on the save button they will have created the dttTemplate that will be used by the DTT platform for sending all text messages. The resultant template when created will look something like the following screenshot:
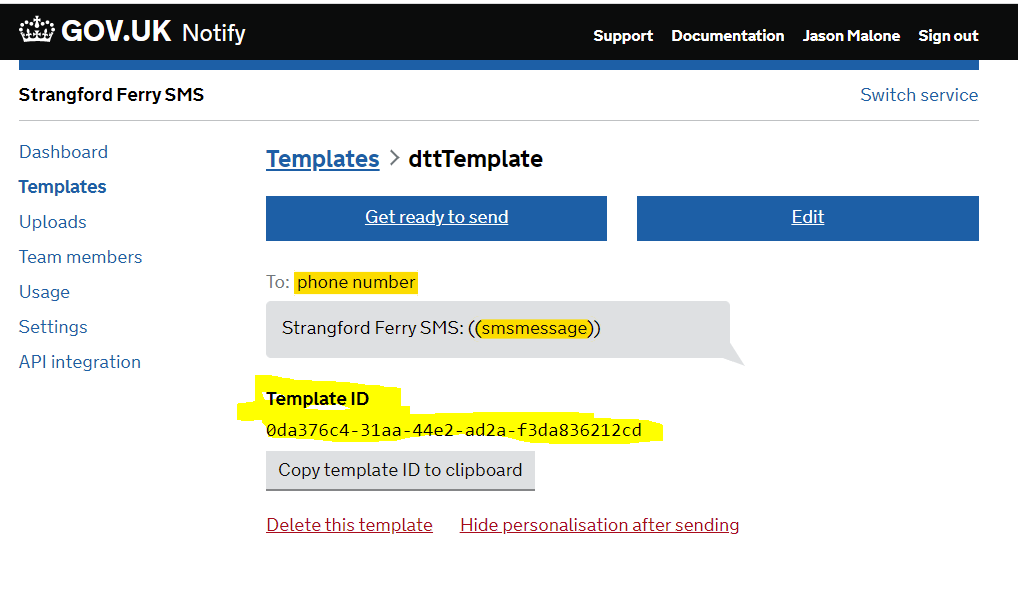
Screenshot 13
THE INFORMATION THAT IS REQUIRED FOR THE DTT SETUP IS THE TEMPLATE ID AS HIGHLIGHTED IN YELLOW IN THE ABOVE SCREEN SHOT.
This then completes all the setup for the Notify Portal the next step is to set up the DTT Notify service. (See ServiceAdmin User Guide)