Payment Gateway User Guide
Configuring your payment provider
Using the Service Configuration menu item, any existing configurations will be displayed on this screen. Users can create a configuration by using the Add Configuration button. (Only one configuration per instance).
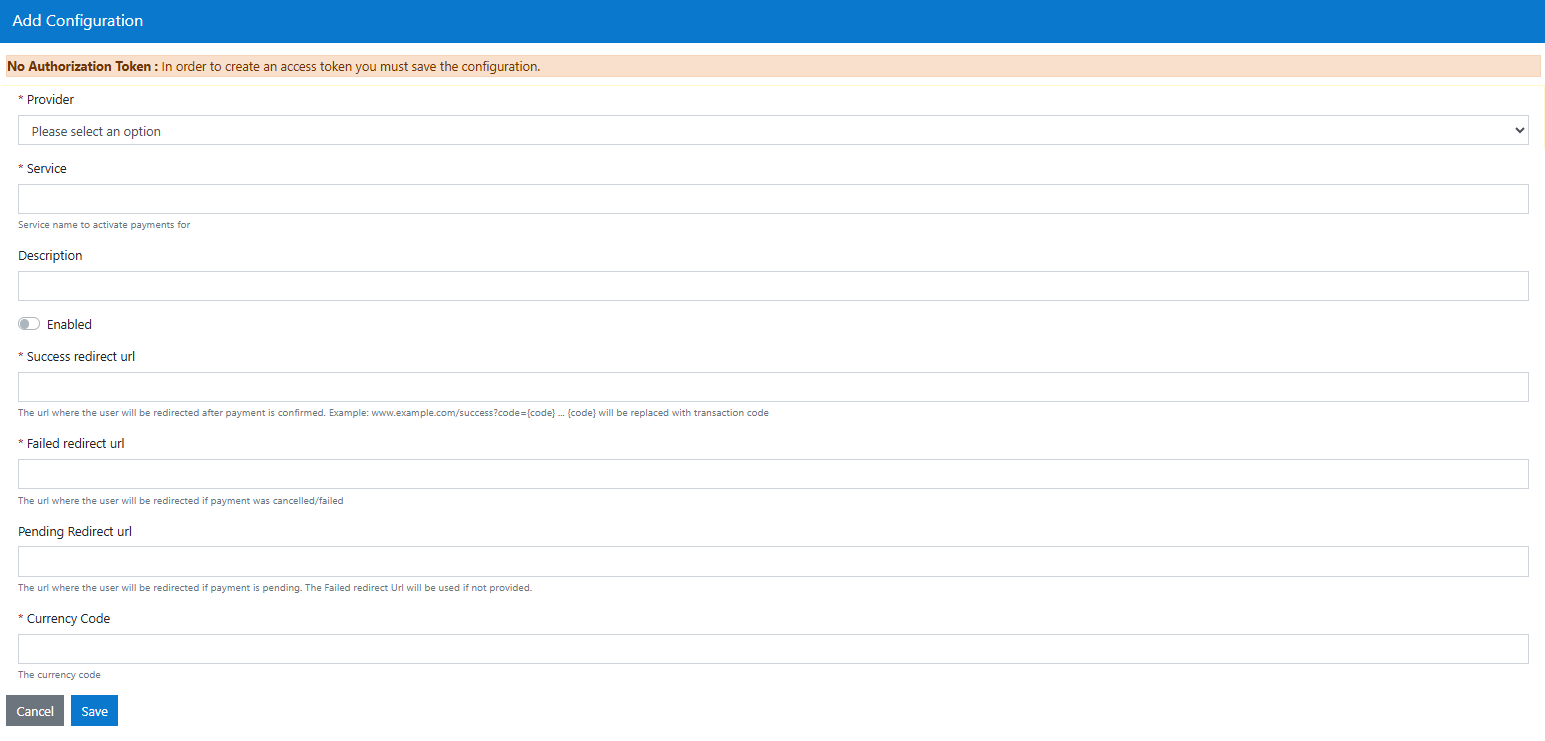
Depending on provider more fields may be required.
World Pay
When configuring your payment provider, Some information from WorldPay is required to complete the configuration.
- Merchant Code
- Installation ID
- Authorization (header)
- HashSecret (Set by Service not WorldPay)
GovUkPay
When configuring your payment provider, you need additional information from GovUkPay.
- Requires an API Key.
Note
Once the initial configuration is set, only then can an Authorization Token be added.
Editing Configuration
Using the Service Configuration menu item, any existing configurations will be displayed on this screen. The Table will display Provider, Service, Description, Enabled and Actions.
Users can edit a configuration by using the 'Edit' or 'Delete' buttons in the Actions Column.
Transactions
Within the Payment Gateway app, there are two other options on the side nav bar, Search Transactions and Transactions. You can use these to see the payments made.
The Payment Code will be what is used to identify the transaction - this will appear when completing a transaction and be sent to the user by email. The Service will be InvoiceManager for PRONI payments.
The Status will depend on the status of the transaction - it can be:
- PendingAuthorisation - the user has entered the payment module but has not completed the payment
- Refused - issues with card/balance/etc
- Error - if error code was used for cardholder name
- Authorized - if payment was made successfully
- Captured - if payment was made and confirmed by payment service (note that this happens 15-20 min after the payment is made and there is no way to speed this one up, so you need to wait after the transaction becomes Authorized)
The Amount will be specified in the invoice, the same one that the user paid.
The Refund will show 0.00 at the start.
The Currency will be the one specified as the payment one in the payment service.
The Created Date will be when the payment was made.
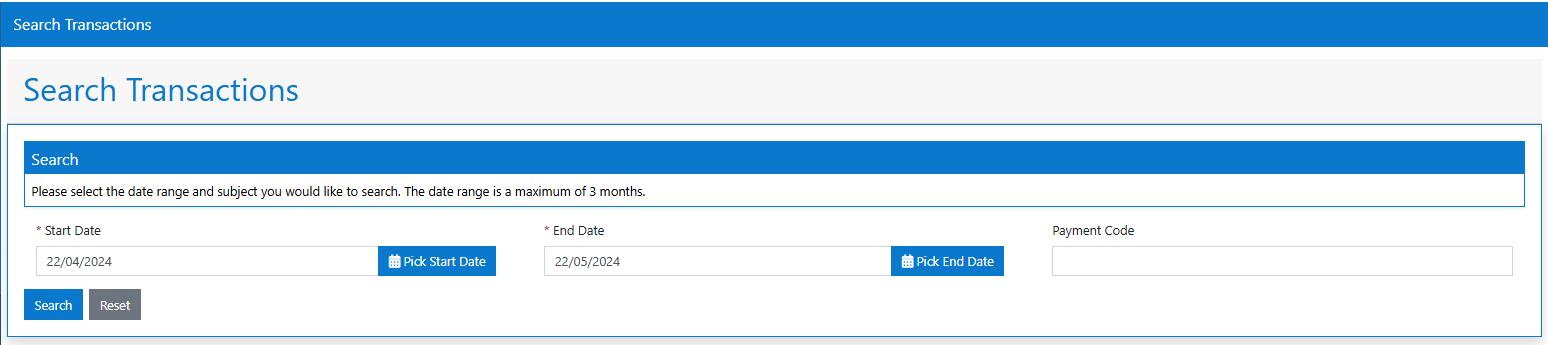
Search Transactions
From the left-hand nav bar, clicking the Search Transactions menu item displays a list of payment transactions which have been carried out in your service.
The following actions can be carried out against transactions:
- clicking the Details button will navigate you to a new screen where you can view the details for this transaction, including any refund information, should it exist. This button is available against all transactions regardless of their status.
- clicking the Refund button will navigate you to the Refund screen. This button is only displayed against transactions which have successfully completed.

To search for a specific transaction:
- enter text into the Search text field and click the Search button
- alternatively, you can filter/sort the list of transactions in the table
Refunds
The user is only be able to refund a transaction if the payment is in the Captured state.
When clicking the Refund button, they can insert a value to refund ( ≤ customer paid) and refund it. Several refunds can be made, but the total of the refunds must never be greater than what the customer paid.
Once a refund is made, the customer will get an email informing them of such and the refund column will display the refunded value.