User Management
Service Administrators can set up other users on the service using the Associate User functionality.
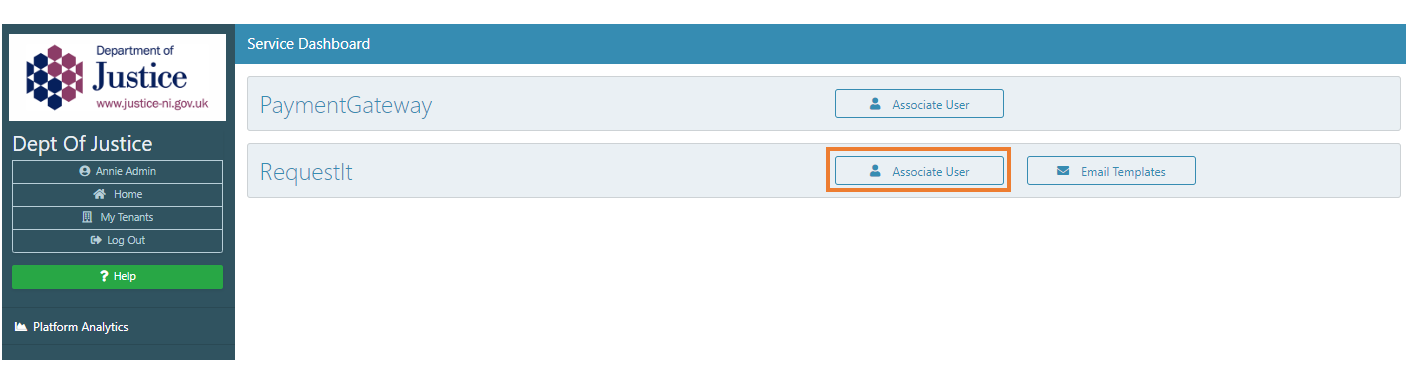
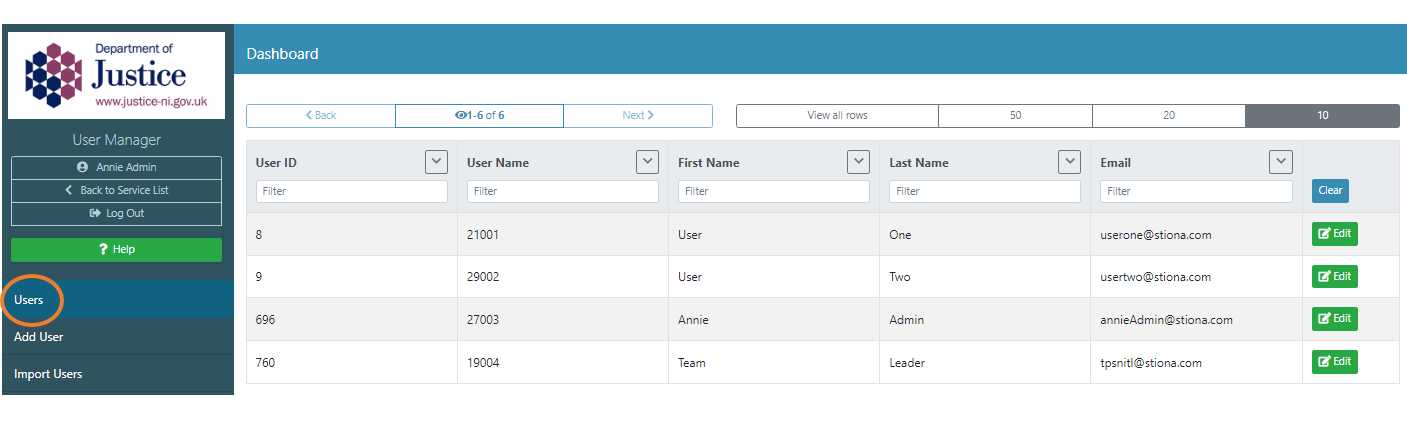
Click the Associate User button to enter the user management functionality. As default, you will see a list of currently permissioned users on the service.
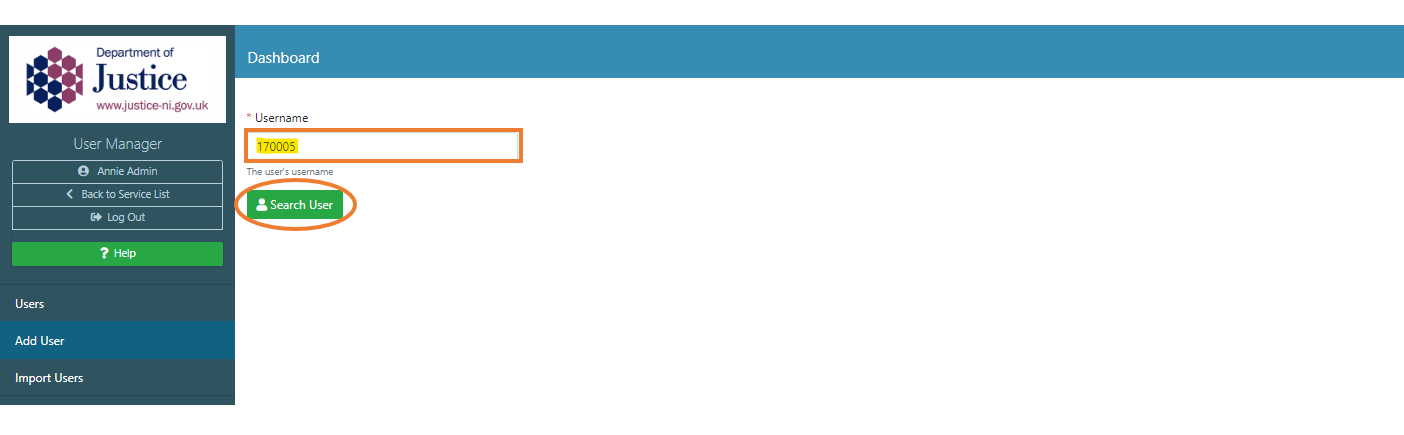
Adding a new user
click the Add User menu item in the left-hand navigation bar
enter the new user's Staff ID as the username
click the Search button
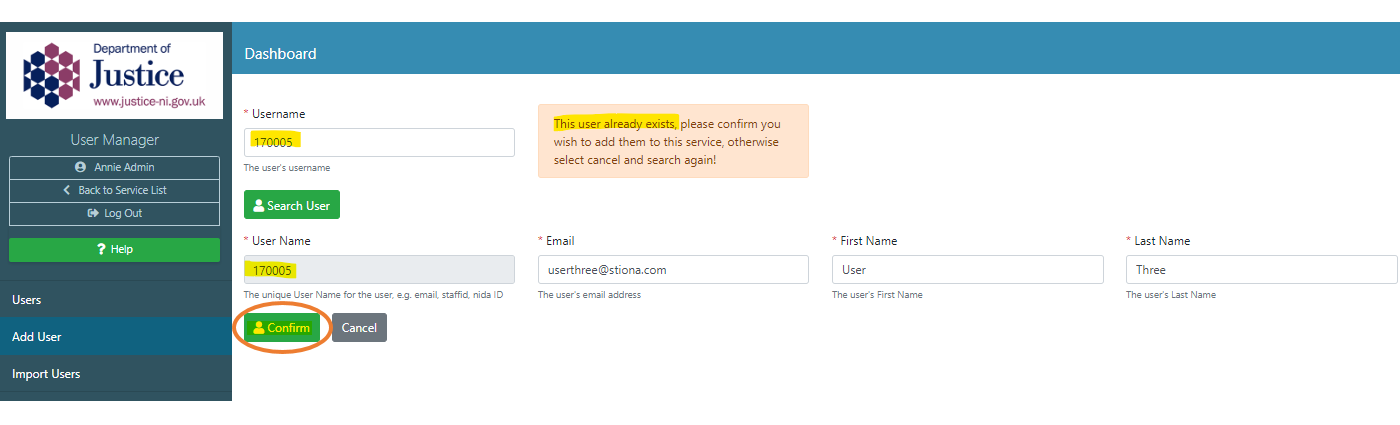
User Account already exists
The system will look to see if it already has an account for this user, if it does, it will display the details on the screen.
You can then click the Confirm button to associate the user to the service.
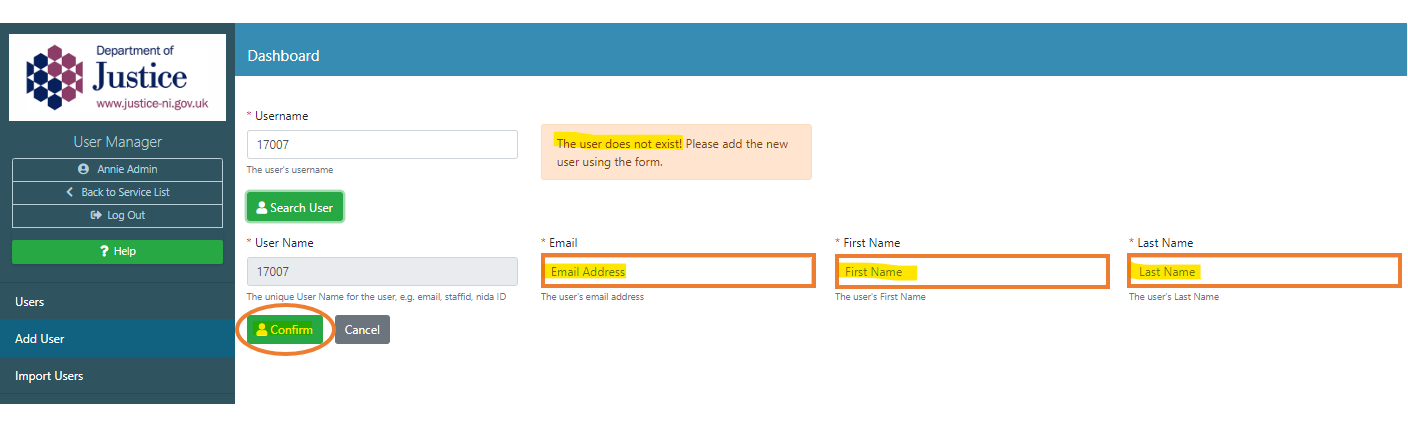
User Account does not already exist
If the system cannot find an account for the Staff ID, you can enter the account details in the fields highlighted below and click the Confirm button to create a new account.
Granting roles
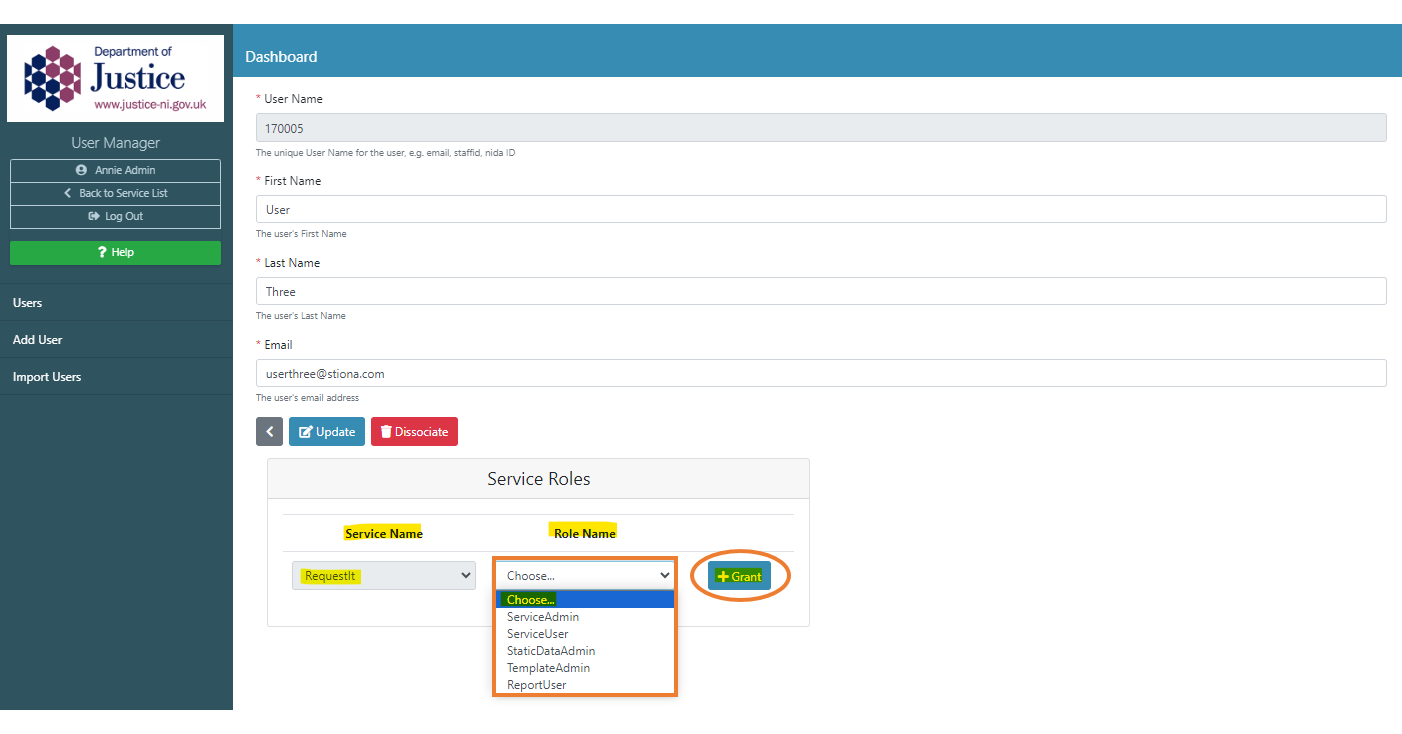
Once you have added a new user to the service, you will be automatically navigated to a screen where you can then grant them the appropriate role(s).
The system has already selected your Service Name so you will then:
select a Role from the dropdown list
and click the Grant button
- This will add the role to the user and grant them the associated access on the service.
- These roles can be granted singly or together in conjunction with other roles. You may add as many roles as the user requires to perform their duties on the service.
- Click the Update button to complete.
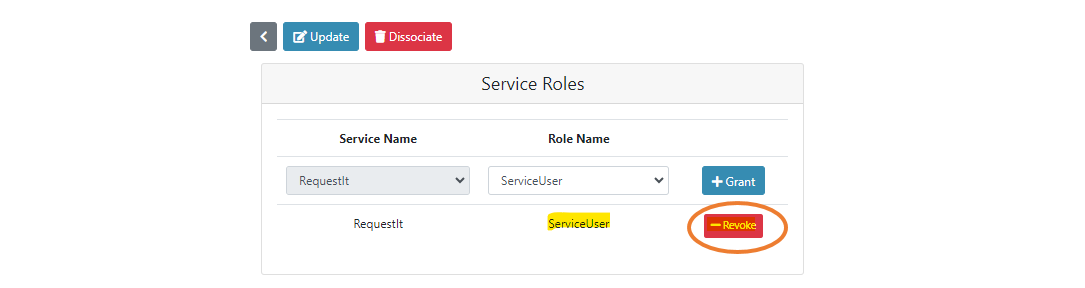
Each role granted will appear with an associated Revoke button.
Clicking this button will remove the role from the user and any associated access it afforded them.
For further information about updating and making changes to a service's administration please see General Administration