Central Procurement Directorate (CPD) Application Guide
CPD - What you can do?
CPD – Transactions Functions
This is the CPD Transactions Dashboard:
- You can view all received CPD work request transactions from a state in a list.
- You can filter and order existing CPD work request transactions in this list.
- You can download your CPD work request transactions.
- You can use navigation filters to view groups of CPD work request transactions.
- You can view the history and edit the row of an individual CPD work request transaction.
CPD – Manage Teams Functions
This is the CPD Manage Teams List:
- You can add new teams to which your CPD work request transactions will be assigned to afterwards.
- You can filter and order existing teams.
- You can Edit the details of an individual existing team.
- You can Activate/Deactivate Teams so that a CPD work request transaction can be issued to them or not.
CPD – Static Data Functions
This is the CPD Static Data management:
- You can filter and order existing lists.
- You can edit the lists to alter the data used within the application. More information on what each list does in the How to do it? – Static Data Management section of this guide.
- You can view existing data within each list.
CPD - Who can do what?
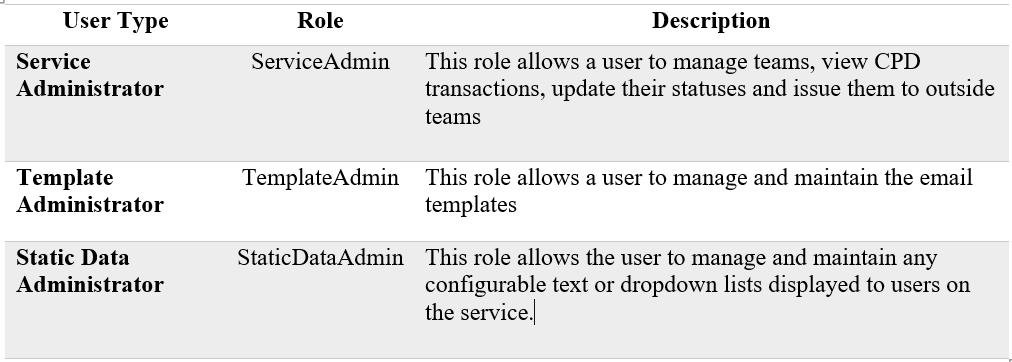
Below is a link to the General Administration Guide:
CPD – How to do it?
CPD – Transactions
View All Tell Us Transactions
Step 1: Tenant List Administration Home The first screen is the Admin Dashboard for the Tenant List which shows the Tenant(s) for which you can access services for:
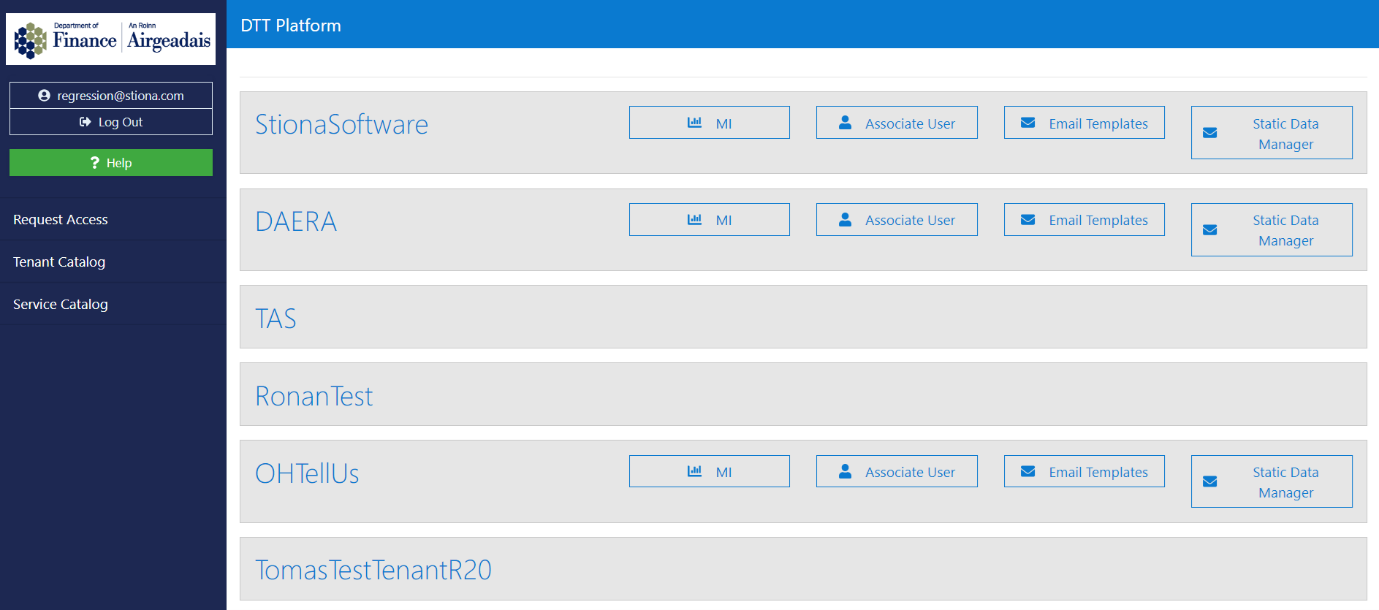
Click on the link for your tenant, e.g. DAERA, Careers, to open the Service Administration Home page.
The User will only be able to access the Tenant Admin screen if they have the Tenant Admin Role.
Step 2: Service List Administration Home The next screen is the Admin Dashboard for the Service List which shows a dashboard detailing the services linked to the user for this Tenant:
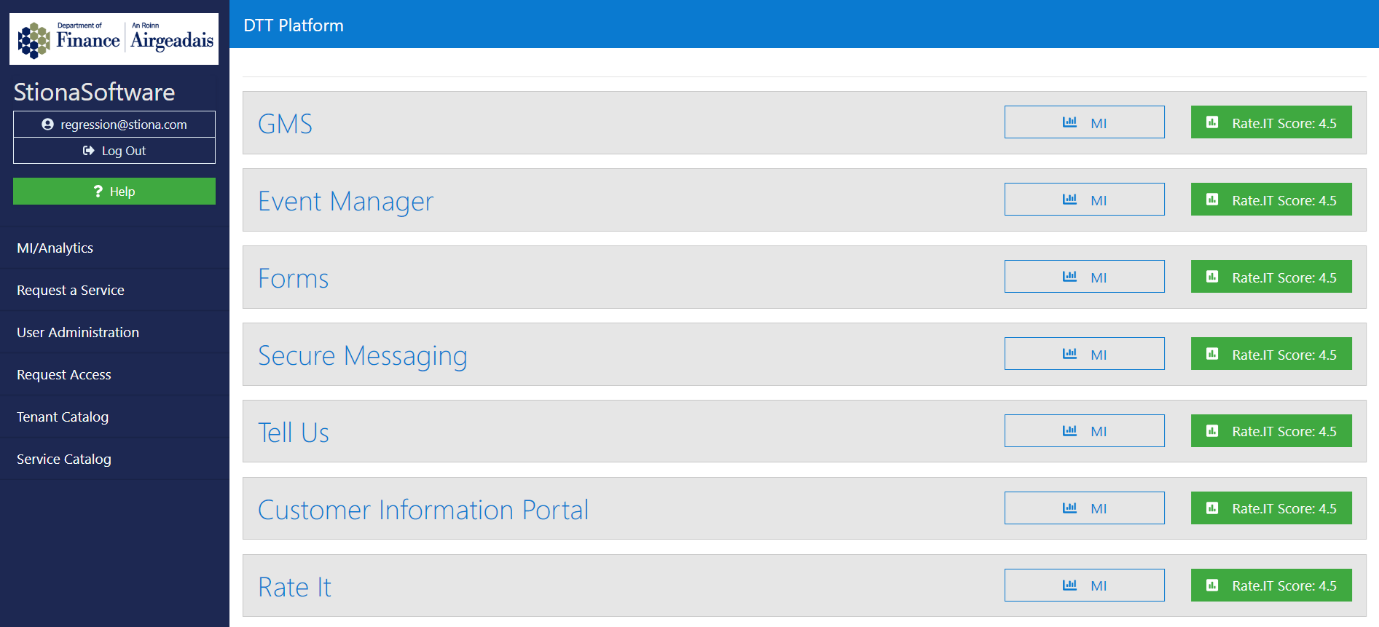
Click on the "Workrequest" link to open the CPD – Work Request Administration page
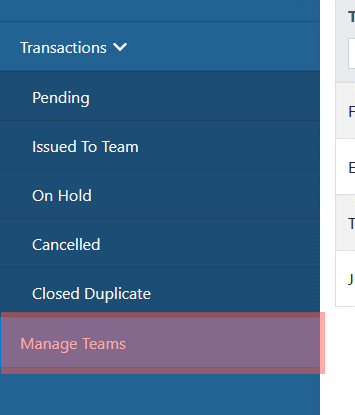
Step 3: Transaction Types Click on the Transaction link in the side navigation bar to expand it. Clicking on any of the existing options from the expanded bar will load up the CPD work request transactions which are under that state.
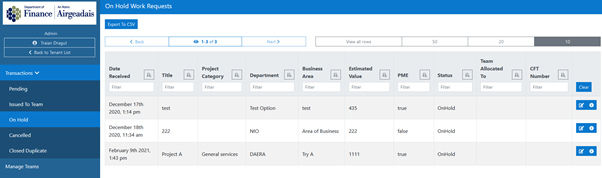
Step 4: Transaction Dashboard
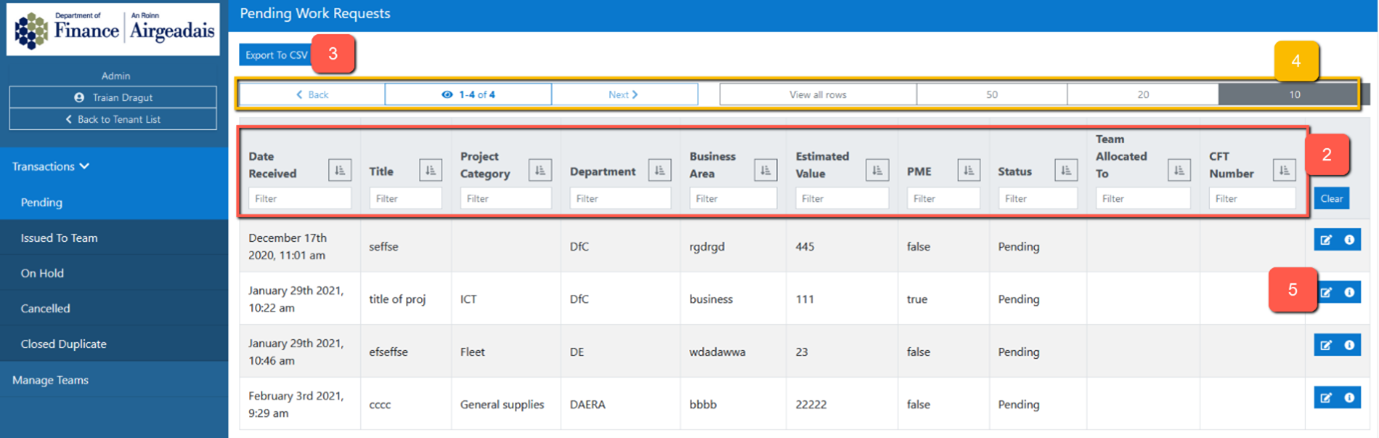
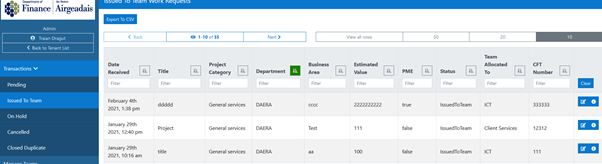
This is the Transactions Dashboard:
- Click on the "Edit Row" button next to the message for which you wish to see the specific details for.
- You can change the number of messages listed on the dashboard by choosing the appropriate number from the four button options. This will redisplay the page with the number of messages chosen, or all if the total number of messages available is less than the number chosen.
- If there is more than one page of messages, you can use the "Next" and "Back" buttons to move between the pages, as required.
- Click on the "View History" button to view any actions taken on the specific ticket.
- Click on “Export to CSV” to download a csv type file containing the transactions from that state.
Search, Filter & Download CPD Transactions
Transactions – Searching and Filtering the Dashboard
On the Tenant’s CPD Transactions Filter dashboard, the user can choose how to filter the transactions:

- To filter the messages, choose one or more of the following filtering options:
- Enter the date when the work request was received.
- Enter the title of the project specified in the work request.
- Enter the Project Category of that transaction.
- Enter the Department of that transaction.
- Enter the Business Area inserted by the creator of the work request.
- Enter the Estimated Value of the work request.
- Enter “true” or “false” regarding if the request is a Pre-Market Engagement (PME) Exercise
- Enter the status in which the transaction is.
- Enter the Team Allocated To if the work request was already assigned to one
- Enter the CFT number, if that work request was already assigned one
- The button to the right of each Filter Title will display the list in ascending or descending order depending on what option you have clicked.
Please note that, depending the status transaction dashboard you are in, some columns might not be populated yet.
Transactions – Filtering by status of work request items
The Transactions Dashboard has five options under it for selecting the different status in which work request transactions can be in
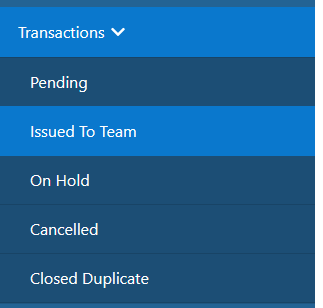
Click on any of the status options shown in the buttons to only display the list of work request transactions present in that status. Note that, when a work request transaction is created, it reaches the Pending status.
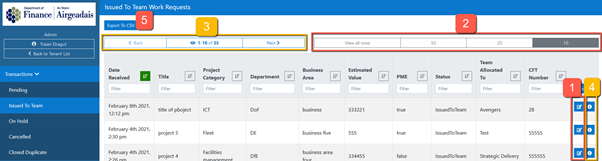
Below if an example of the Issued To Team status, when all columns are populated:
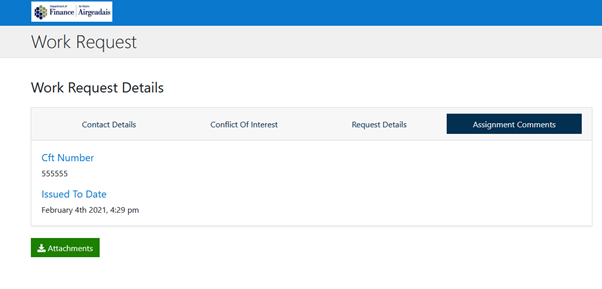
Review CPD Transaction Details
The CPD Transaction Details screen allows the user to review and update the CPD work request transaction. It can be accessed by clicking the “Edit Row” next to a ticket.
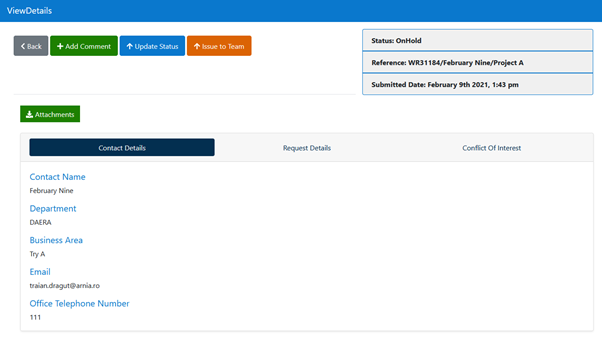
Click on the “Add Comment” button to open the following modal box:
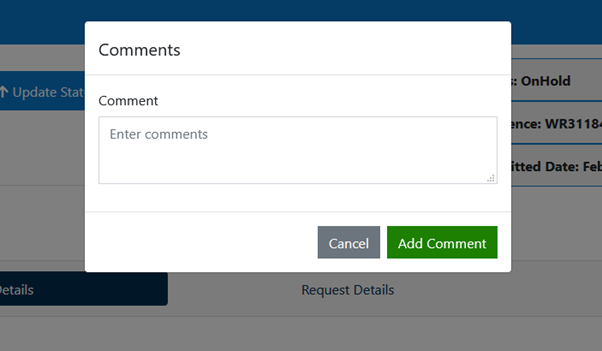
You can use this to leave a comment on that specific work request. Said comment will then appear in the History modal box and it will be visible only for ServiceAdmin type users.
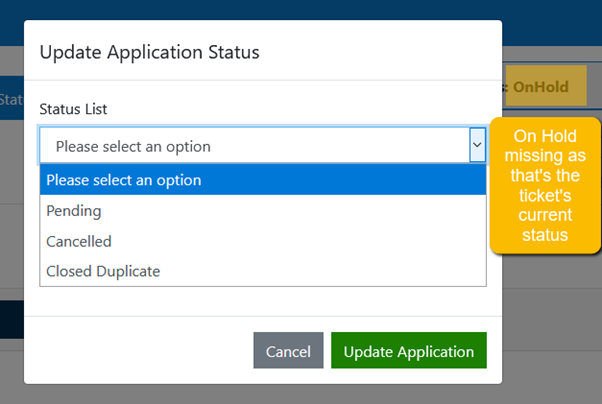
Click on the “Update Status” button to open the following modal box:
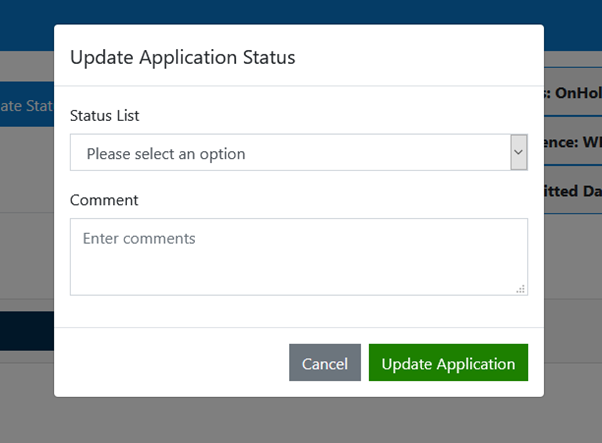
You can change the status of the work request transaction by choosing the appropriate option from the “Status List” dropdown to any of the status options besides the one the work request is already in and “Issued To Team”.
You also must leave a comment underneath to be able to update the work request status.
Once complete, click on the “Update Application” button to save the changes.
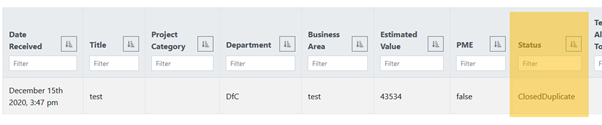
Your work request transaction will move to the corresponding Transaction Status list and display the new status in the “Status” column.
Click on the “Issue To Team” button to open the following modal box:
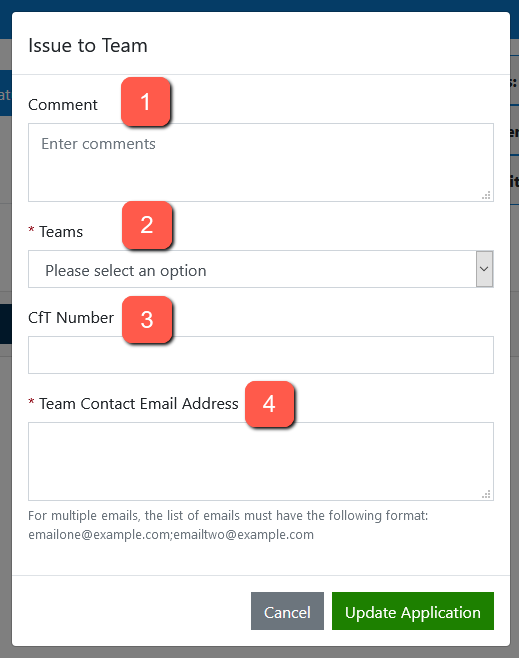
In here you can:
- Insert a comment for the team to which the work request is sent to (optional).
- Pick a team from the dropdown to which the work request should be sent to. Please note that, if no teams were created or none of the created teams are active in the Manage Teams section, this dropdown will be empty and you will not be able to issue the work request to a team.
- Insert a CfT number for the work request transaction.
- Insert or edit the Team Contact Email Address so that the teams can receive an email through which they can access a read-only view of the work request.
This field is automatically populated with the email of the team selected but you can edit the existing email, add or remove multiple emails in the following format: emailone@example.com; emailtwo@example.com
Once complete, click on the “Update Application” button to save the changes.
This will have the following effects:
- Your work request transaction will move to the “Issued To Team” status list from Transactions
- The CfT and Team Allocated To columns will be populated with the values inserted for this work request
- The “Update Status” button will disappear from that work request’s details page
- A mail will be sent to the team email address. Through this the team user will be able to access a read-only view of the application which will contain the details inserted into the Issue to Team modal.

CPD – Manage Teams
Add a New Team
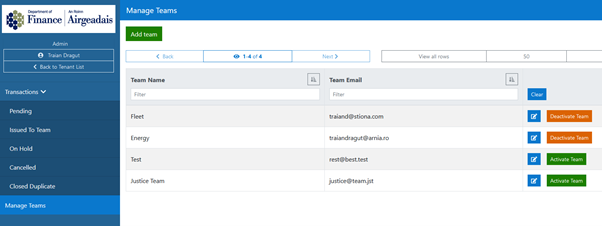
The Manage Teams dashboard is accessed by clicking on the “Manage Teams” button from the side navigation bar.
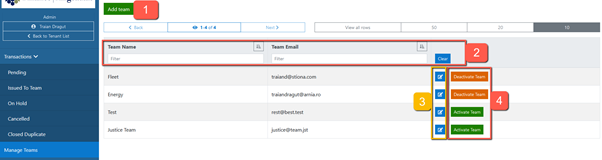
This is the Manage Team Dashboard:
Click on “Add Team” to open the following modal box:
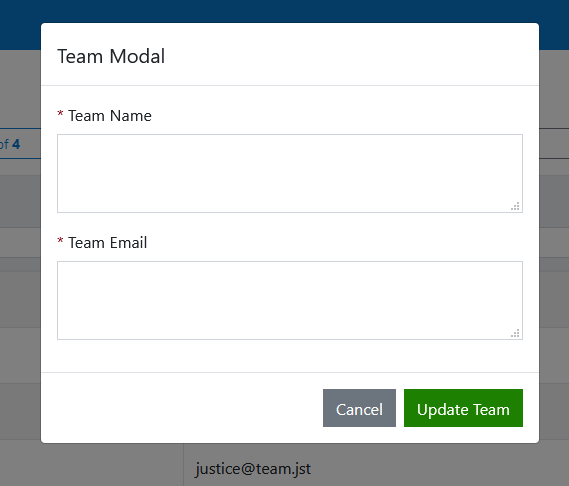
- Enter the team name – this will be the one displayed in the Issue to Team modal Validation: Maximum 40 characters.
- Enter the team email – this will be the email associated with this particular team. Validation: Must be a valid email address. Once done, click on “Update Team”.
Your newly created team will appear in the list.
Activate and deactivate teams
Newly created teams are considered active – meaning that they can instantly be assigned to a work request in the Issue to Team modal.
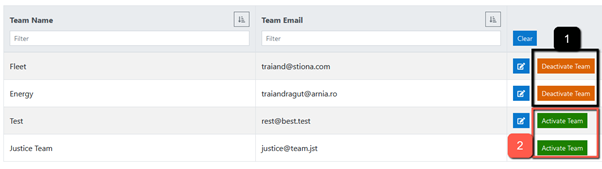
However, if you want to retire a team or simply not have it show in the Issue to Team modal, you can click on the “Deactivate Team” (1) button next to it. When a team is deactivated, it can no longer be assigned to a work request in the Issue to Team modal.
If you then decide that you want said team to be active again, simply click on the “Activate Team” (2) button next to it. This button only appears next to deactivated teams and allows the user to assign a work request to that team again within the Issue to Team modal.
Note
If all teams are deactivated, you will not be able to issue existing work requests to a team as the dropdown will be empty in the Issue to Team modal.
Edit Teams
Within the “Manage Teams” dashboard you can see all the existing teams.
Clicking on the Edit button next to one opens the following modal box:
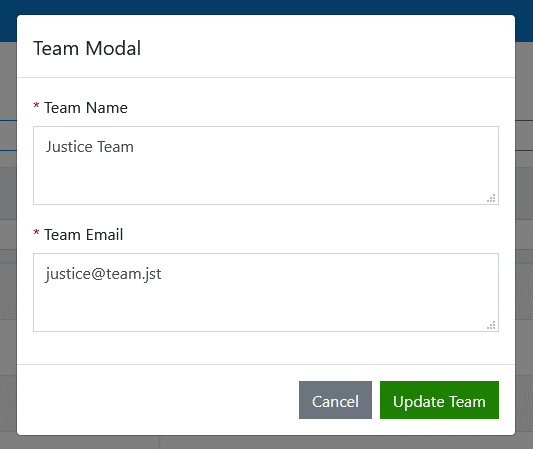
- Edit the team name: This will be the one displayed in the Issue to Team modal Validation: Maximum 40 characters.
- Edit the team email: this will be the email associated with this specific team. Validation: Must be a valid email address. Once done, click on “Update Team”.
Note
If a work request was previously issued to the edited team, it will still display the old value within its Team issued to column.
CPD – Static Data Management
Static Data Management – How to reach it?
To reach the static data management dashboard, you must click on Static Data Manager button next to the Workrequest service in the Service Dashboard page.
Note that if you do not have the StaticDataAdmin role, this button will not appear.

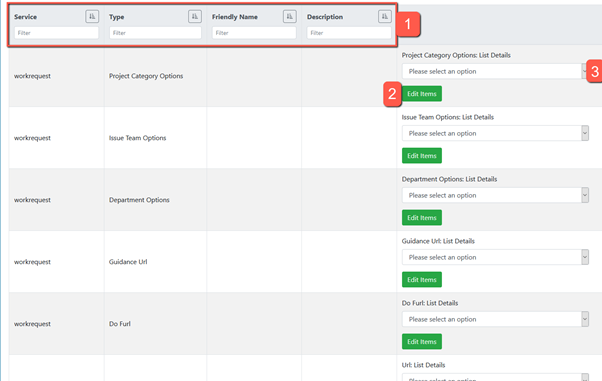
This is the static data management dashboard:
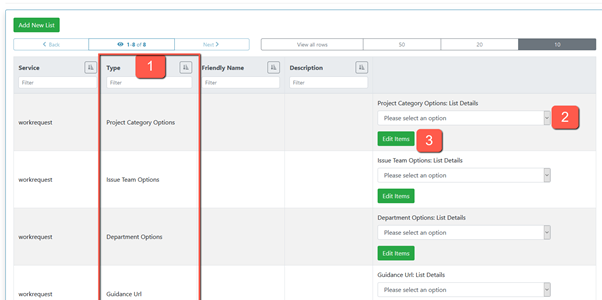
- The Type column displays a short name of where that data is used.
- This dropdown contains the current data used within that area.
- Clicking the “Edit Items” button results in you being able to alter existing data.
Static Data – What is each data list type used for?
These are the lists of static data available for editing:
- Department Options: The options here will appear in a dropdown on the public user flow when they are creating a work request in Step 1 under the “Department”.
- Project Category Options: The options here will appear in a dropdown on public user flow when they are creating a work request in Step 1 under the “Please specify the category, from the following options:”.
- Guidance URL: The url here will appear in the landing page of the public user flow. The word “here” will be the one hyperlinked with this URL.
- DoF url: The url here will appear in the landing page on the public user flow. The words “DoF website” will be the ones hyperlinked with this URL. Validation: This can only contain one link, any other links inserted in the list will be ignored.
- URL: The url here will appear in the acknowledgement confirmation email sent to the public user after they have submitted a work request. Validation: This can only contain one link, any other links inserted in the list will be ignored.
- From Static Email: The email inserted here will appear as the sender of the acknowledgement confirmation email sent to the public user after they have submitted a work request. Validation: This can only contain one email, any other emails inserted in the list will be ignored.
- To Static Email: The email inserted here will be the admin email that receives a notification email when a new work request has been submitted. Validation: This can only contain one email, any other emails inserted in the list will be ignored.
Static Data – How to alter the lists?
Click on the Edit Items next to the static data list you wish to alter.
The edit static data modal will open:
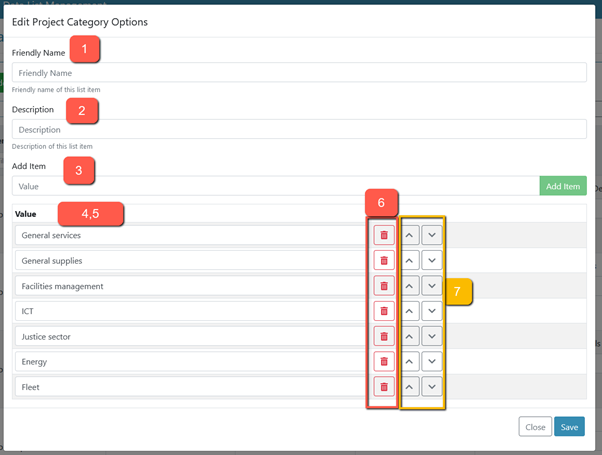
- Friendly Name: This has no impact on the list options but you can write something to make it easier for you to know what the list is about if the Type column is unclear
- Description: This has no impact on the list options but you can write a small description for you to remember where this list is used
- Value: You can write new options you wish to appear in your list here then click “Add Item”
- List of Values: This is the list of values already used
- You can edit the content of existing values
- You can delete values from the list
- Using these buttons you can alter the order in which the values are displayed within the app.
Please note that for the Guidance URL, DoF URL, URL, From Static Email, To Static Email the List of Values should only contain a single value. All others will be ignored by the application.
When you are done editing, click on “Save”.
Static Data - How to edit the Text?
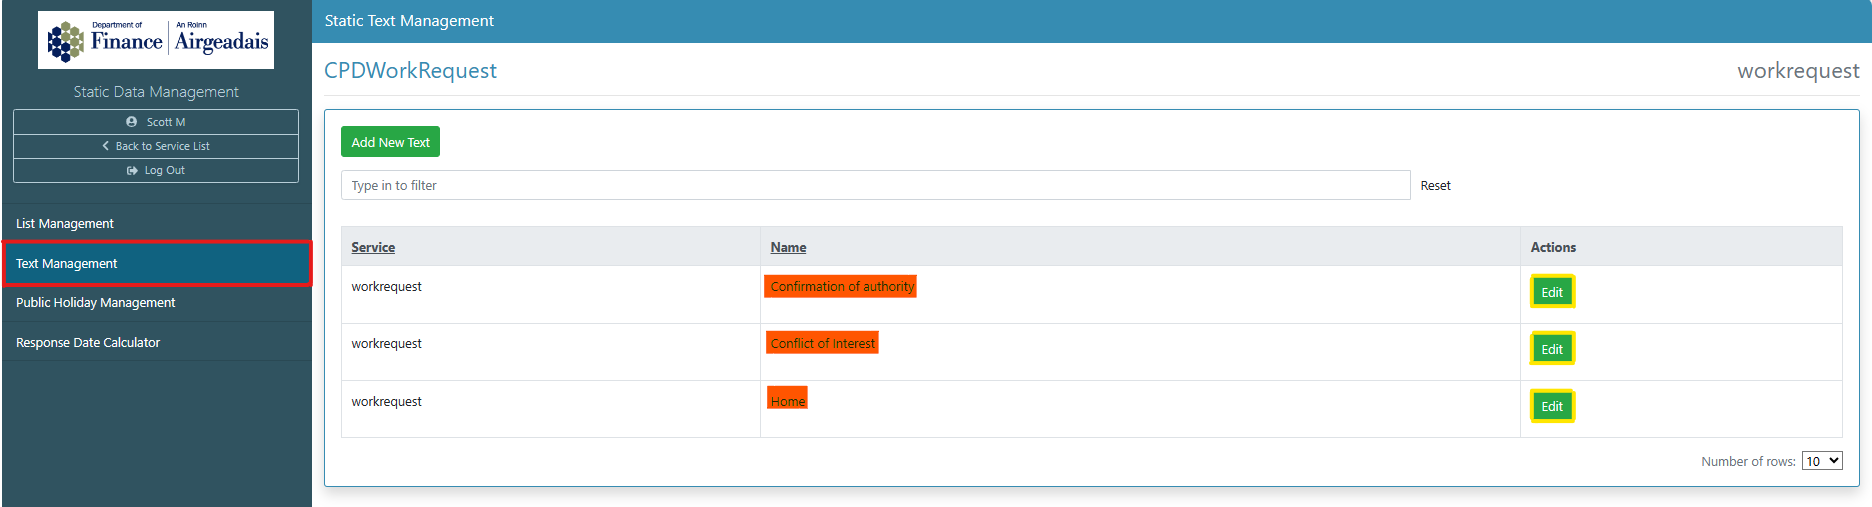 The configured fields that are able to be edited via Static Data are as follows;
- Home
- Conflict of Interest
- Confirmation of Authority
Click the 'Edit' button
The Edit Static Data modal will open:
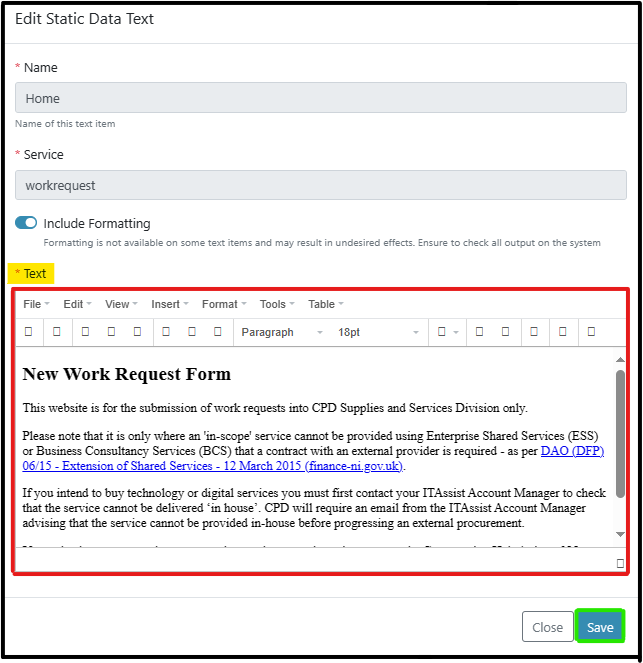
Name and Service fields are not able to be edited.
Using the editor in the modal, make the required changes and update the text. Once saved, the changes will update immediately in all areas of the application calling that text item. The Text Editor provdies the users with standard formatting choices.