Administrators
Roles
Users should be placed in the appropriate role for them by the "Service . These roles are given in the roles matrix in the Service Administration guide.
Once the appropriate roles have been granted a user can then be set up from the appropriate menu.
For example, those granted an ‘Adviser’ role will appear in the ‘Configure Advisers’ list.
These users can then be configured in order to build the hierarchy shown below. We will begin with the District Managers and work our way down.
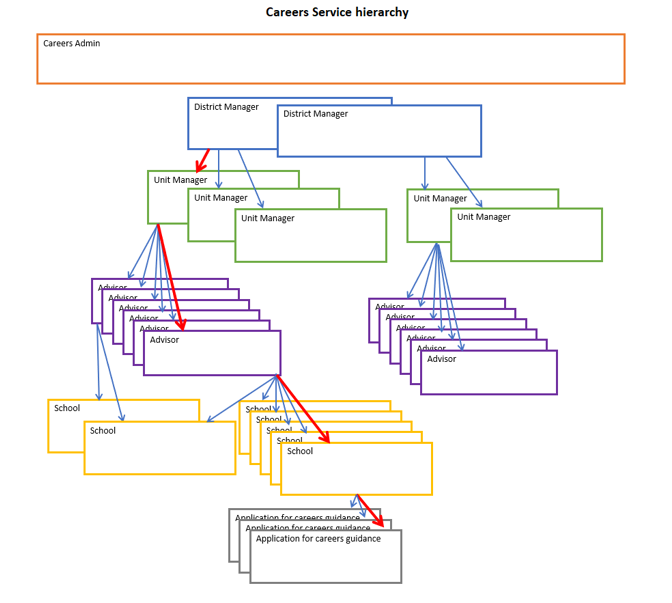
Initially, the hierarchy should be created using the following order of steps.
Via the ‘Associate User’ facility
- Add/edit/verify the users you wish to provision on the Careers Service
- Grant these users the correct roles (see the roles matrix - this will determine where in the above hierarchy they reside and what information or actions they can access)
Enter the Careers Service by clicking the ‘Careers’ link
Via the ‘Configuration’ menu item
- Configure your District Managers
- Configure unit manager & link to district manager
- Configure adviser & link to unit manager
- Create/edit school & link to adviser
- Repeat until all your users and schools have been configured.
Configure District Managers
We will start at the top of the hierarchy; district managers must be configured first. To do this

Click the ‘Configuration’ drop down list of the left-hand navigation bar
Click ‘Configure District Managers’ menu item
- All users granted the 'District Manager' role using the 'Associate User' utility will be displayed in this list.
Click the orange 'Edit' button beside the user to launch the 'Edit Details' modal.
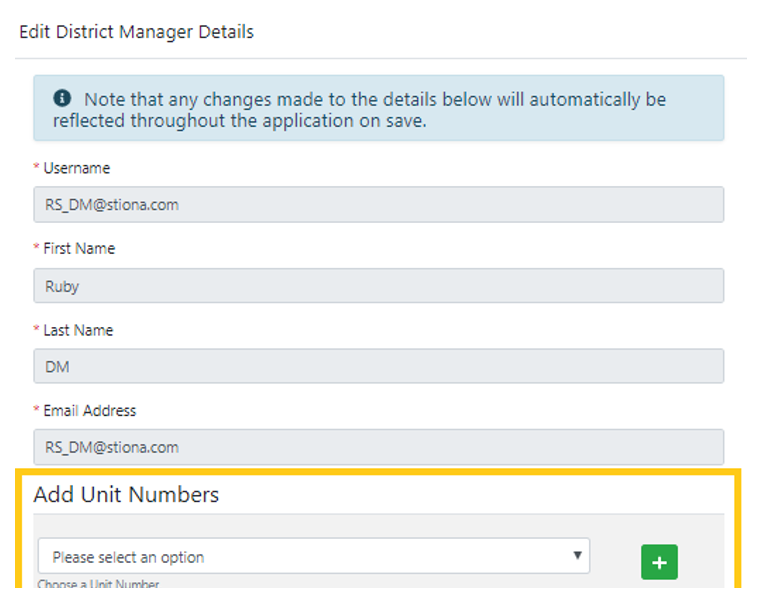 Username, First Name, Last Name and Email Address details are pre-filled and Read Only. These details can only be edited in the ‘Associate User’ utility by a user provisioned with the ‘ServiceAdmin’ role.
Assign Unit Numbers to the District Manager
- Click ‘Please select an option’ to open the drop-down list and select a Unit number.
- Press the green ‘Add icon’ button to allocate this Unit Number to this District Manager.
- Click ‘Close’ to close modal.
To allocate several unit numbers continue to select from the dropdown list and click the add icon button before closing the modal.
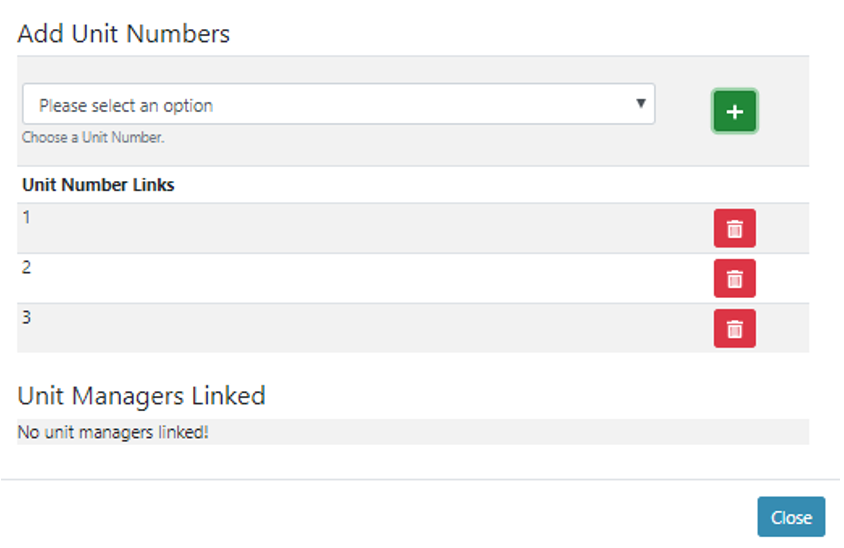 To remove an incorrect allocation, click the red 'Bin icon' button.
Please note – If Unit Managers have not been configured, yet the modal will read ‘No unit managers linked!’ – this will become updated as soon as a unit manager is assigned to this district manager via the ‘Configure Unit Managers’ section.
Testing tip: You can return and check this has been updated once unit managers have been configured.
Configure Unit Managers
Moving down the hierarchy, unit managers need to be configured next. To do this
Click the ‘Configuration’ drop down list in the left-hand navigation bar
Click ‘Configure Unit Managers’ menu item
- All the users granted ‘UnitManager’ role via the ‘Associate User’ utility will be displayed in this list.
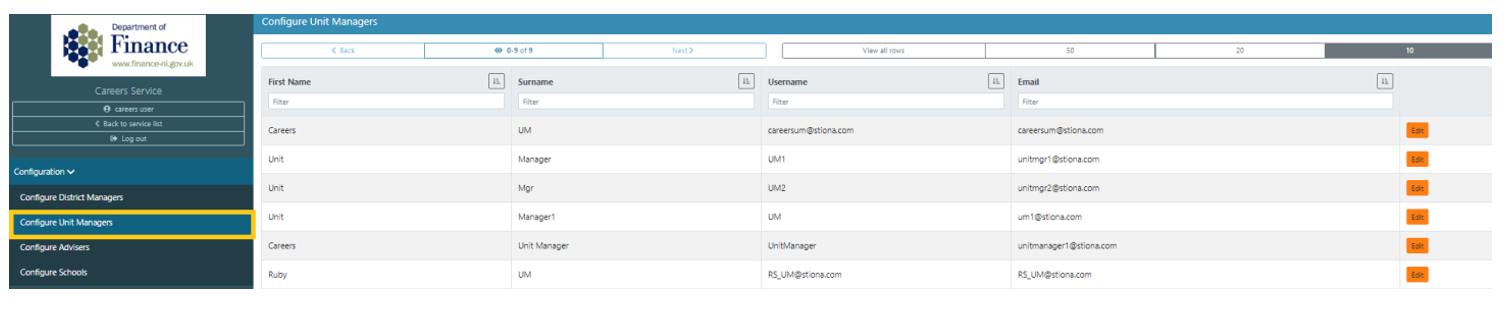
- All the users granted ‘UnitManager’ role via the ‘Associate User’ utility will be displayed in this list.
Click the orange 'Edit' button which will launch the 'Edit Details' modal.
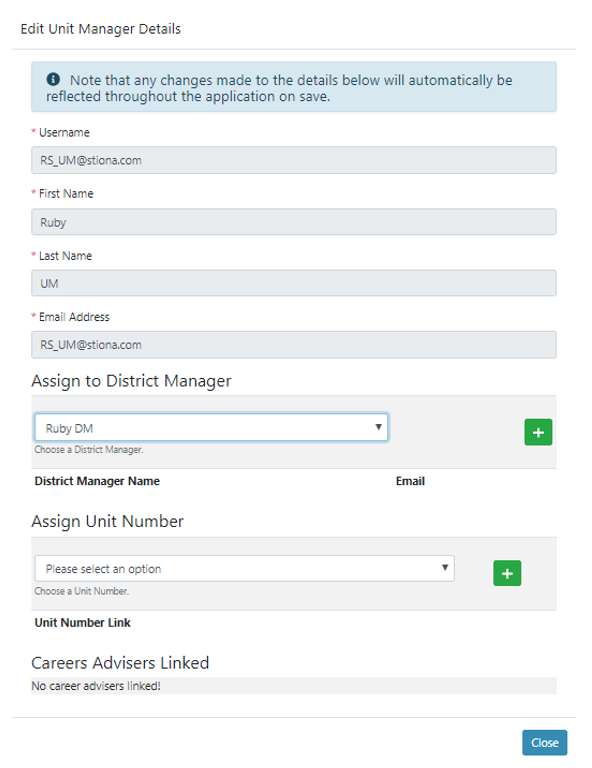
Username, First Name, Last Name and Email Address details are pre-filled and Read Only. These details can only be edited in the ‘Associate User’ utility by a user provisioned with the ‘ServiceAdmin’ Role.
Note
Where Advisers have not yet been configured, the modal will read ‘No career advisers linked!’ – this will become updated as soon as an adviser is assigned to this unit manager via the ‘Configure Advisers’ section.
4.Assign to District Manager
- Click into Assign a District Manager to open the drop-down list and select a District Manager.
- Press the green ‘Add icon’ button to allocate this Unit Manager to the selected District Manager.
5.Assign to Unit Number *Click ‘Please select an option’ to open the drop-down list and select a Unit number. * Press the green ‘Add icon’ button to allocate this Unit Number to this Unit Manager.
6.Click 'Close' to close modal.
This Unit Manager will now be listed under the ‘Unit Managers Linked’ area of the selected district manager in the ‘Configure District Managers’ section
Note
A Unit Manager can only be allocated to one District Manager and one Unit Number.
To remove an incorrect allocation, click the red ‘Bin icon’ button.
Configure Advisers
Moving down the hierarchy from unit managers, careers advisers need to be configured next. To do this
- Click the ‘Configuration’ drop down list
- Click ‘Configure Advisers’ menu item on the left-hand navigation bar
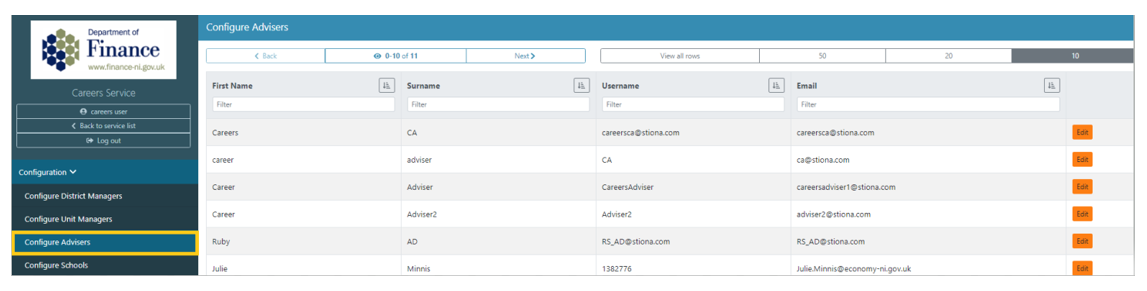
- All the users granted the ‘Adviser’ role using the ‘Associate User’ utility will be displayed in this list. To configure a user
- Click the orange ‘Edit’ button which will launch the ‘Edit Details’ modal.
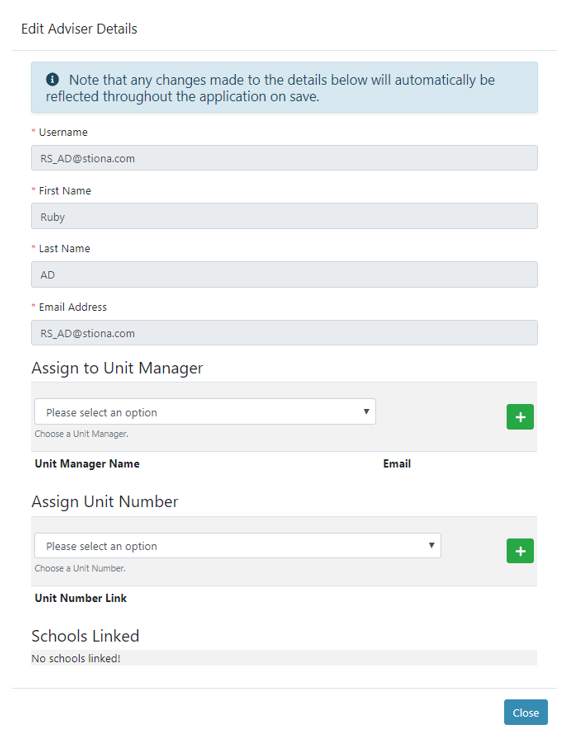 Username, First Name, Last Name and Email Address details are pre-filled and Read Only. These details can only be edited in the ‘User Management’ utility by a user with the ‘Service Admin’ Role.
Note
Where Schools have not yet been configured, the modal will read ‘No schools linked!’ – this will become updated as soon as a school is assigned to this adviser using the ‘Configure Schools’ section.
- Assign to Unit Manager to the Adviser
- Click into Assign a Unit Manager to open the drop-down list and select an option.
- Press the green ‘Add icon’ button to allocate this Adviser to the selected Unit Manager.
- Assign to Unit Number
- Click ‘Please select an option’ to open the drop-down list and select a Unit number.
- Press the green ‘Add icon’ button to allocate this Unit Number to this Adviser.
- Click ‘Close’ to close modal.
Note
An Adviser can only be allocated to one Unit Manager and one Unit Number
To remove an incorrect allocation, click the red ‘Bin icon’ button.
Configure Schools
Last to configure is the schools. To do this
Click the ‘Configuration’ drop down list
Click ‘Configure Schools’ in the left-hand navigation bar
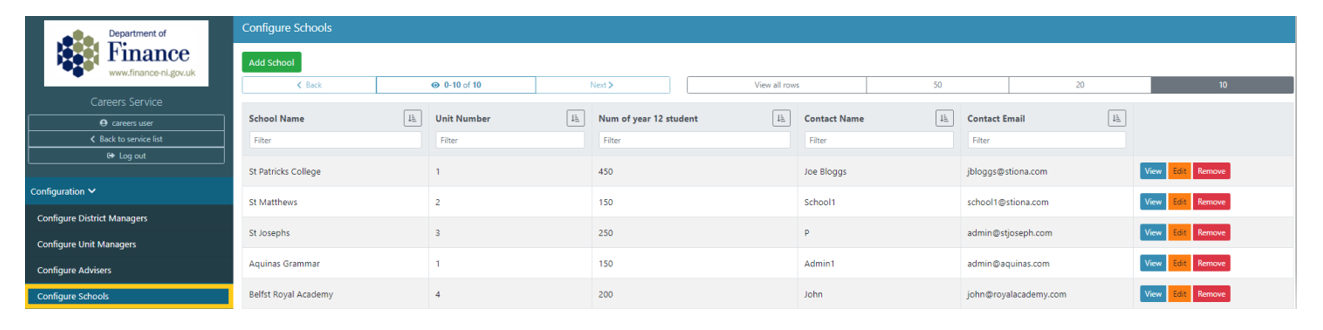
This table will display a list of all the schools on the service and the list can be filtered by entering text into the ‘filter’ text box under the column header you wish to filter by. The ‘Back’ and ‘Next’ buttons allow you to page through the list of schools or you can increase/decrease the amount of schools listed per page.
To view a read-only version of the school’s details, click the blue ‘View’ button to launch the ‘View school details’ modal.
Click the orange ‘Edit’ button which will launch the ‘Edit Details’ modal.
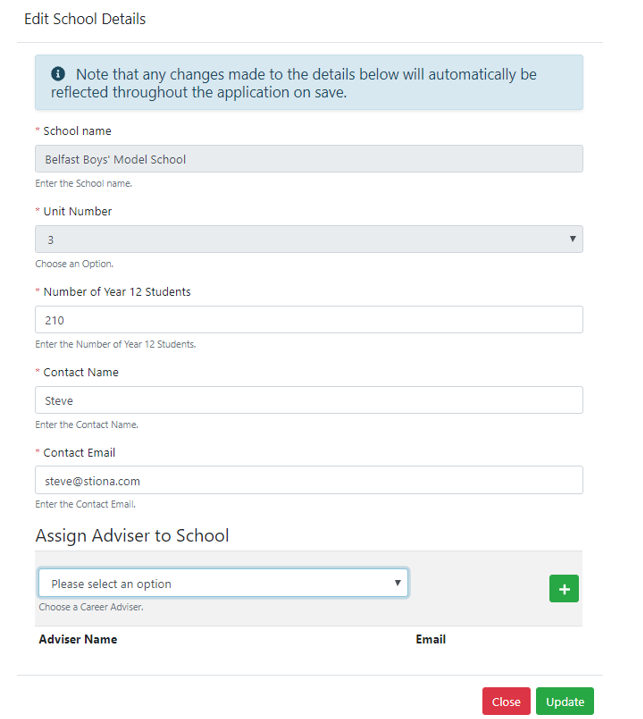
School name and unit number are pre-filled and Read Only. These details cannot be edited.
Enter or update the ‘Number of Year 12 Students’ by typing into the text field
Enter or update the Contact Name and Contact Email address and School Adviser's Email address by typing into the respective text fields.
Warning
Careers Advisor email for school will be cc’d into Student Action Plan correspondence emails, please ensure this email address is accessible and up to date.
Assign one or more advisers
- Click ‘Please select an option’ to open the drop-down list and select an Adviser
- Press the green ‘Add icon’ button to allocate this Adviser to the School. To allocate several advisers to a school continue to select from the dropdown list and click the add icon button before closing the modal. 7.Click ‘Update’ to close modal.
Add a new School
To add a new school to the service
- Click the green ‘Add school’ button on the school list view which will launch the ‘Add New School’ modal.
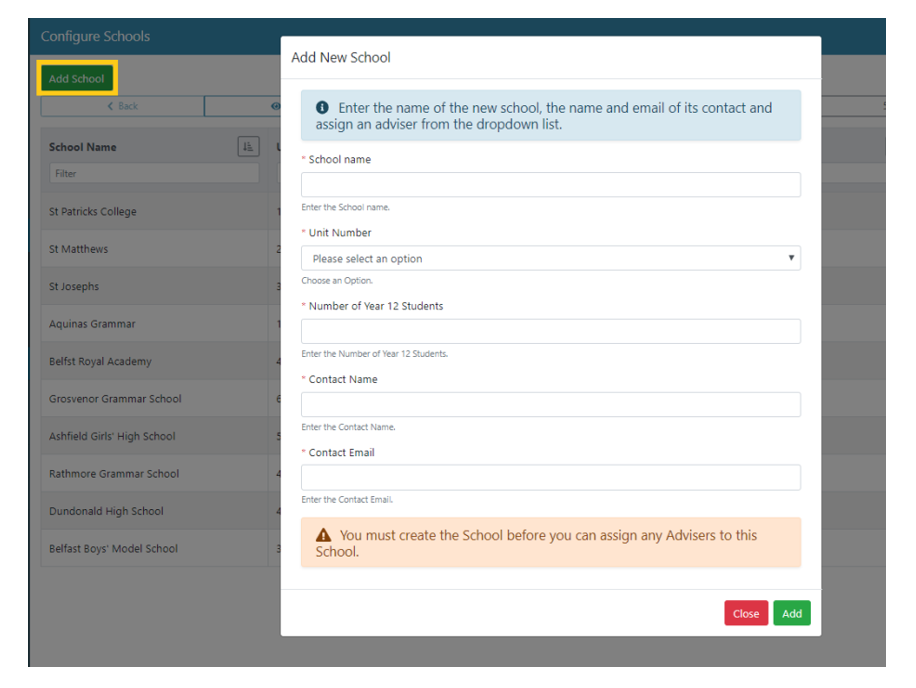
- Enter the School Name,
- Enter the Number of Year 12 Students
- Enter the Contact Name and Contact Email
- Enter the schools Unit number
- Click the ‘Add’ button to add the school to the list
Once the school has been successfully created, you can then assign one or more Advisers via its corresponding ‘Edit’ button.
_Please note- The email address listed as contact name
Delete a School
To delete an existing school
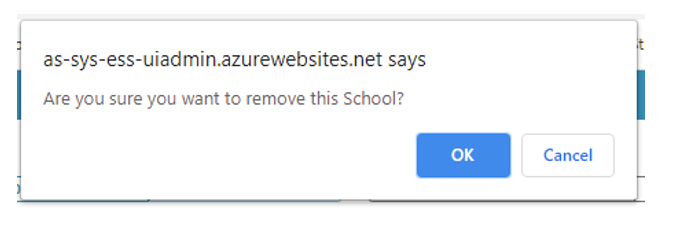
- Click the red ‘Remove’ button - this will launch a modal requesting confirmation before carrying out the removal.
- Clicking the ‘Ok’ button will remove the school from the list.
Note
Clicking ‘Cancel’ button will close the modal without deleting the school.
Configure Adult Adviser
In addition to the Careers Adviser role, Adult Advisers must also be configured in the service. To do this
- Click the ‘Configuration’ drop down list
- Click ‘Configure Adult Advisers’ menu item on the left-hand navigation bar
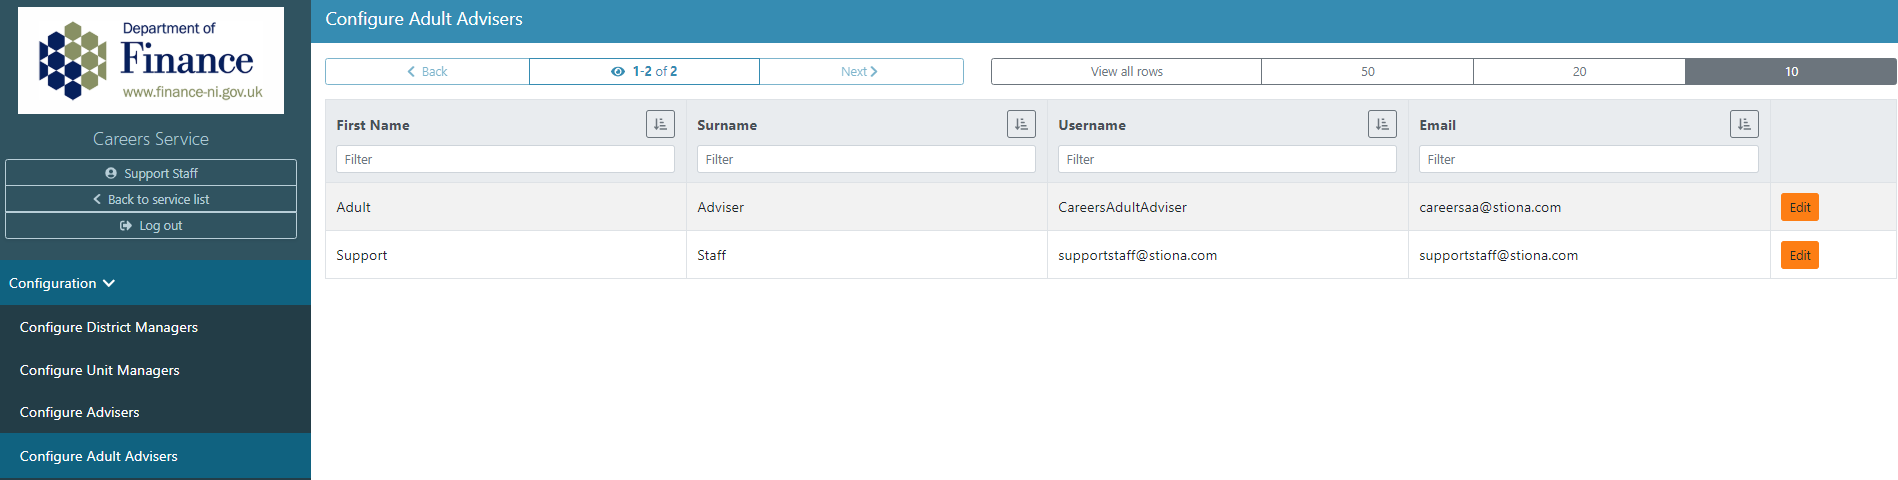
- All the users granted the ‘Adviser’ role using the ‘Associate User’ utility will be displayed in this list. To configure a user
Click the orange ‘Edit’ button which will launch the ‘Edit Details’ modal.
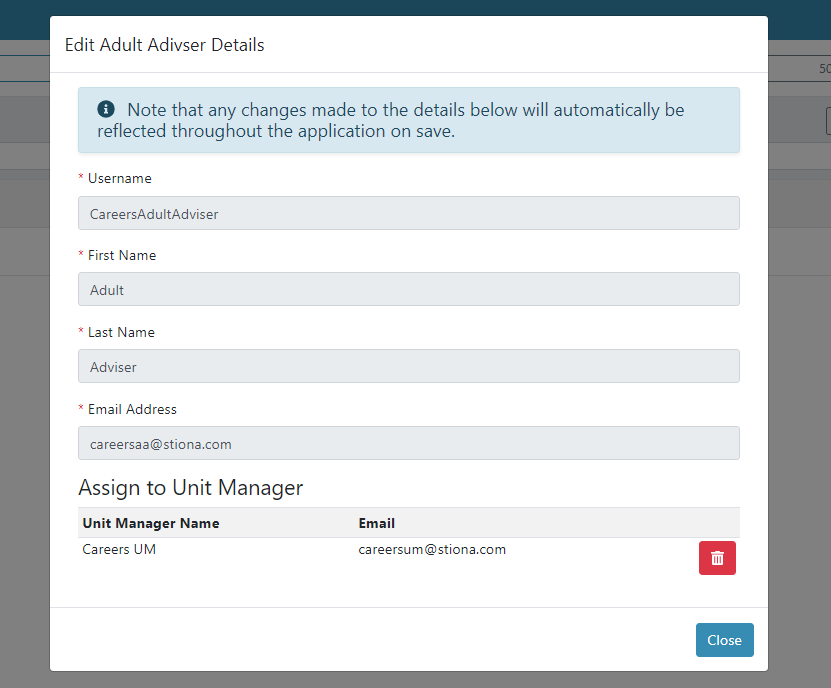
Username, First Name, Last Name and Email Address details are pre-filled and Read Only. These details can only be edited in the ‘User Management’ utility by a user with the ‘Service Admin’ Role.
Assign to Unit Manager to the Adviser
Click into Assign a Unit Manager to open the drop-down list and select an option.
Press the green ‘Add icon’ button to allocate this Adviser to the selected Unit Manager.
Assign to Unit Number
- Click ‘Please select an option’ to open the drop-down list and select a Unit number.
- Press the green ‘Add icon’ button to allocate this Unit Number to this Adviser.
Click ‘Close’ to close modal.
Navigating the Service
A Careers Administrator has read-only access to ALL submitted applications and feedback forms in ALL states. You will have the sole ability to delete an application (and to reinstate a deleted application if required).
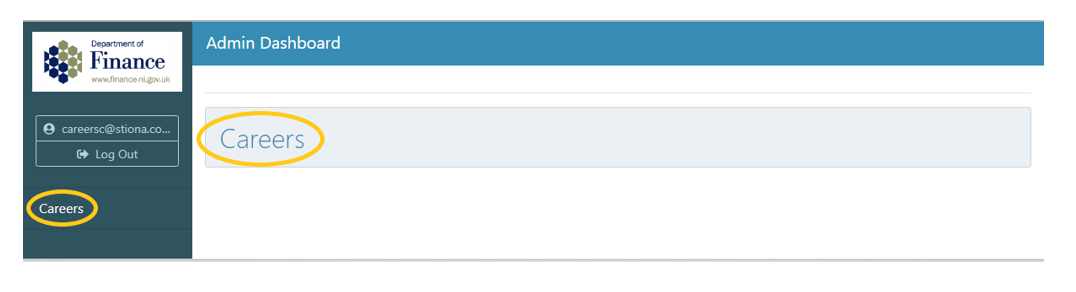
Careers Administrator Dashboard
This is the dashboard view for a user that has been granted an ‘CareersAdmin’ role, in order to enter the service, the user can click on either button.
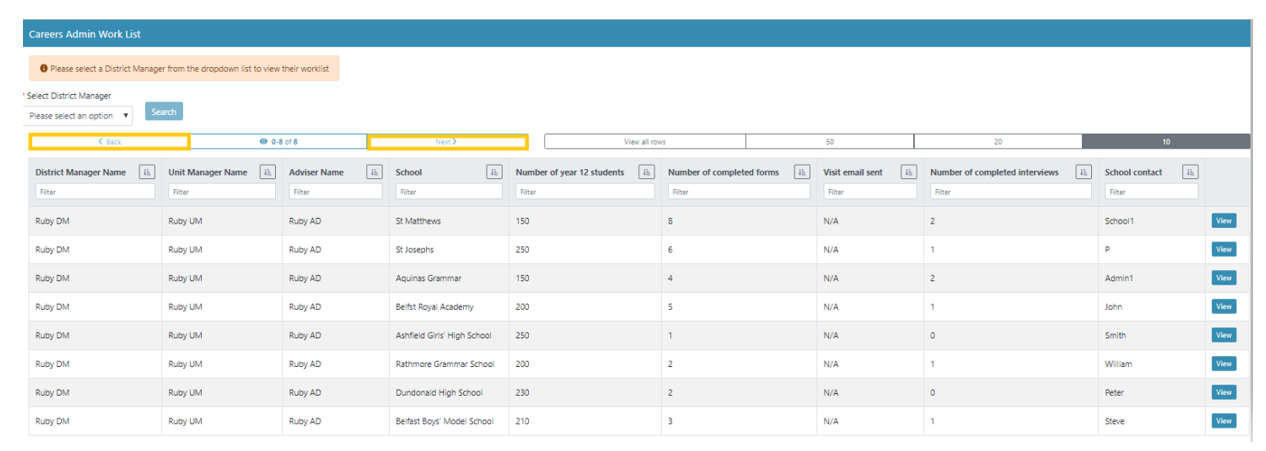
Careers Admin Work List
Once the user has entered the service the ‘Careers Admin Work List’ is displayed, they must then select a District Manager, Unit Manager and Careers Adviser from the dropdown list and click ‘Search.’
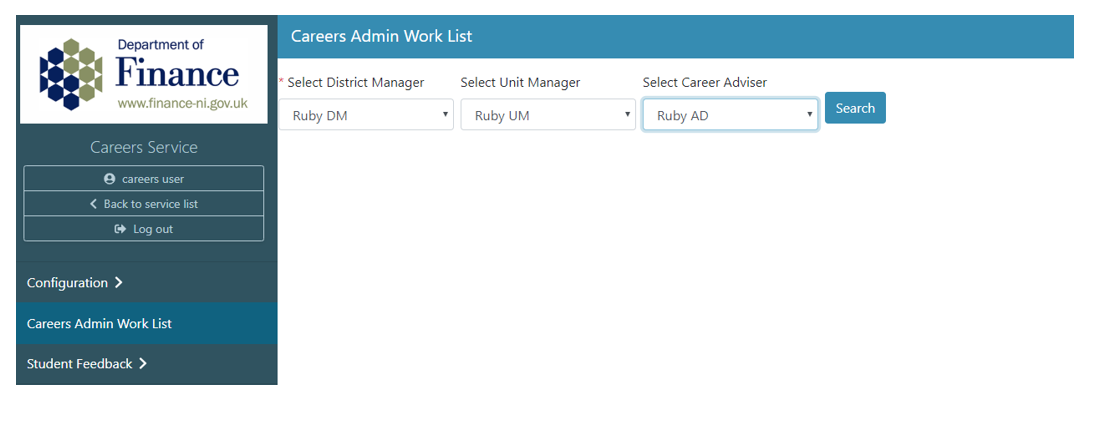
This will filter the table on the selected District Manager, Unit Manager and Careers Adviser and produce a list of schools allocated to the Adviser (and accessible to all selected parties).
All list views can be filtered alphabetically and numerically by clicking the filter icon button beside each heading – users can filter the list further by typing into the text boxes under each heading. Filters available at CareersAdmin level are:
District Manager Name
Unit Manager Name
Adviser Name
School
Number of Year 12 Students (set in school configuration)
Number of completed forms (calculated by system and incremented for each application submitted against that school)
Number of completed interviews (number is incremented when the Adviser clicks the ‘Interview Complete’ button for an application raised against that school)
School Contact (set in school configuration)
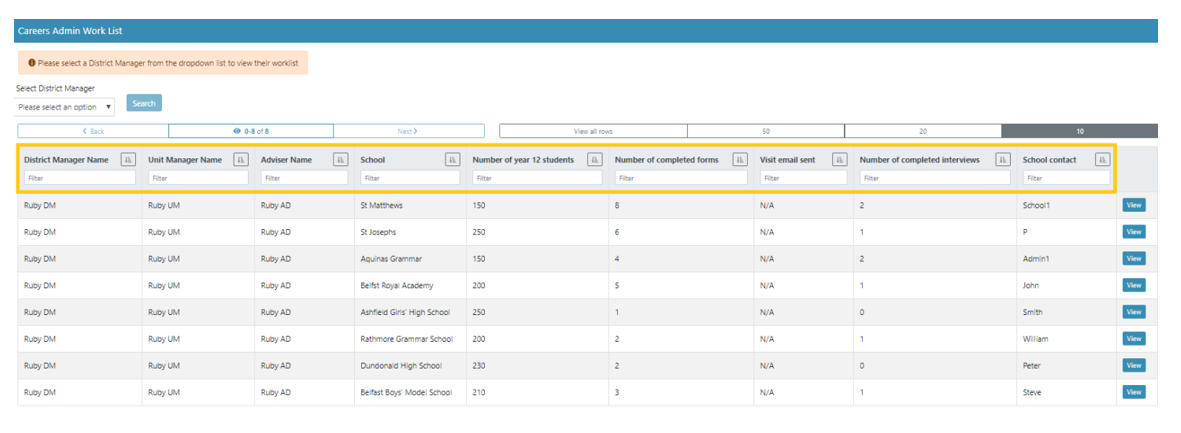
Users have a range of view options for the tables within this service and can depict how many table entries they wish to view on one page by clicking the buttons.
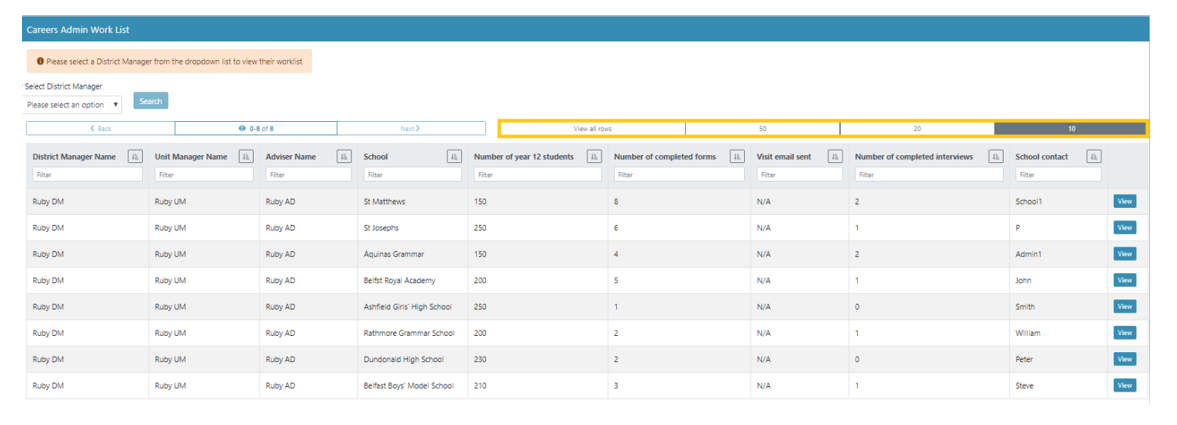
All users can navigate through the table if necessary, using the ‘Next’ and ‘Back buttons
Click the blue ‘View’ button on the right of the school to enter the list of applications submitted for that school.
Applications List View
Displays a list of the applications that have been submitted against this school. The table can be filtered and changed as previously discussed.
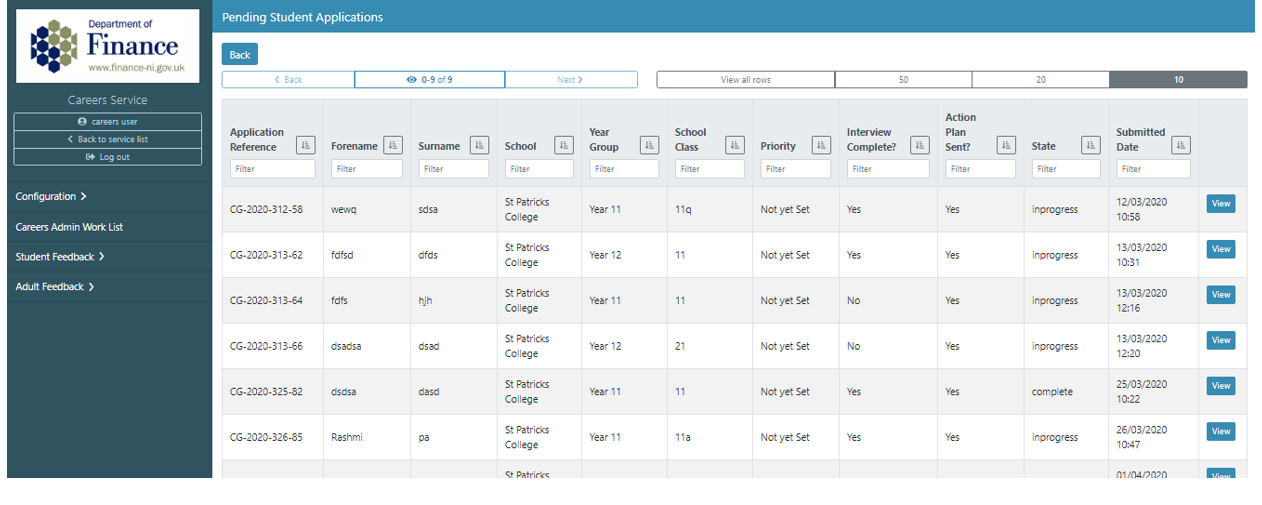
All applications have been assigned a state
Applications with a ‘new’ state have not been started by a Careers Adviser
Applications with an ‘InProgress’ state have been started but are not yet complete
Applications with a ‘complete’ status have been completed by the Careers Adviser
Some additional information on the following columns:
Application Reference: unique id automatically generated on submission
Priority: this will display a value of ‘Not yet set’ until the adviser sets a priority level.
Interview Complete: this will display as ‘No’ until the adviser clicks the ‘Interview Complete’ button which will set it to ‘Yes’
Action Plan Sent: this will display as ‘No’ until the adviser clicks the ‘Send Email’ button which will set it to ‘Yes’
All applications regardless of state are available to view by clicking the blue ‘View’ button.
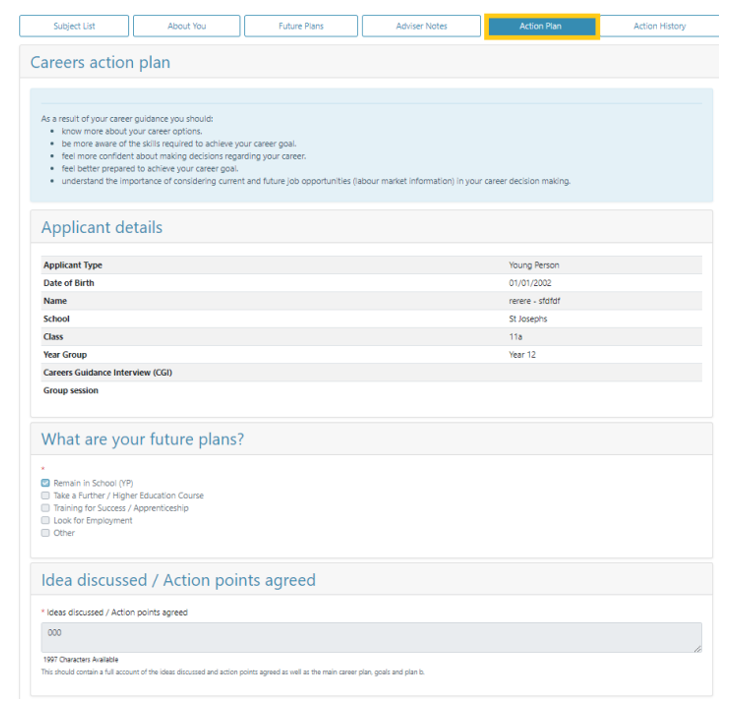
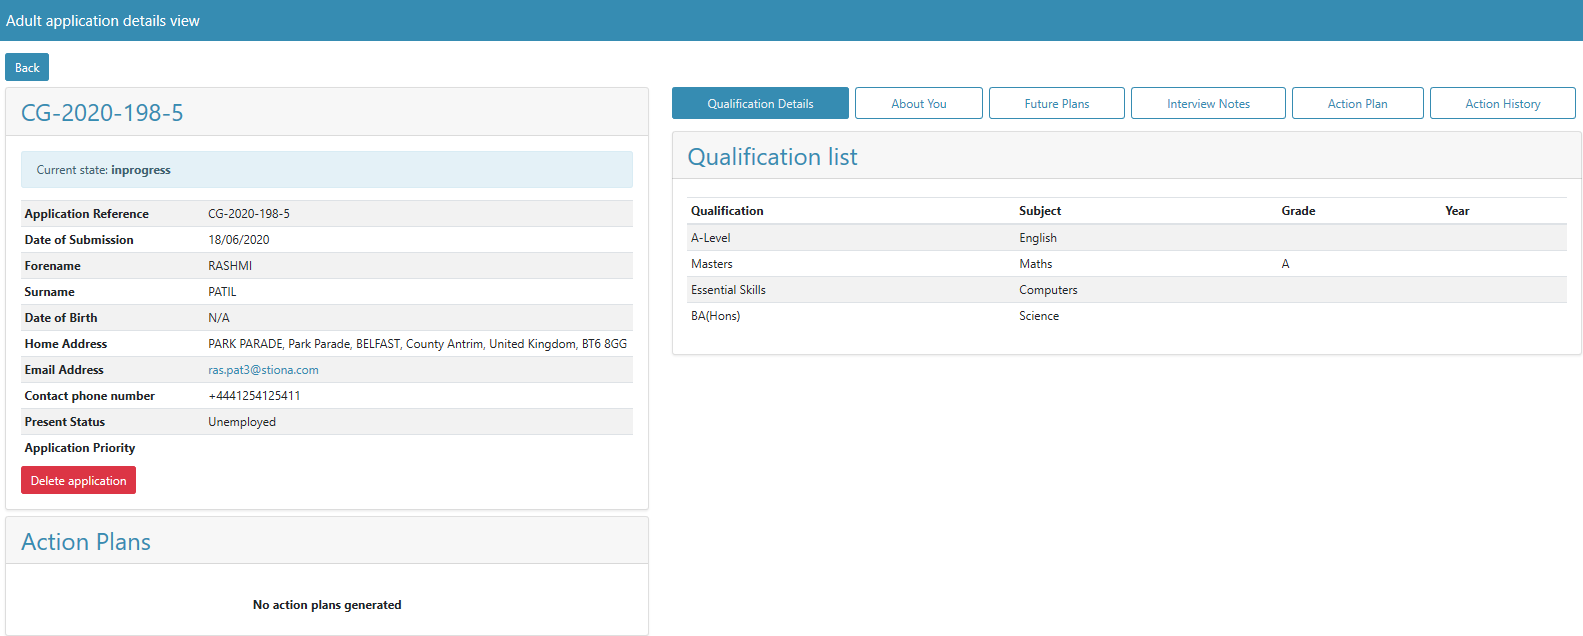
Application Details View
The Application details view, will display the application submitted by the student and any and all actions performed against it by the Adviser processing it.
- Click ‘View’ button to enter the Application Details View.
[!NOTE]Application details view is a Read Only view of a student application, no actions can be implemented by the Careers Admin (with the exception of deletion)
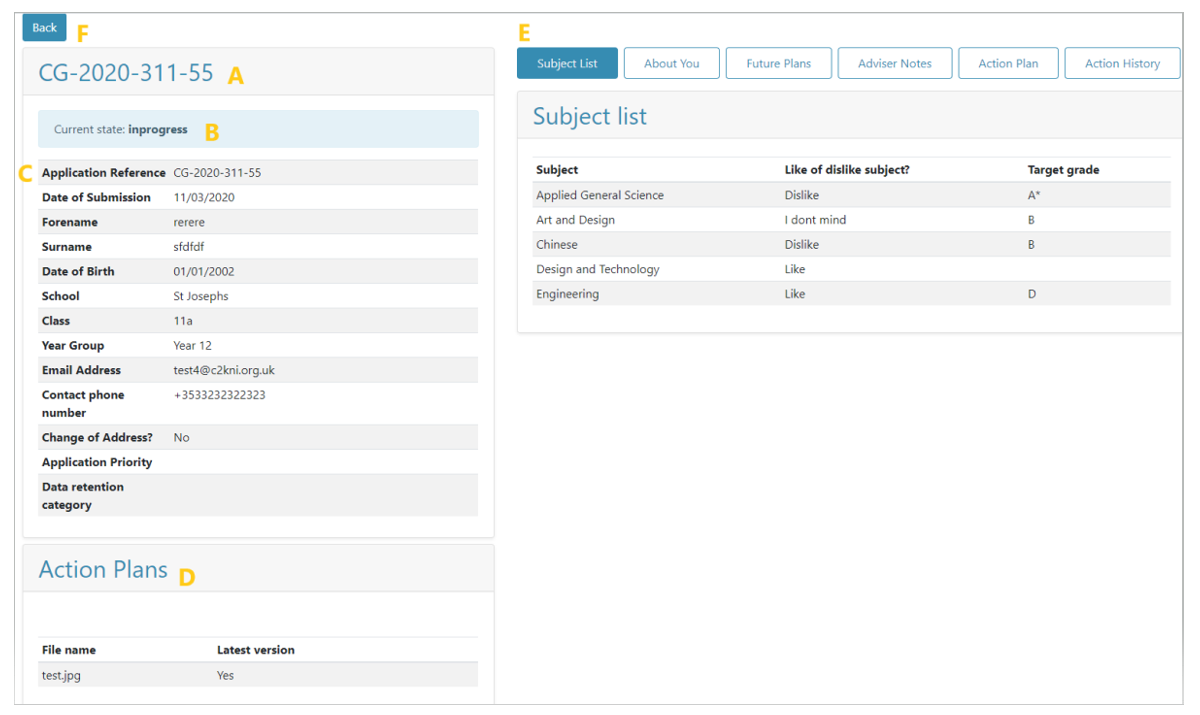
A. Reference Number: unique id automatically generated on submission
B. Application State: the current status of the application (inprogress/complete)
C. Applicant Details: Information provided by the student
D. Action Plan File: Once an Action Plan PDF has been generated by an Adviser it will automatically be uploaded into the action plan section.
E. Navigation Panels: allows the user to navigate through all parts of the application form and adviser admin sections using the buttons above.
F. Back button to return to school list view
Student Application
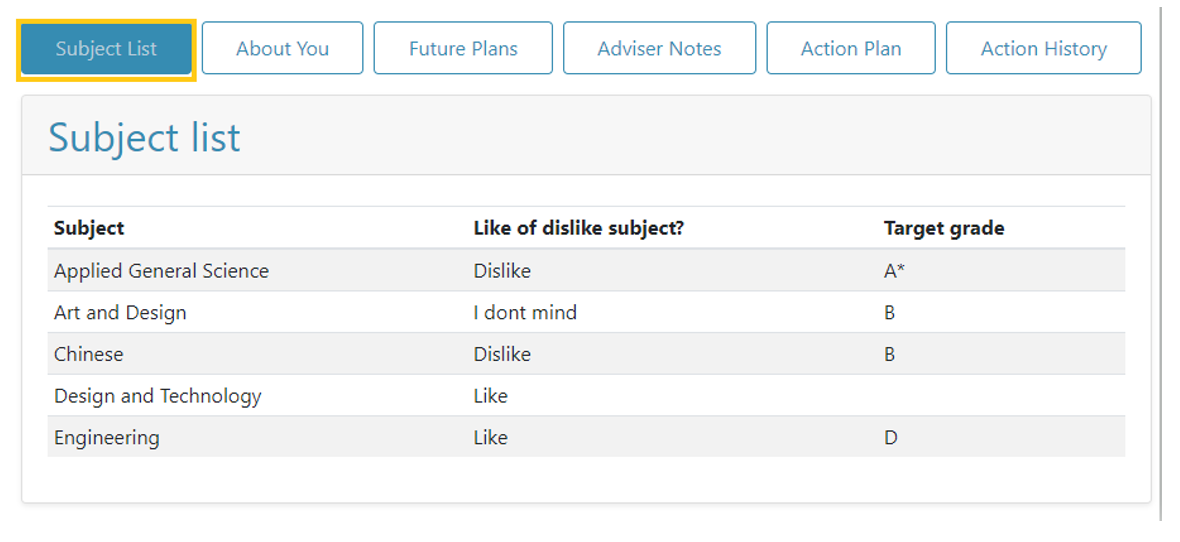
Subject List Student has provided these details during completion of Step 2: Subjects
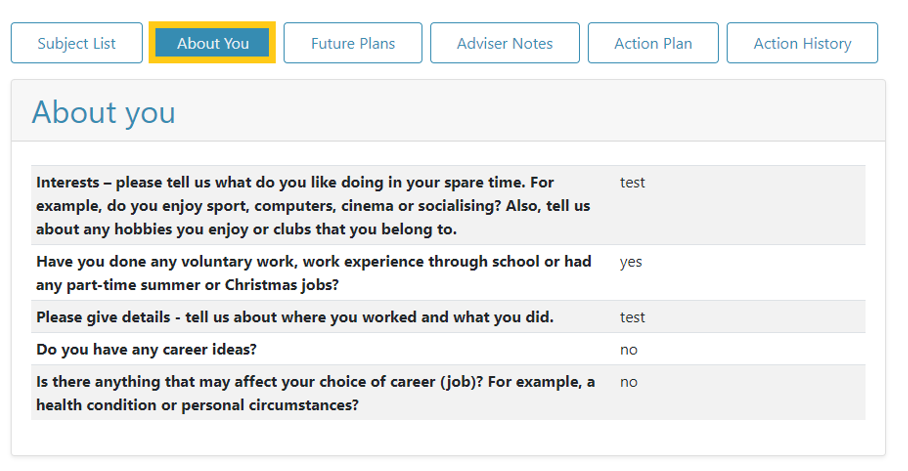
About You
Student has provided these details during completion of Step 3: About You
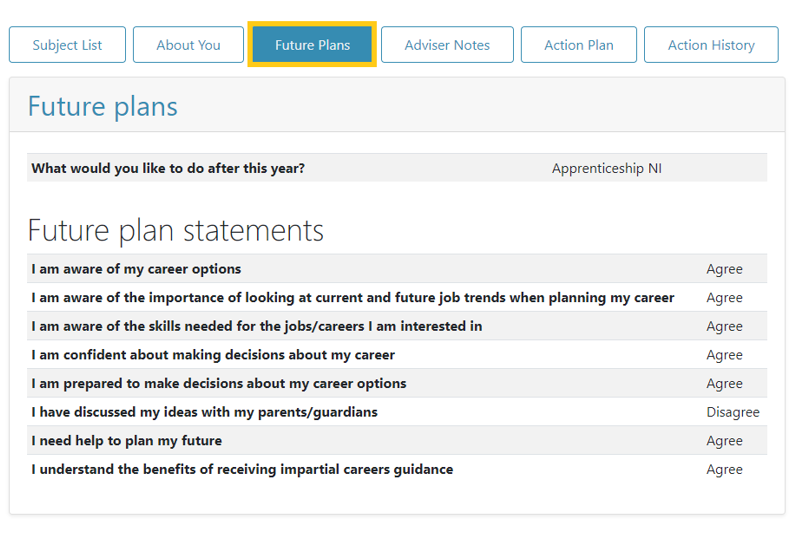
Future Plans
Student has provided these details during completion of step 4: Future Plans
Application Processing information
The following panels are updated by the Adviser who is handling this application and interacting with the student. As they work their way through the process, they will update each section and as CareersAdmin, you will see a read-only view of their progress.
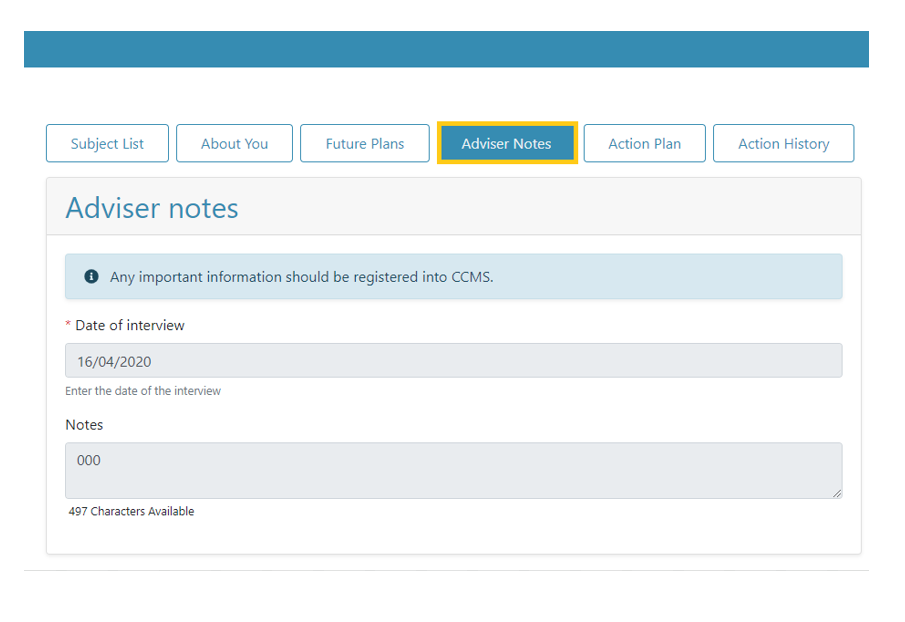
Adviser Notes Displays a read-only view of details entered by the adviser in relation to the student interview process, such as interview date and any notes entered.
Action Plan
Displays a read-only view of the Action Plan that the adviser has drawn up for the student.
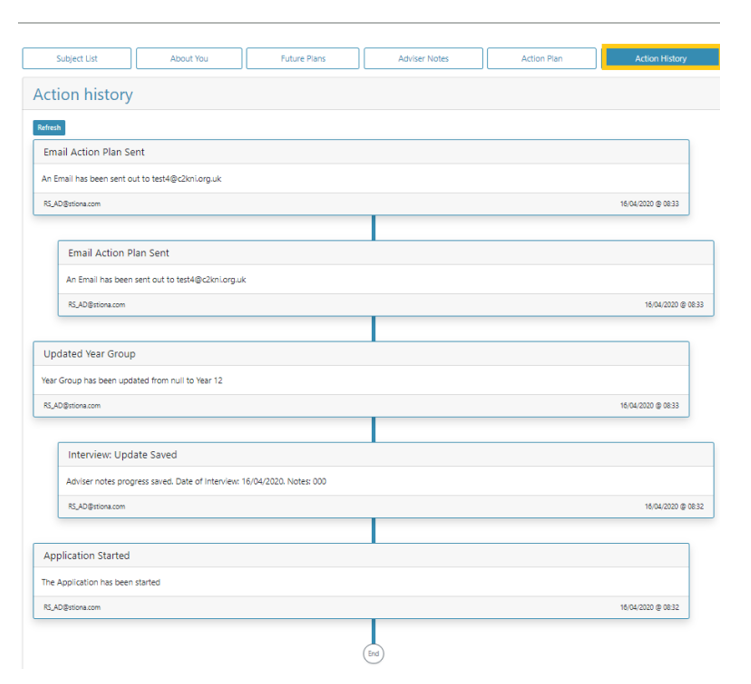
Action History This panel is very useful as it displays an audit of all the actions performed against this application; it includes the user who performed the action, a description of the action and the date/time it took place.
Student Feedback
Once the Adviser has sent the Action Plan to the student, they will receive an email with two links:
- Action Plan
- Student Feedback Form
The student has the opportunity to provide feedback about their experience with the careers service interview process.
Once submitted by the student, this feedback will enter into Admin and be available in the appropriate Feedback list view.
Note
The system will set ALL forms that require follow up to a status of ‘unassigned,’ all the rest will be set to ‘Completed’.
On the left-hand navigation panel below ‘Careers Admin Work List’ is the ‘Student Feedback’ menu item. When clicked will display the various feedback list views available.
Each list view will display the same information in table form, the action button will always appear as a ‘View’ button to allow the user to enter a read-only view of the feedback form.
Unassigned – this list will contain, all new feedback forms submitted that require follow up.
Assigned – this list will contain, all feedback forms requiring follow up that have been assigned to advisers by unit managers.
InProgress – this list will contain, all feedback forms which are being processed by Advisers.
Complete – this list will contain all feedback forms that have been completed.
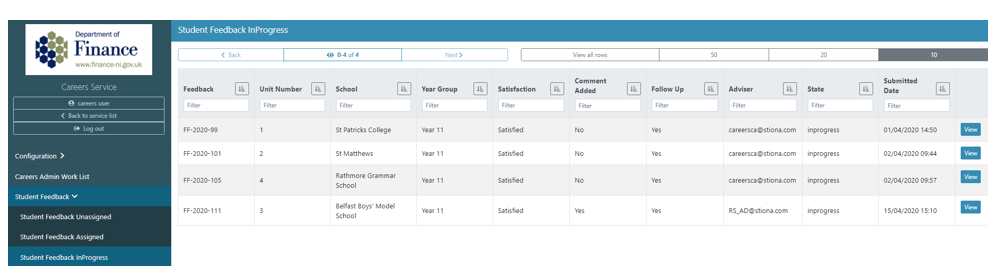
Each list view is can be filtered by typing into the free text area labelled ‘Filter’ which appears under each of the table headings. For example, you can display all forms submitted with comments added, by using the comments added filter.
Where feedback has been received which has indicated that it requires Adviser follow-up, the Unit Manager responsible will ‘Assign’ this feedback form to a named Adviser to work on.
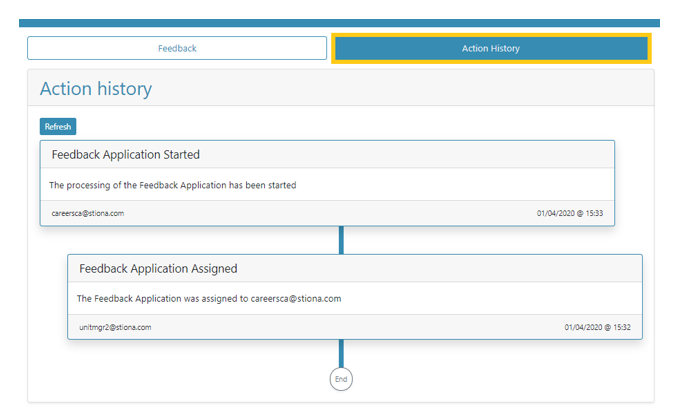
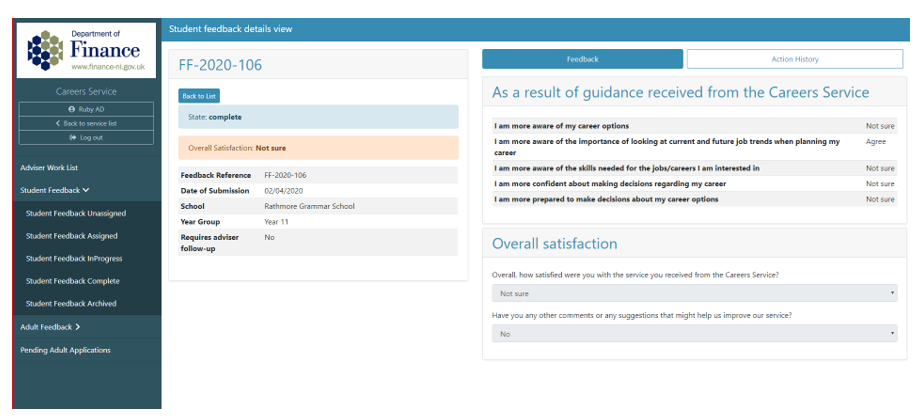
Student Feedback Details View
Click ‘View’ in any of the feedback list views to enter ‘Student Feedback Details View’

This view is Read Only - User can navigate through the Feedback and Action History panels to view further details. All feedback forms that require follow up will display a red contact box detailing the students preferred contact method.
The Action History panel will document all actions performed on this feedback, recording the action, user, date and time performed.
Feedback not requiring follow up
All feedback forms which do not require follow up will enter the system as completed and be available for view. These forms will essentially be anonymous and will only contain the school and year group for that student. The application ID will not be visible and there will be no red contact box displayed.
If the identity of the student is required for a valid child protection reason, a user granted the ‘FeedbackAdmin’ role has the ability to retrieve that student’s application ID, thus allowing the student to be identified.
Additional Functionality
Careers Admin have the ability to delete and reinstate applications.
Delete an Application
Filter the Careers Admin Work List by selecting District Manager > Unit Manager > Adviser and click view to enter the school work list view. Enter the application you wish to delete by clicking the view button to open the student application details view.
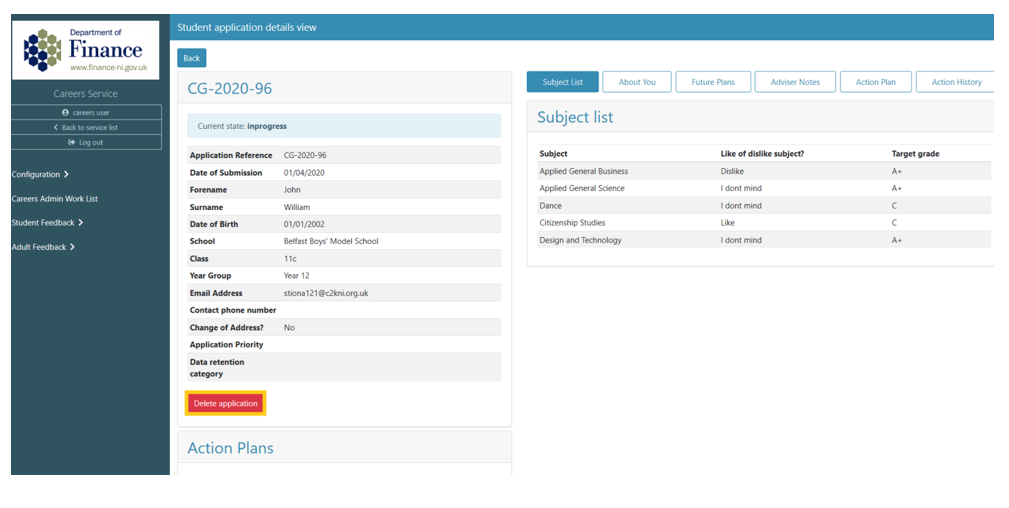
To delete the application, click the red ‘Delete application’ button which will
Change the current application status to ‘removed’
Change view to Read Only for all users, except for a CareersAdmin, who will see a ‘Reinstate’ button.
Reinstate an Application
To locate a deleted application, use the ‘State’ filter by typing ‘Removed’ on the student applications worklist. The list will then filter and display any applications that have been deleted.
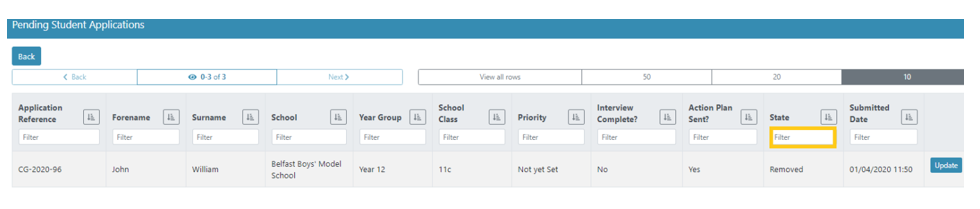
Click the ‘View’ button to open the application.
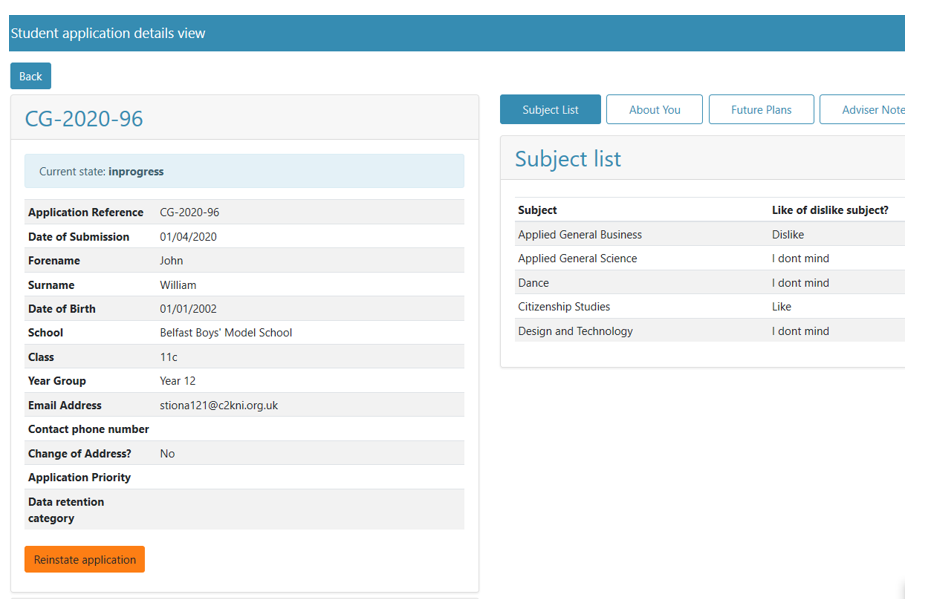
To reinstate the application, click the orange ‘Reinstate application’ button which will
- Change current application status from ‘removed’ to ‘inprogress’
- Change the view of the application depending on the role
- CareersAdmin: read-only view with ‘delete application’ button
- Adviser: will see all expected action functionality as per any inprogress application.
- All other users: will continue to see a read-only view as always.
Allocating Adult Applications
On the left hand navigation panel is a tab labelled 'Adult Applications.' This will contain a table of all applications submitted for adult applicants.
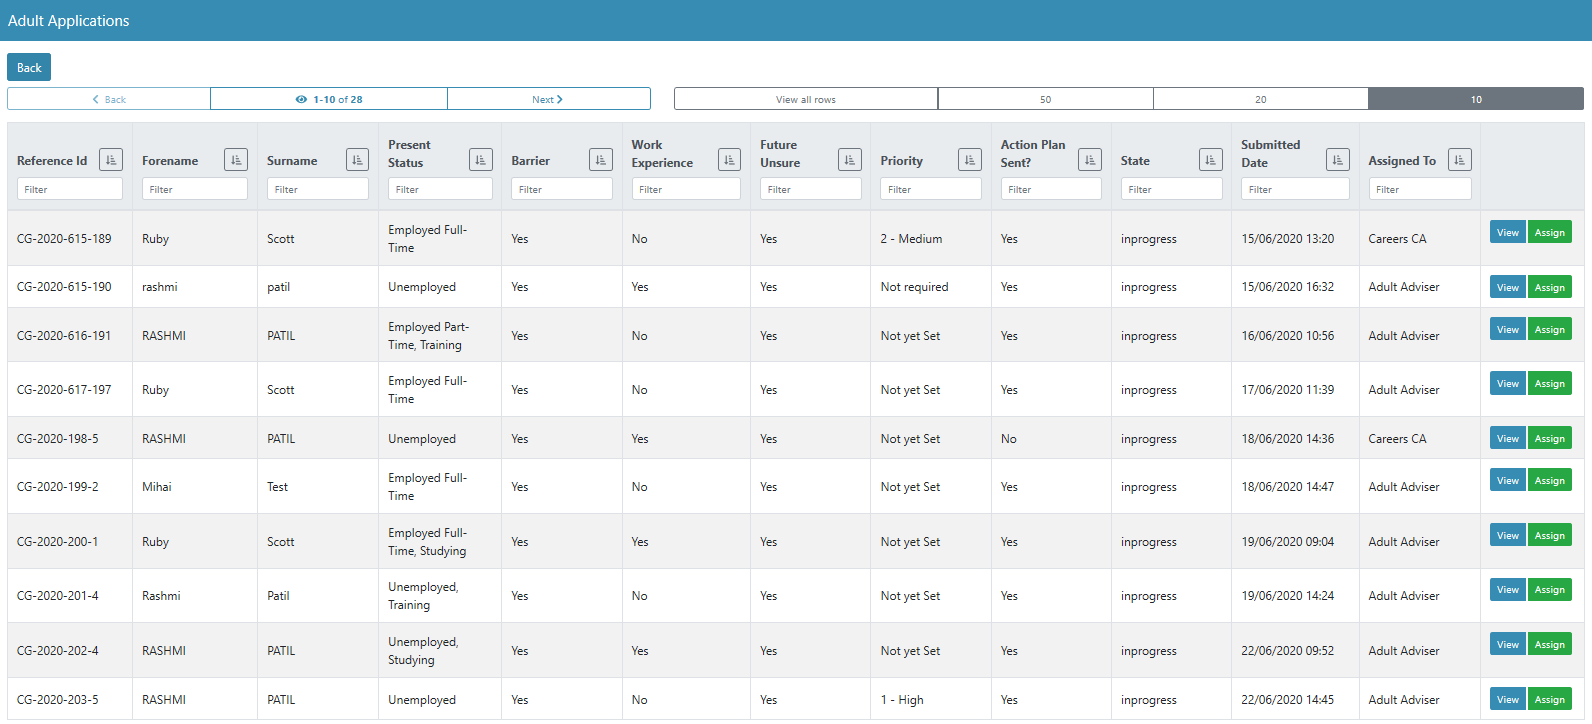
This list can be filtered using the following column headers:
Reference ID
Forename
Surname
Present Status
Barrier
Work Experience
Future Unsure
Priority
Action Plan Sent?
State
Submitted Date
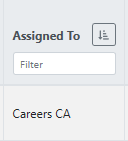
Assigned To
Note
It is your role as a user provisioned with the 'CareersAdmin' to allocate Adult applications to Advisers.
If you wish to view the application before assigning it (to gather the applicants geographical location), you can do so by clicking the blue 'View' button - this will bring you into the adult application details view.
Using the back button, a user can return to the table of adult applications and assign the application by clicking the green 'Assign' button.

Clicking this button will launch a drop down list where a user provisioned with the 'AdultAdviser' role can be selected.
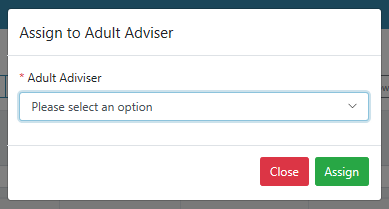
Once an Adult Adviser has been selected the Assigned to column will update with the selection.
Note
Only once the application has been assigned will it appear in an Adult Advisers worklist.