Adviser
Careers advisers can use the application to view and process application forms.
Adviser Dashboard

This is the dashboard view for a user that has been granted an ‘Adviser’ role, in order to enter the service, the user can click on either button.
Adviser Work List
Once the user has entered the service the ‘Adviser Work List’ will be displayed. Each adviser’s Work List view will contain a list of schools they are configured against and from which they can access a list of each schools submitted applications. Advisers will only have access to the applications which are raised against the school(s) they are assigned to; this is configured by the Careers Administrators (e.g. CareersAdmin/ServiceAdmin roles). The Work List (as with all list views in the system) can be filtered depending on an adviser’s search criteria by typing into the free text area labelled ‘Filter’ which appears under each of the table headings.

Users also have a range of view options for the list views within this service. A user can depict how many table entries they wish to view on one page by clicking the buttons highlighted below. Pages can be traversed using the ‘Next’ and ‘Back’ buttons. To view a student application the user must first select the school they wish to enter and click the blue ‘View’ button located at the right-hand side of the application. This button will navigate the user to a view of that selected school’s application forms.
Application List View
In this view, the adviser will only be able to view applications submitted against the school they selected in their work list.

- Applications that are in the state ‘new’ will have a ‘Begin’ button
- Applications that are in the state ‘InProgress’ will have an ‘Update’ button
- Applications that are in the state ‘complete’ will have a ‘View’ button (these applications are Read-only and can only be updated again if reinstated to the ‘InProgress’ state).

If a user wishes to filter this list depending on their search criteria, they can do so by typing into the free text area labelled ‘Filter’ which appears under each of the table headings.

Application Details View
To view an application, click the Begin/Update button next to it; this will open the ‘Student Application Details View.’
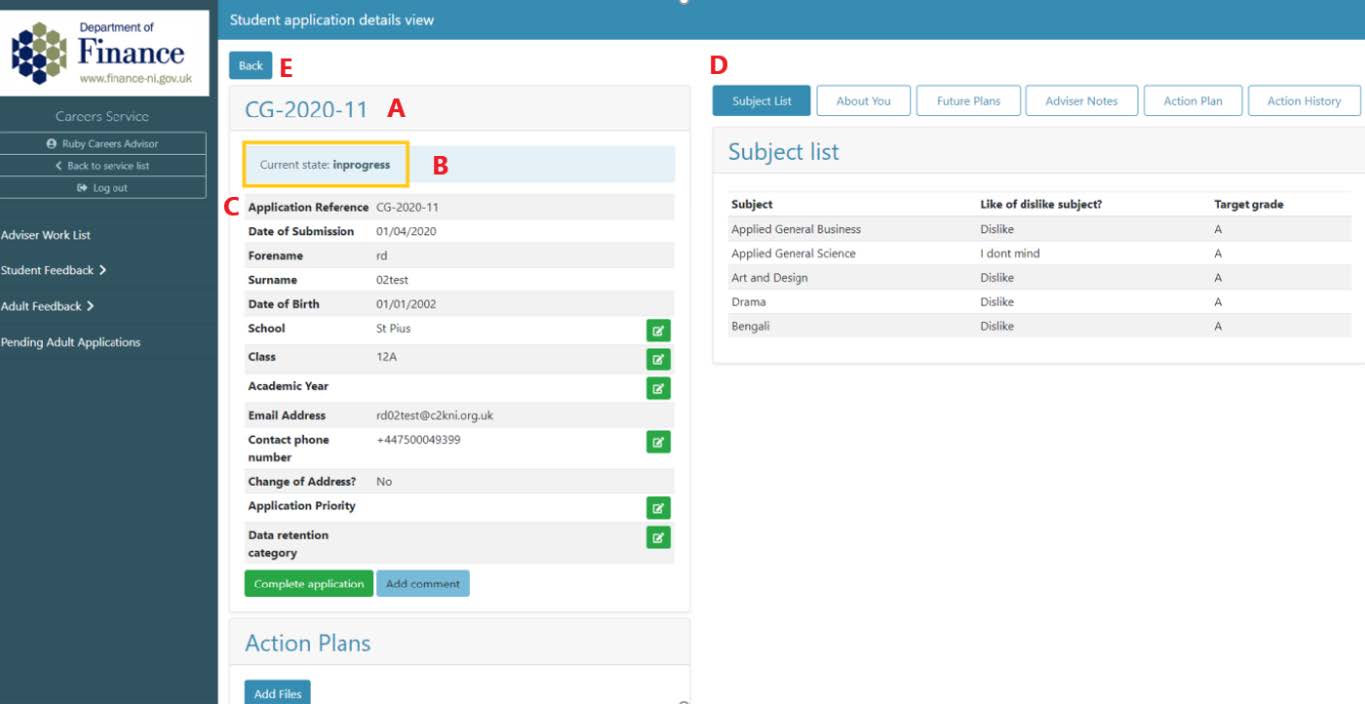
A. Unique reference id: upon submission, the system generates a unique reference id for each application
B. Current State: will reflect the application’s current status – InProgress/Complete
C. Applicant Details: this section contains all the information about the applicant, some o of which can be updated by the adviser.
D. Panel Navigator: this is a row of buttons which allow the user to traverse through the panels - all panels are Read Only except ‘Adviser Notes’ & ‘Action Plan’
E. Back button: returns user to student application list
Processing the Student Application
There are a number of actions that an Adviser can perform on the Application Details view, which we will discuss in this section.
Applicant Details
An adviser has the ability to edit/update fields which display a green ‘edit icon’ button; all other fields are read-only.
- Click the ‘Edit’ button to launch the Edit modal.
- Make the required changes
- Click the ‘Submit’ button to save the update
These changes will be reflected on the screen.
Academic Year and Application Priority will always appear blank here until an update is made and submitted by the Adviser.
Applicant Priority - can be set at the users discretion, click the green edit icon, using the dropdown list select from the options; 1-High, 2-Medium and 3-Low. Click submit to save.
Priority can be filtered in the Student Applicants grid.
Add Comment

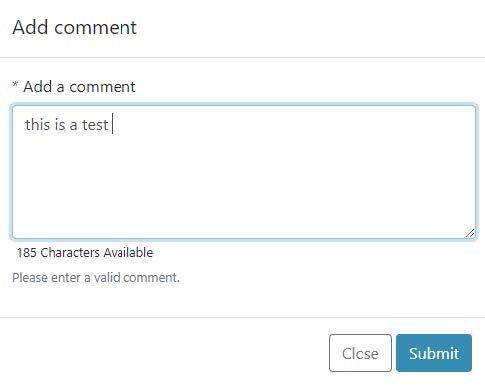
At the bottom of the applicant details view, there is a blue ‘Add comment’ button; this button can be clicked by the Adviser if they wish to add any relevant additional notes or commentary to the application.
- Click the ‘Add comment’ button to launch the ‘Add comment’ modal
- click into the free text box area and type a comment
- click the blue ‘Submit’ button.
Note
Once a comment has been submitted it will be recorded and visible in the ‘Action History’ panel.
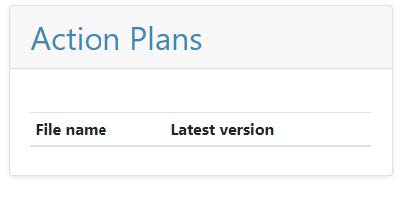
Action Plans Folder
Once an Action Plan PDF has been generated, it will automatically be uploaded into the action plan folder which is situated below the applicant details on the Student Application Details View
More details on how to generate a PDF Action Plan
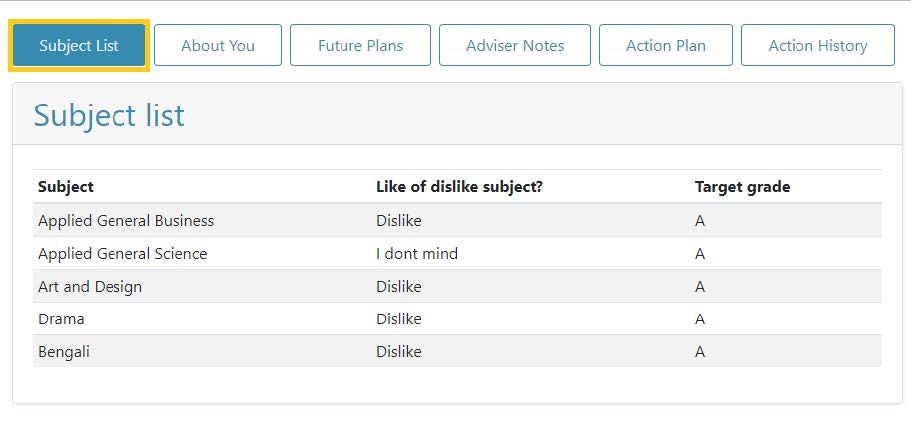
Subject List Panel
Read Only – displays the details that the student provided on ‘Step 2: Subjects’ of the online application form.
About You Panel
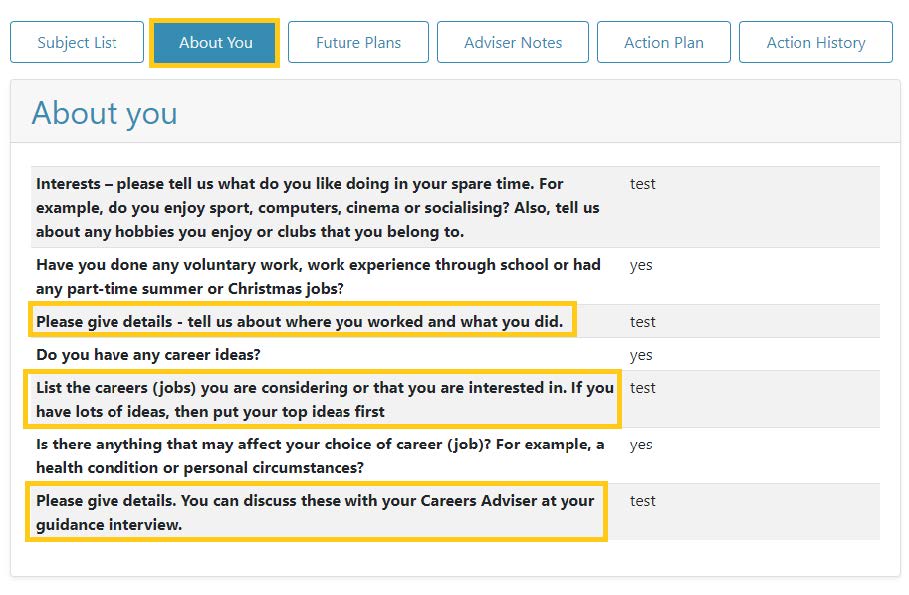
Read Only – displays the details that the student provided on ‘Step 3: About You’ of the online application form.
If the student has answered ‘Yes’ to any of the questions in this section of the application form, the system will have prompted them to provide further details which will also be displayed.
If the student has answered ‘No’ to the questions then no further details will be displayed.
Future Plans
Read Only – displays the details that the student provided on ‘Step 4: Future Plans’ of the online application form.
Adviser Notes Panel
This panel allows the adviser to document details, notes or commentary. Adviser can perform several actions on this panel
Pick a date for interview-
Clicking the ‘Pick a date’ button will launch the calendar control
Select a date to set or update the date of an interview
Type Notes –
- Click into the ‘Notes’ section
- Enter any notes or commentary.
Save updates –
- Clicking the ‘Save updates’ button will save any changes to the interview date or notes section you have just made.
- It will update the ‘Action History’ panel accordingly.
Mark interview as complete –
- Clicking the ‘Mark interview as complete’ button will
- Change this section to ‘Read-only’
- Increment the ‘Number of completed interviews’ column entry on the Work List view for that school.
- Update the ‘Action History’ panel accordingly.
- Clicking the ‘Mark interview as complete’ button will
Action Plan
This panel facilitates the creation, updating and issuing of action plans to students.
All editable fields which require adviser input are displayed on this panel and can be set and updated by the Adviser; they can type into free text boxes and check checkbox where appropriate, once completed they will save their updates. They can continue to make and save changes as many times as required
An alert banner at the bottom of the action panel is displayed to remind the Adviser that the academic year must be set before the action plan can be emailed to the student.
Generate PDF Button – when this button is clicked, the system will take the values from the fields above and insert them into an Action Plan template in PDF format. It will then save this newly created PDF to the ‘Action Plans’ folder displayed on the left-hand side of the screen.
Email action plan Button – allows an adviser to issue an email to the student which will contain a link to their action plan (this will be the latest PDF version saved to the Action Plans folder) which the student can access/download through the secure public site.
Click the ‘Email action plan’ button to launch the modal (see below)
Adviser will click into the ‘Adviser message’ text box and enter note to the student. Note: any text entered here will be embedded in the body of the email.
The latest action plan that has been generated by the Adviser will automatically be attached.
Adviser can add additional files by clicking the blue ‘Add Files’ button
Click the blue ‘Send Email’ button and the following actions will be triggered:
- Email is sent to the student’s C2K email address as specified on the applicant details
- Copy of the email is sent to the school contact
- The ‘Action Plan Sent?’ column displayed on the Application List View will be updated from ‘No’ to ’Yes’
- The Action History will be updated accordingly.
Action History
Read Only - This panel will display all the actions performed against this application; it will include the user who performed the action, action description, date and time.
Complete Application
Once the Adviser wishes to set an application to ‘complete’ they will click the green ‘Complete Application’ button which is located below Applicant details on the Student Application Details View.
Click the ‘Complete application’ button to launch the ‘Complete Application’ modal
Adviser may add a further comment by clicking into the ‘Comment’ text area
Clicking the ‘Complete Application’ will
- Change the status of the application from ‘InProgress’ to ‘Complete.’
- Make the application Read-only and remove all action buttons.
- Display the ‘reinstate application’ button should the adviser wish in the future to reopen the application
- Update the ‘Action History’ panel accordingly.
Note
Once the application has been completed, no further actions will be available and the application will be Read Only.
A user will be unable to set an application to ‘Complete’ without marking the interview as complete and sending out the action plan. Should this occur, the system will display the following message to inform the user.
Reinstate Application
A completed application will show only the ‘Reinstate Application’ button allowing an Adviser to reopen it where required. Clicking this button will
• Change state from ‘complete’ to ‘InProgress’
• Restore all action buttons
• Update Action History panel
Student Feedback
Once the Adviser has sent the Action Plan to the student, they will receive an email with two links:
- Action Plan
- Student Feedback Form
The student has the opportunity to provide feedback about their experience with the careers service interview process.
Once submitted by the student, the feedback will be available in the appropriate Feedback list view.
Note
The system will set ALL forms that require follow up to a status of ‘unassigned,’ all the rest will be set to ‘Completed’.
On the left-hand navigation panel below ‘Adviser Work List’ is the ‘Student Feedback’ panel. When clicked will display the various feedback list views available.
Each list view will display the same information in table form, the only difference will be the action button on the right.
Unassigned – this list will contain, all feedback forms submitted against your school(s) that require follow up. Each form will have a view button
Assigned – this list will contain, all feedback forms requiring follow up which have been assigned to you by your unit manager. Each form will have a Begin button
InProgress – this list will contain, all feedback forms assigned to you which are in progress. Each form will have an Update button
Complete – this list will contain all feedback forms submitted against your school(s) that have been completed. Each form will have a View button
Each list view can be filtered by typing into the free text area labelled ‘Filter’ which appears under each of the table headings. For example, you can display all forms submitted with comments added, by entering ‘Yes’ into the ‘Comments added’ filter textbox.
Feedback requiring follow up
Where feedback has been received which has indicated that it requires Adviser follow-up, the Unit Manager responsible will ‘Assign’ this feedback form to a named Adviser to follow up on.
Once Feedback has been assigned to an adviser, it will appear in their ‘Student Feedback Assigned’ panel and they will be able to action it.
Processing Feedback Forms
To begin processing the feedback form, click the ‘Begin’ button which will:
- Open the feedback form for viewing
- Change the form state to ‘InProgress’
- Move the feedback form to the ‘InProgress’ List View
- Update the ‘Action History’ panel accordingly.
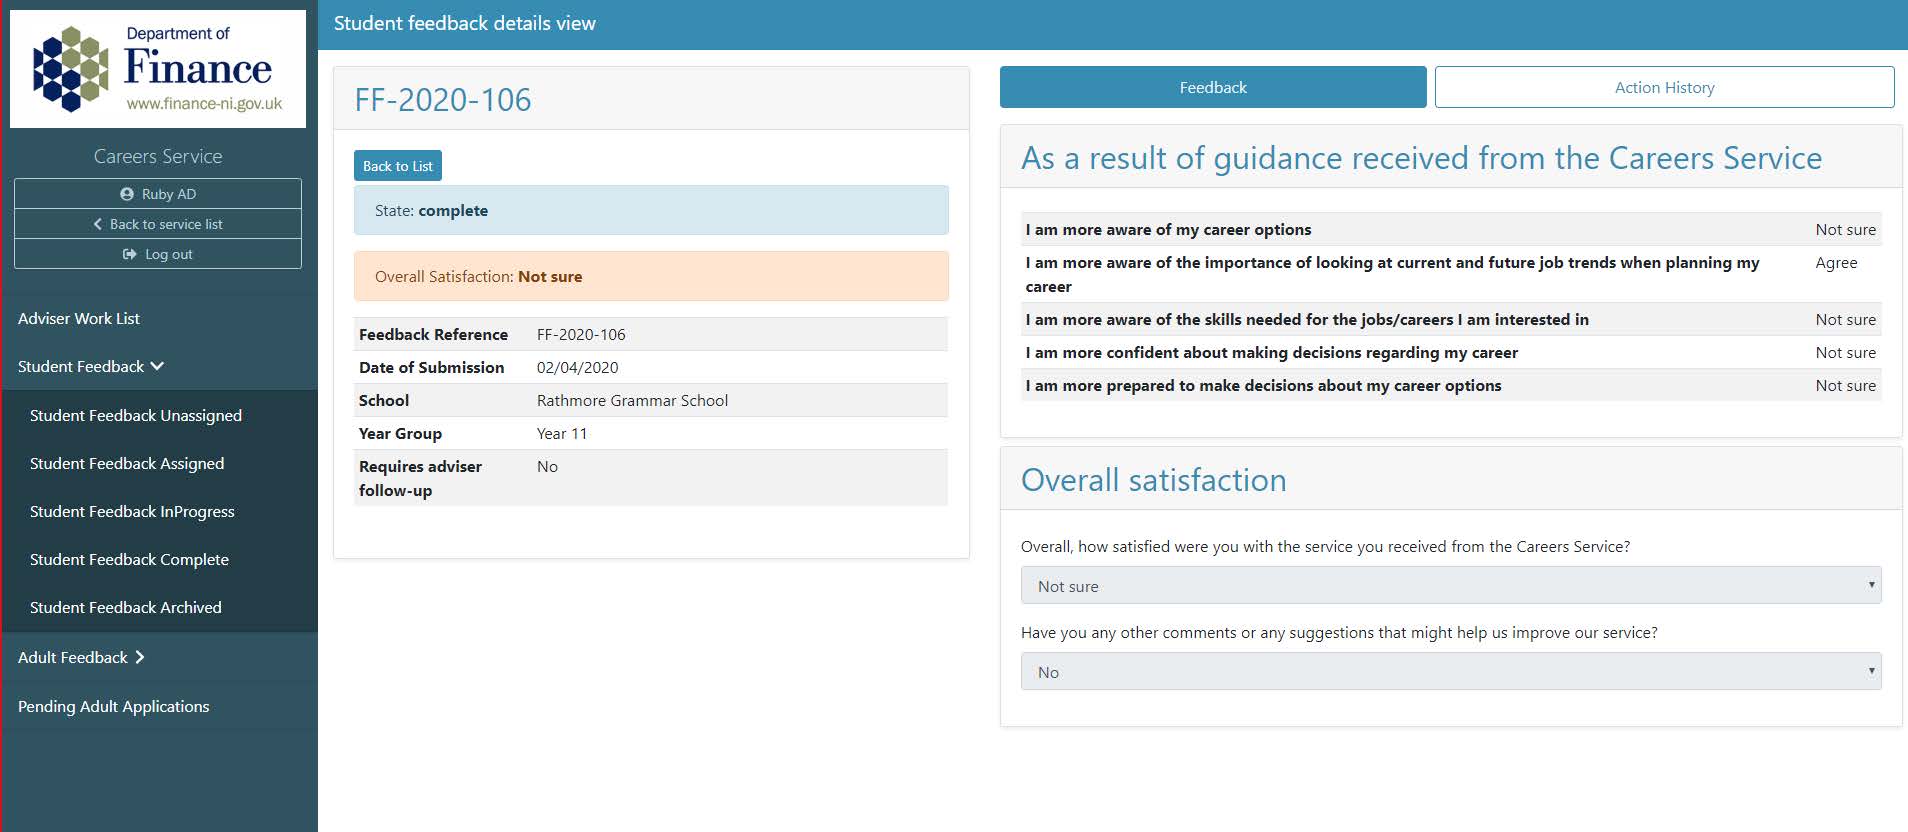
Applicant details are listed as Read Only on the left-hand side of the screen.
Note
All assigned forms require follow up and therefore, will display a red alert box containing the students preferred contact method. It will also display the originating Application ID.
On the right-hand side of the Feedback Details View, the following panels will be displayed:
Feedback Panel
Will contain a Read Only view of all feedback submitted by the student.
Action History Panel
Will display all the actions performed on this feedback form by the adviser and unit manager:
Completing Feedback Forms
When an Adviser has reviewed the feedback and completed the follow up activities, they can set the feedback form to ‘Complete’ via the ‘Feedback Complete’ button which is located under applicant details on the left-hand side of the screen
- Click the green ‘Feedback Complete’ button to launch the ‘Feedback Complete’ modal.
Click into the ‘Comments’ text box and type any comments to be added.
Click the green ‘Mark as Completed’ button, which will
- Update the feedback form state from ‘InProgress’ to ‘Complete’
- Move the form into the ‘Student Feedback Complete’ list view
- Make the form read-only – no further actions are available to perform on this form.
- Update the ‘Action History’ panel accordingly – any comments will also be displayed here.
Feedback not requiring follow up
All feedback forms which do not require follow up will enter the system as completed and be available for view via the ‘Student Feedback Complete’ menu item.
These forms will essentially be anonymous and will only contain the school and year group for that student. The application ID will not be visible.
Should the identity of the student be required for a valid child protection reason, a user granted the ‘FeedbackAdmin’ role has the ability to retrieve that student’s application ID, thus allowing the student to be identified.
Trigger Words Feature
A trigger word feature has been added to the careers service application. This feature enables Advisers to easily identify students who may be at risk.
A list of 'Trigger words' has been determined and listed within the admin side of the service. If a student has matched any of these trigger words within free text areas of their application - the system will turn this entry red within the 'Pending Student Applications' view to alert the user.
To view the trigger words the student has entered click 'View/Update' to enter into 'Student Application Details View.'
Below the student details, a section labelled 'Trigger Words' has been added. Triggered words identified within the student's application will be listed here.
In this application, the system has identified the student as entering 'bad words' as their home address.
Note
The system will check for trigger words in any free text area that the student has entered data.
To action and escalate these findings, click the green 'Actioned' button.
The system will display a pop up, enabling you to add an optional comment up to 500 characters in length. Click the green 'Actioned' button to close and save this update.
An entry will be added to the Action History panel.
Once the trigger words have been 'Actioned' by the adviser:
The 'Actioned' button will no longer display
The table entry will no longer display red
The trigger word column will be updated from 'Yes' to 'Actioned'
Important
Applications containing trigger words are processed in the same manner as applications not containing trigger words. It is at the discretion of the adviser to 'Action' the trigger words on the service for traceability. Further appropriate action taken will be carried out offline.
The same 'Trigger Words' feature is available in student feedback.
To view the trigger words the student has entered click 'Begin,' to enter the 'Student Feedback Details' view.
The trigger word section is displayed on the right hand side of the screen.
In this application, the system has identified the student as entering 'bad' into the text area for their comments or suggestions to improve the service.
Note
The system will check for trigger words in any free text area that the student has entered data.
To action and escalate these findings, click the green 'Actioned' button.
The system will display a pop up, enabling you to add an optional comment up to 500 characters in length. Click the green 'Actioned' button to close and save this update.
An entry will be added to the Action History panel.
Once the trigger words have been 'Actioned' by the adviser:
The 'Actioned' button will no longer display
The table entry will no longer display red
The trigger word column will be updated from 'Yes' to 'Actioned'
Important
Feedback forms containing trigger words are processed in the same manner as feedback forms not containing trigger words. It is at the discretion of the adviser to 'Action' the trigger words on the service for traceability. Further appropriate action taken will be carried out offline.