Rate It Guide
- Create RateIt
- Using Service Admin or Service User Role
- Enter Service Configuration Page
- Create RateIt
- Edit RateIt
- Using Service Admin or Service User Role
- Enter Service Configuration Page
- Edit RateIt
- Take/Distribute RateIt Survey
- Using Service Admin or Service User Role
- Enter Service Configuration Page
- Get Public RateIt URL
- Static Data Management
- Using Static Data Manager Role
- List and Text Management
- Edit Email Templates
- Using Template Admin Role
- Email Template Manager Page
- Export RateIt Data
- Using Export Admin Role
- Export Page
Admin Dashboard
Service Admin's can use the application to view and manage RateIt transactions and to manage users of the RateIt system.
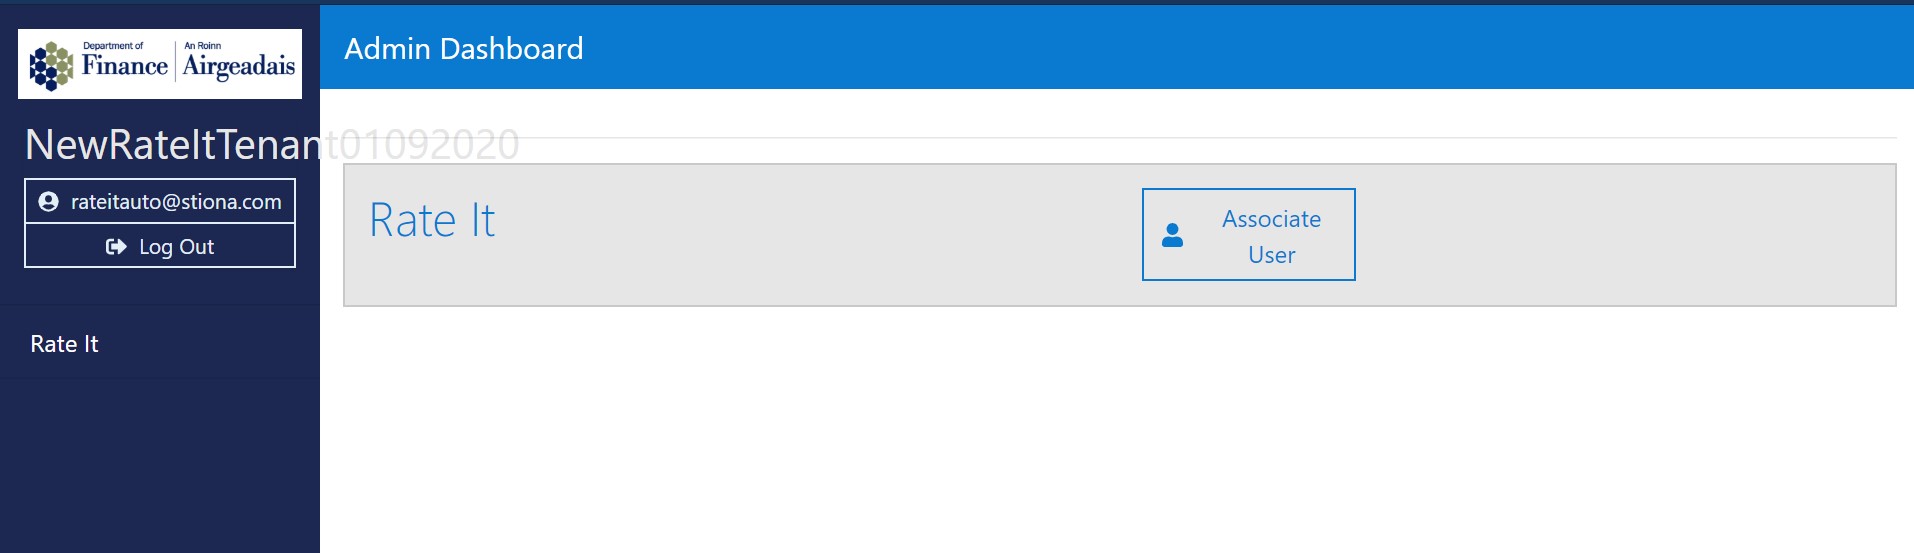
This is the dashboard view for a user that has been granted a ‘Service Admin’ role. In order to enter the service, the user can click on either of the two ‘Rate It’ buttons.
Alternatively, the admin role can manage users by clicking on the ‘Associate User’ button. See User Manager page.
Transactions List
The user can navigate between the three pages (Transactions, Service Configuration and MI) by using the menu on the left of the page.
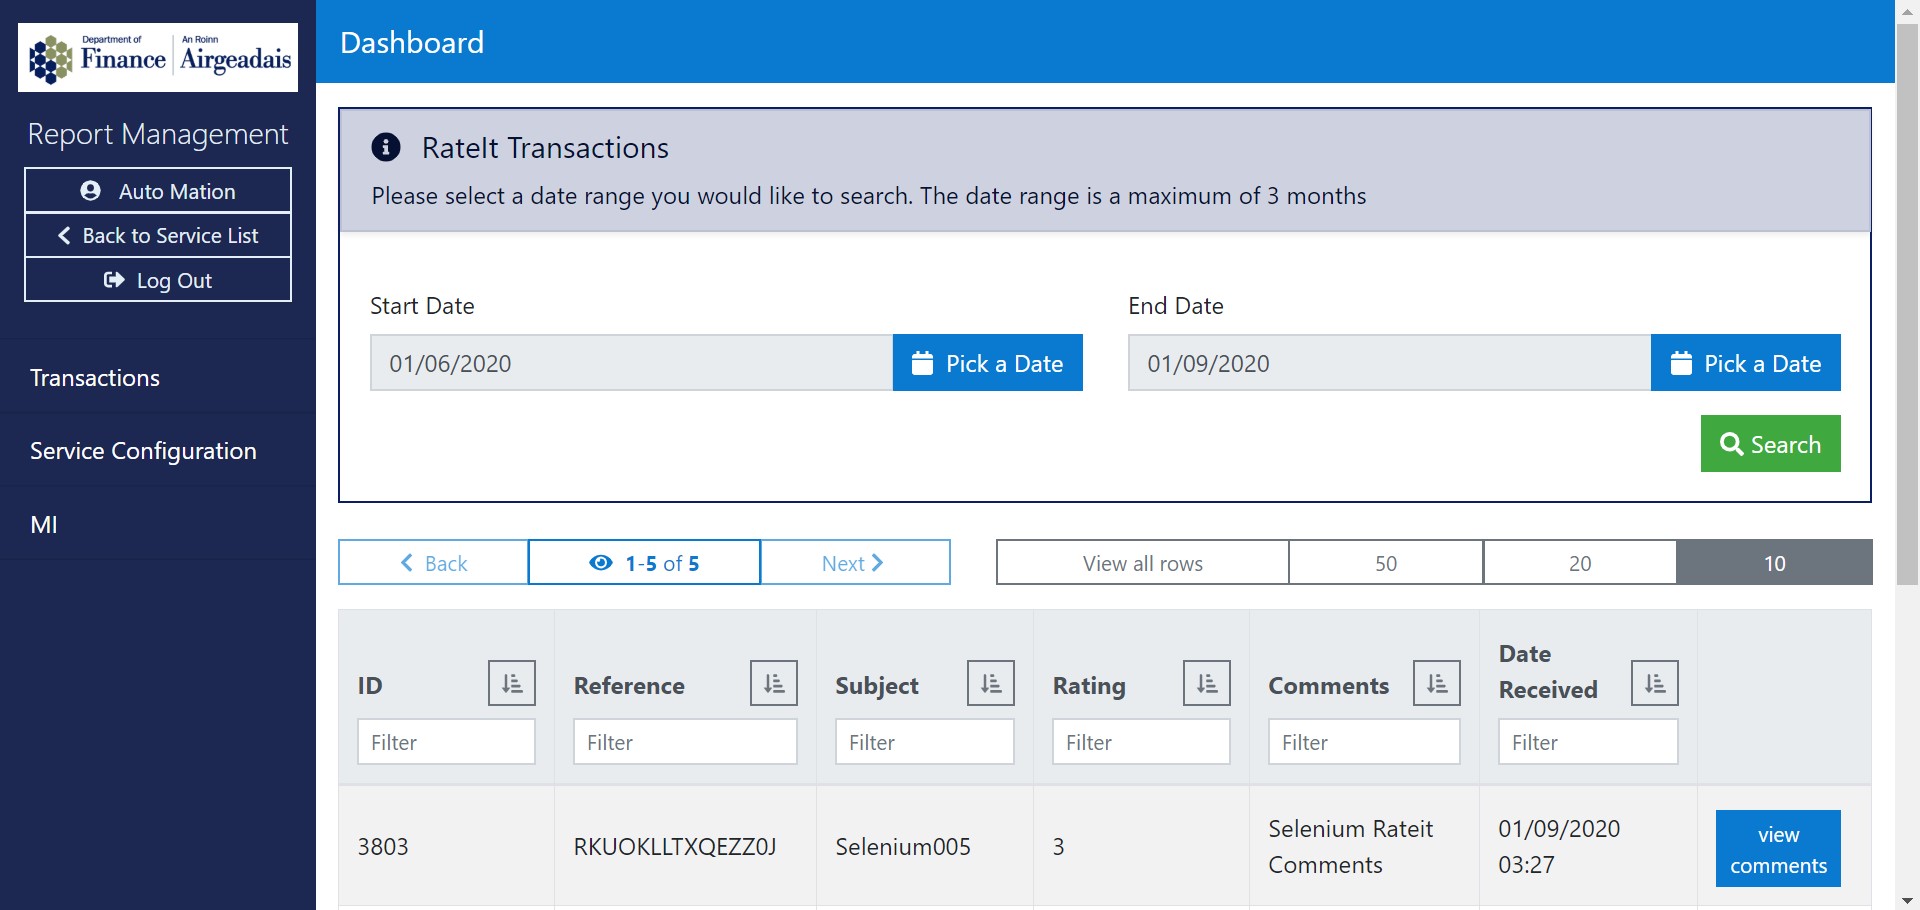
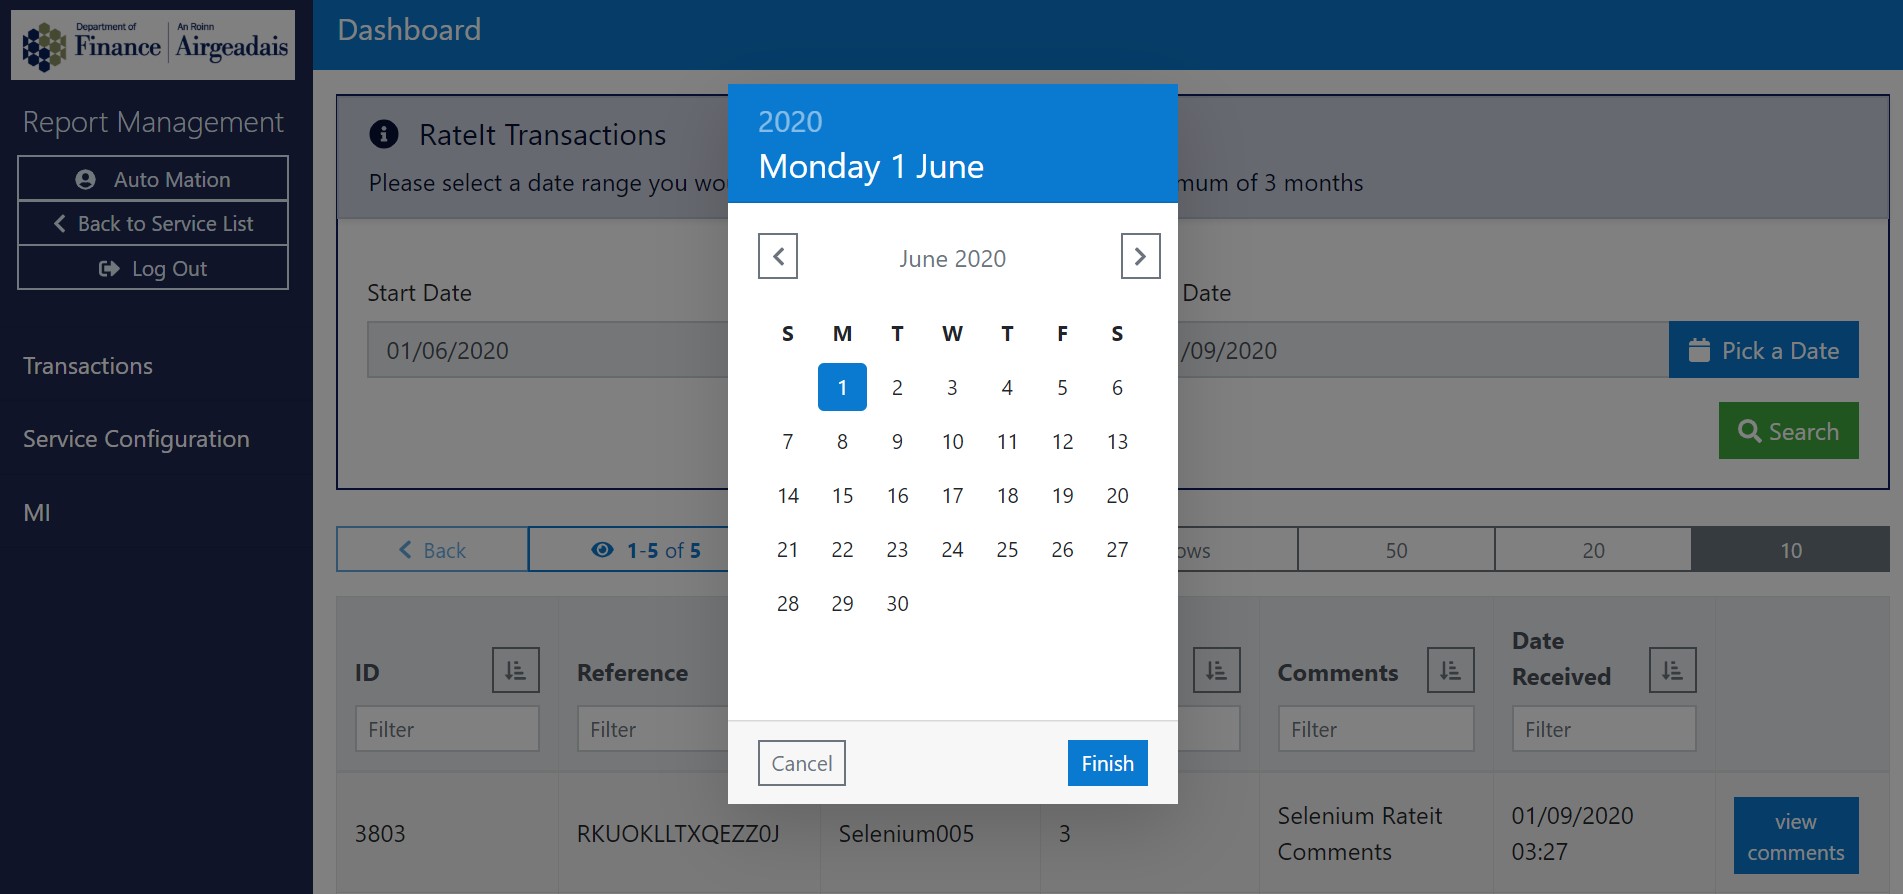
Once the user has entered the service the ‘Transactions’ page will be displayed. This will contain a list of RateIt transactions from the previous 3 months. To change the date range in which records are searched the user can click on the ‘Pick a Date’ buttons and modify the start and end date.
Note
The date range is a maximum of 3 months.
The transaction list can be filtered depending on an admin’s search criteria by typing into the free text area labelled ‘Filter’ which appears under each of the table headings. The user can also sort the list in ascending or descending order (or alphabetical order if relevant) by clicking on the icon next to the desired heading.
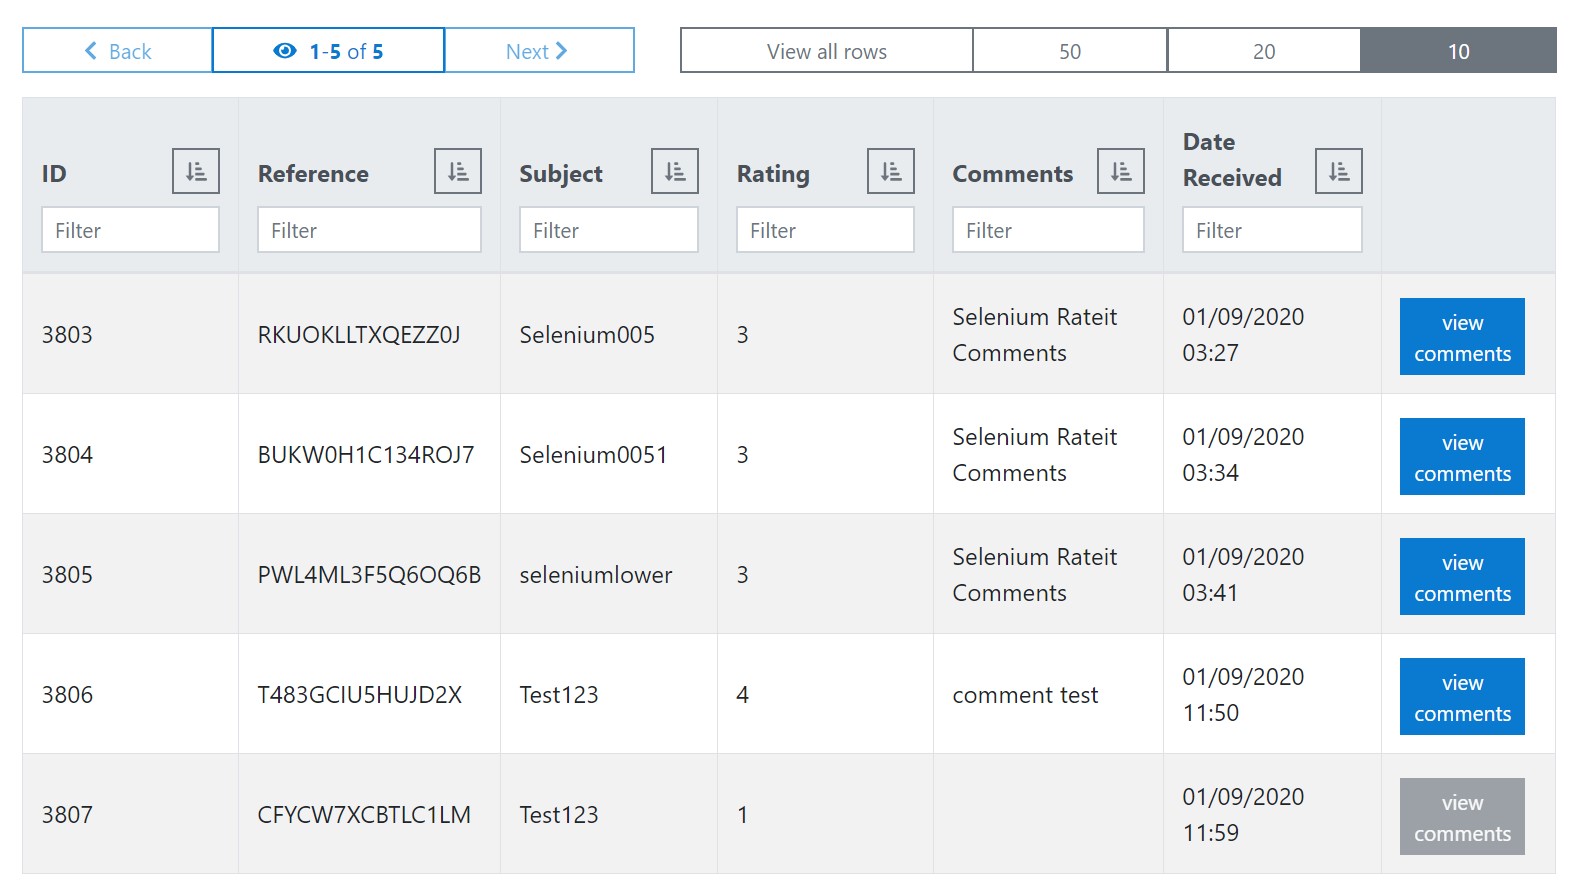
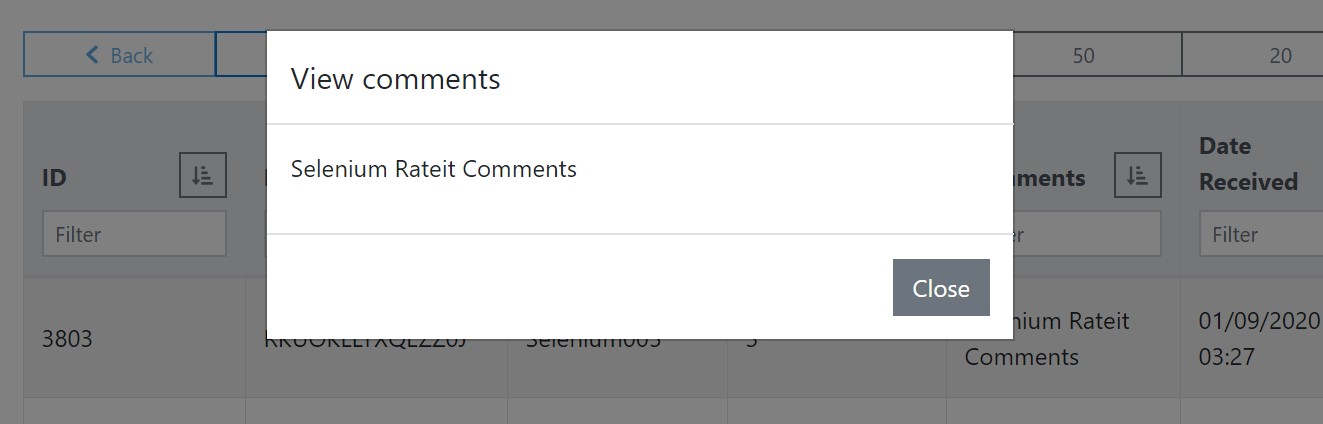
The ‘view comments’ button expands the comments for the given transaction whenever available as shown below:
Service Configuration
The service configuration page allows the user to create, edit and delete Rate It pages.
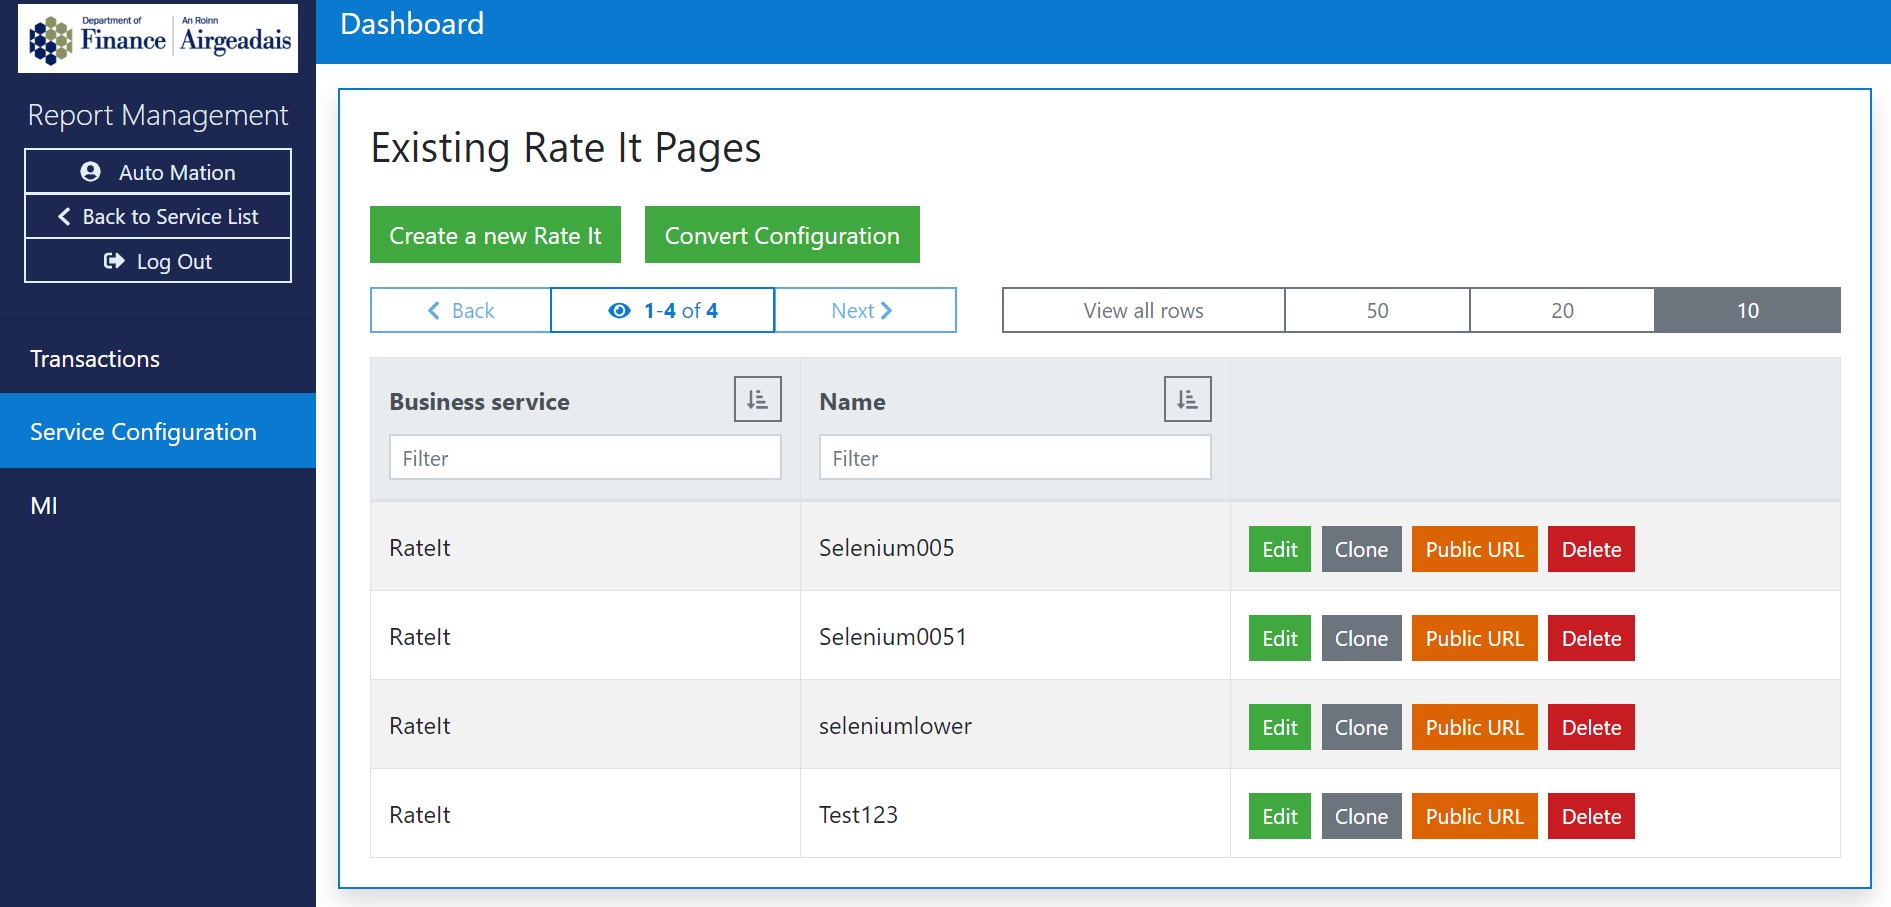
Create
The ‘Create a new Rate It’ button will prompt the user to fill the following fields. The user can toggle the ‘View existing Rate It contact from subjects’ dropdown to access the contact email of previously created Rate It Pages. The ‘Clone’ button will prompt an identical page with the fields already filled in.
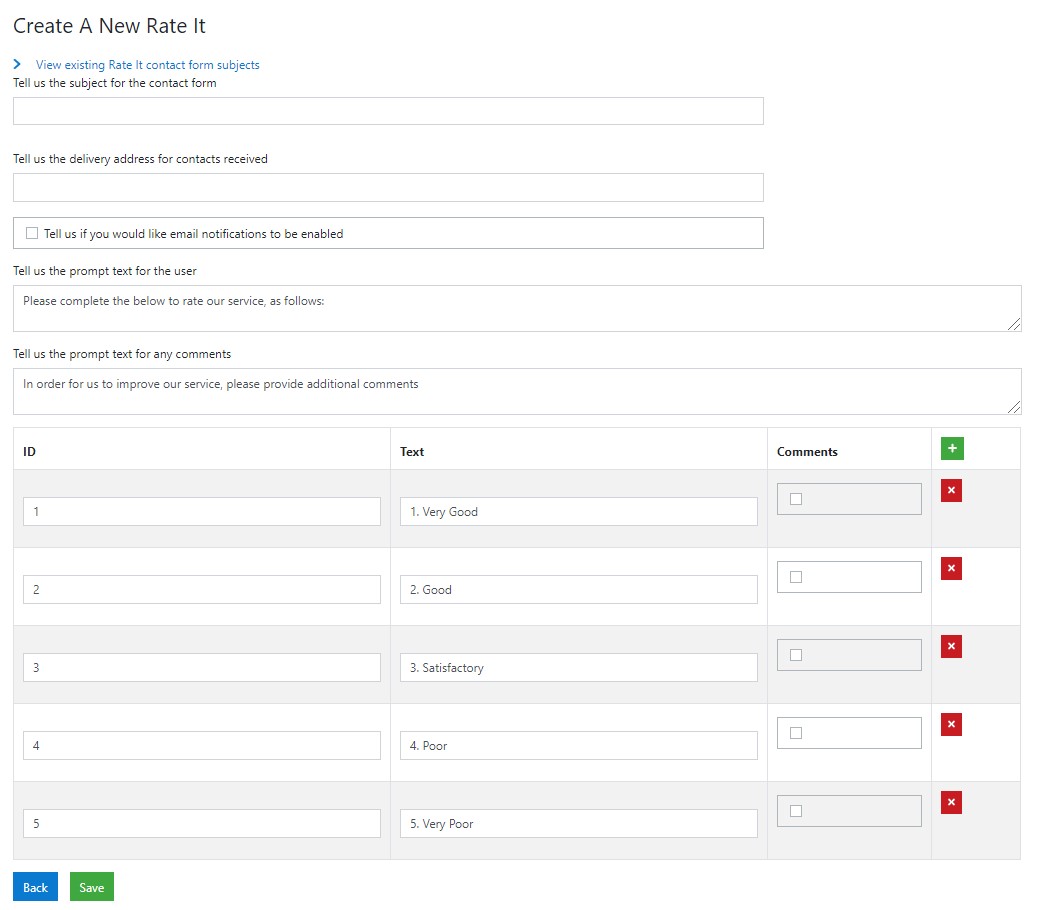
Ticking the boxes under the ‘Comments’ heading will prompt the users filling the RateIt surveys later to write a comment if they click on any of the selected options.
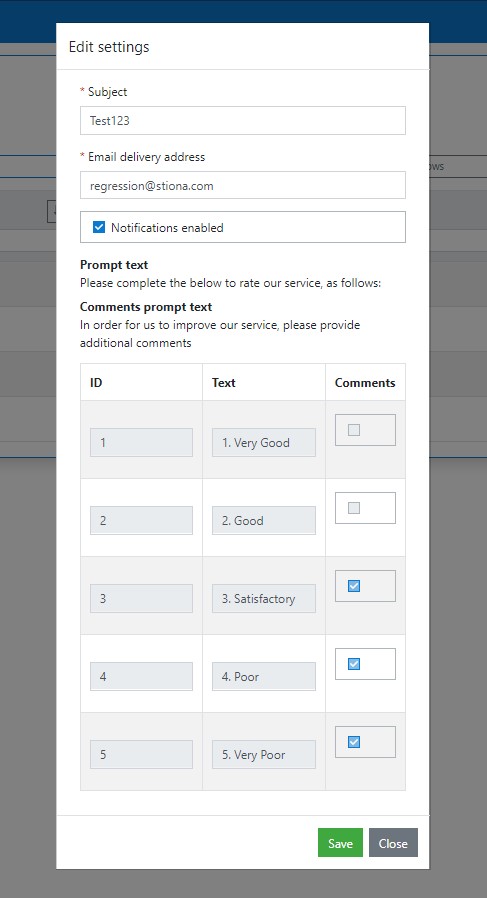
Edit
The ‘Edit’ buttons will display a similar menu in which the user can edit the details of the selected Rate It page. Users can only edit the Subject, Email Delivery Address and Notifications toggle. Users can’t edit the comment prompt section after it has been created.
Public URL
Clicking the ‘Public url’ button from the service configuration page will show the user a unique public link for the specific Rate It page that was clicked.
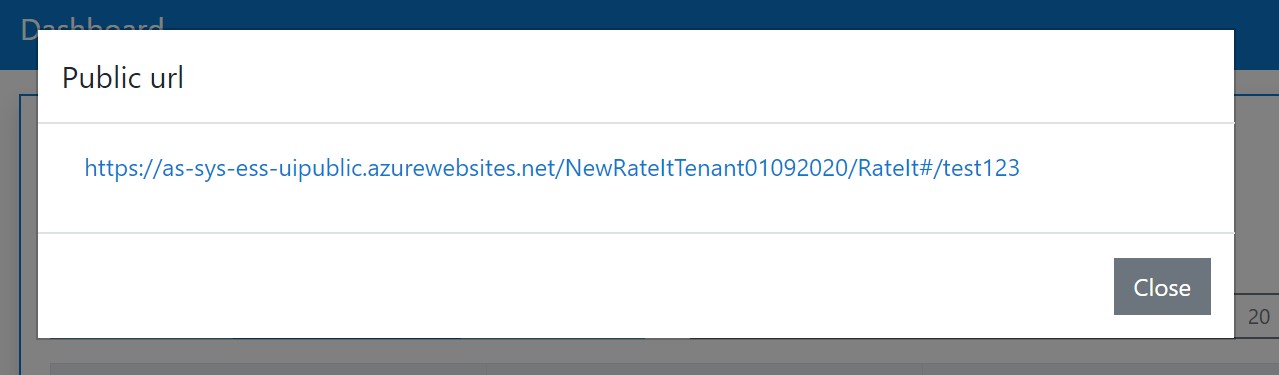
Following the link will open a page matching the details that the Admin user has set for that Rate It page on the Service Configuration page.
The users of this page will encounter a mandatory message prompt if the option marked was set to display messages on the Service Configuration page.
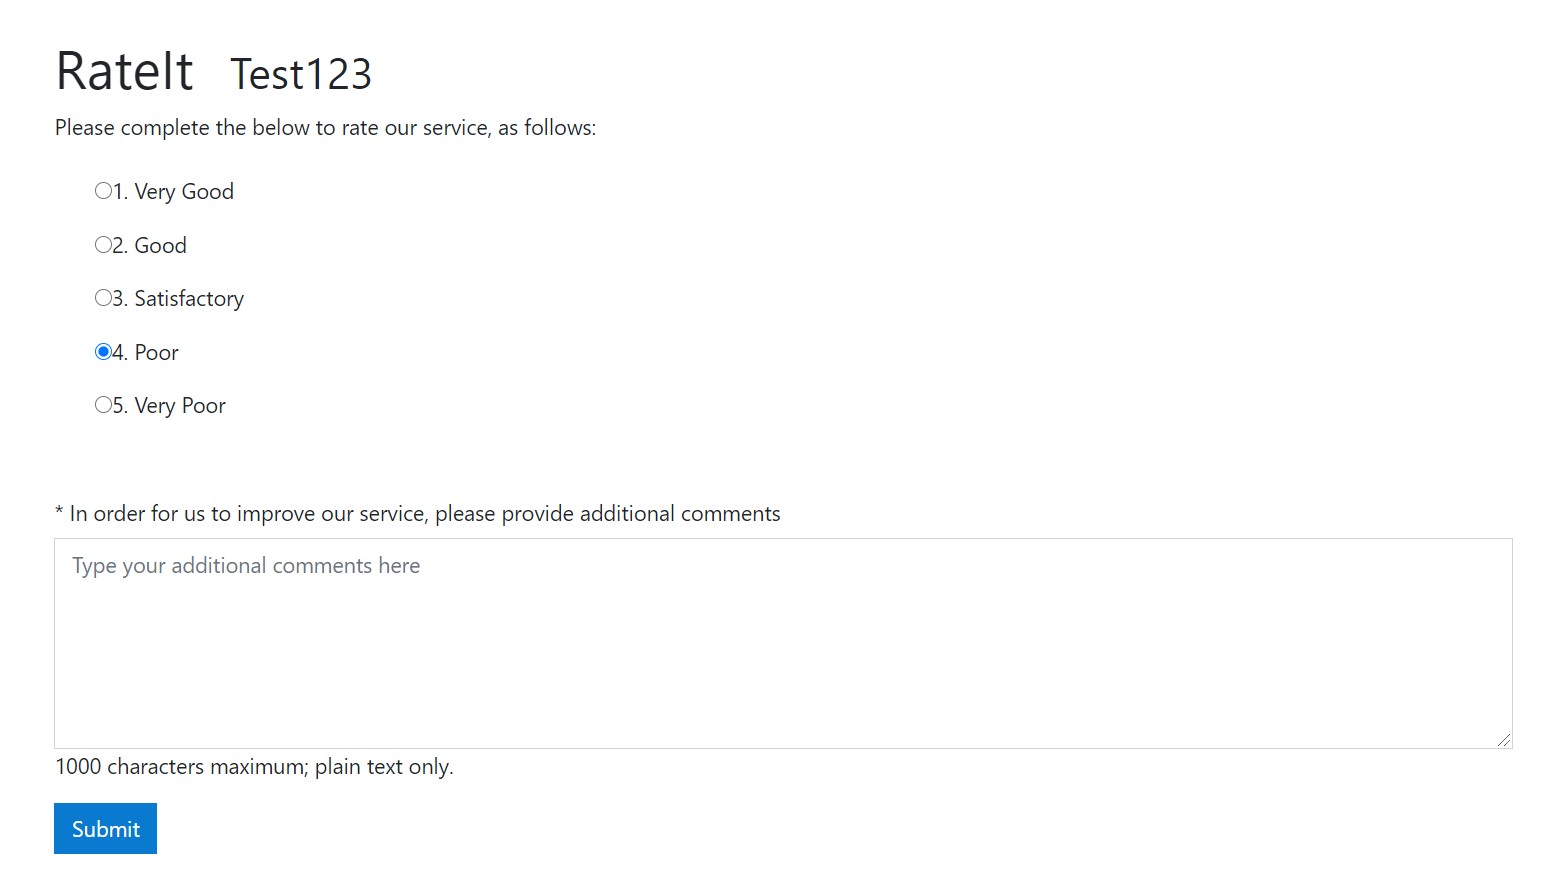
Filling this form and clicking on the ‘Submit’ button will create a new record on the ‘Transactions’ page and the MI Menu will also be updated accordingly.
MI Menu
The MI menu displays the results for the different RateIt subjects as Pie charts.
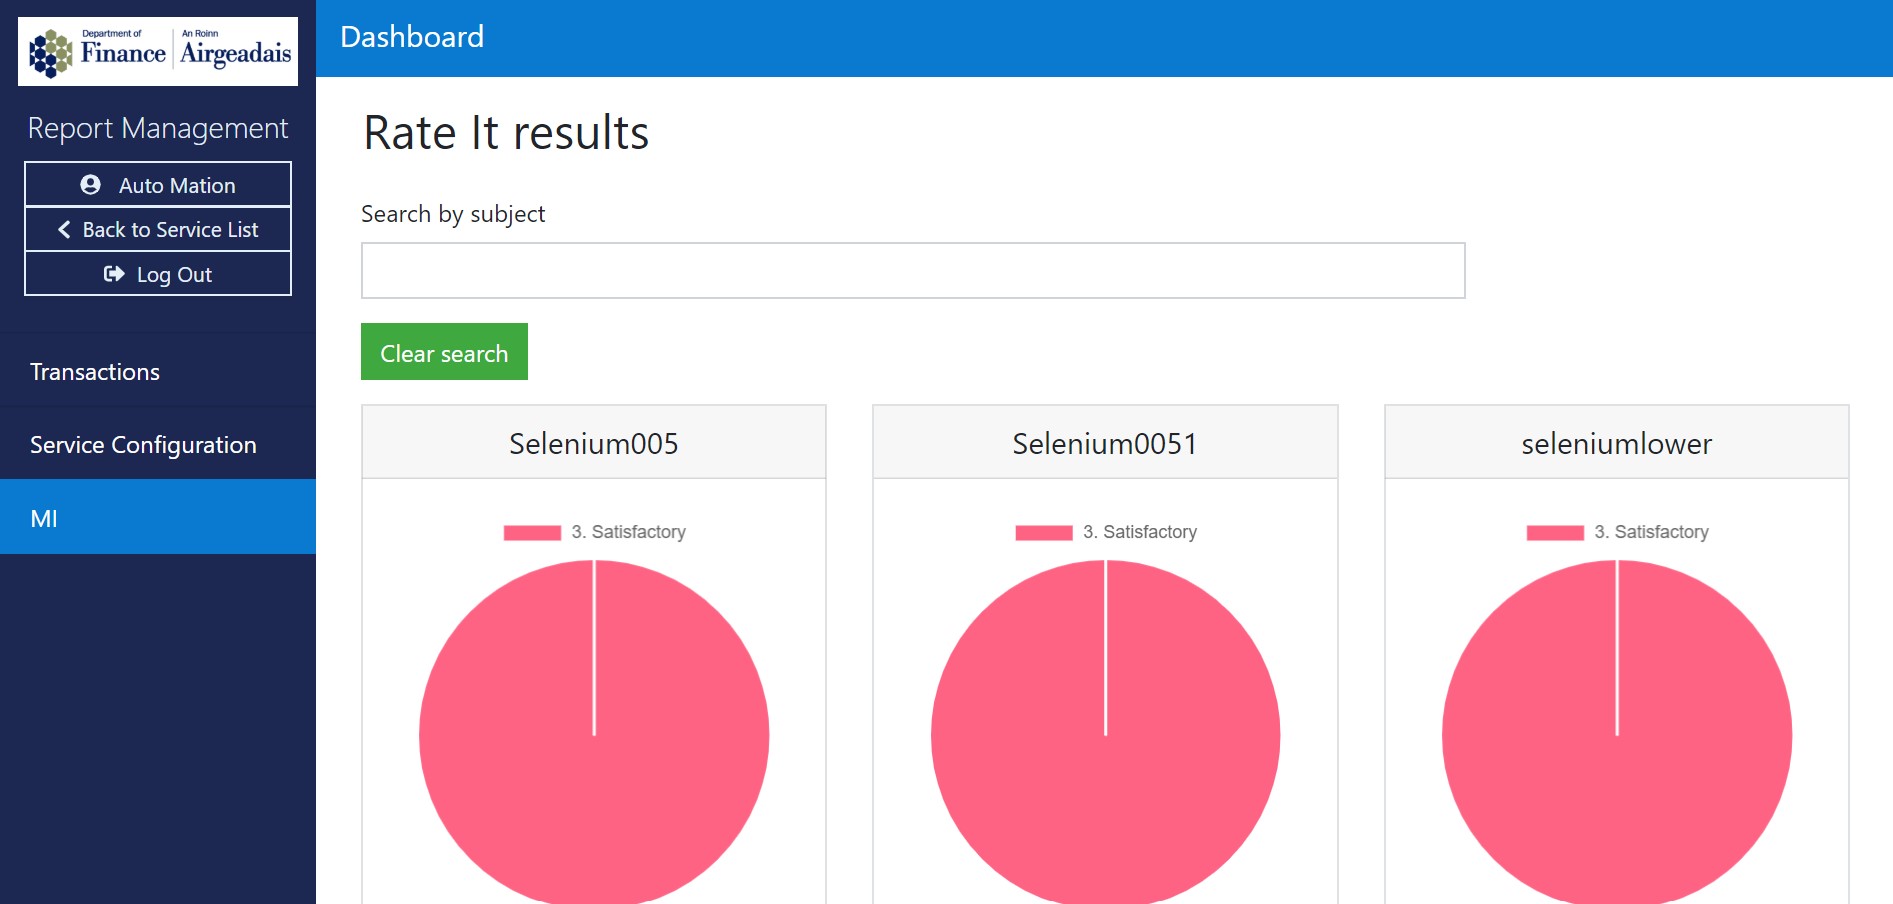
Users can search for specific subjects by typing into the ‘Search by Subject’ text box and click on ‘Clear search’ to once again see all of the subjects. Hovering the cursor over the pie chart will display the percentage of entries for each option.

Roles
There are four roles that users can have other than ‘Service Admin’.
Roles can be given and removed through the User Manager Page.
Note
A user can be given more than one role, in which case all of the permissions are combined.
1. Service User
Service users have the same access to the RateIt system as a Service Admin does but they don’t have access to the User Manager page, as shown by the lack of an ‘Associate User’ button on the dashboard.

4. Export Admin
This role gives the user an ‘Export’ section within RateIt.
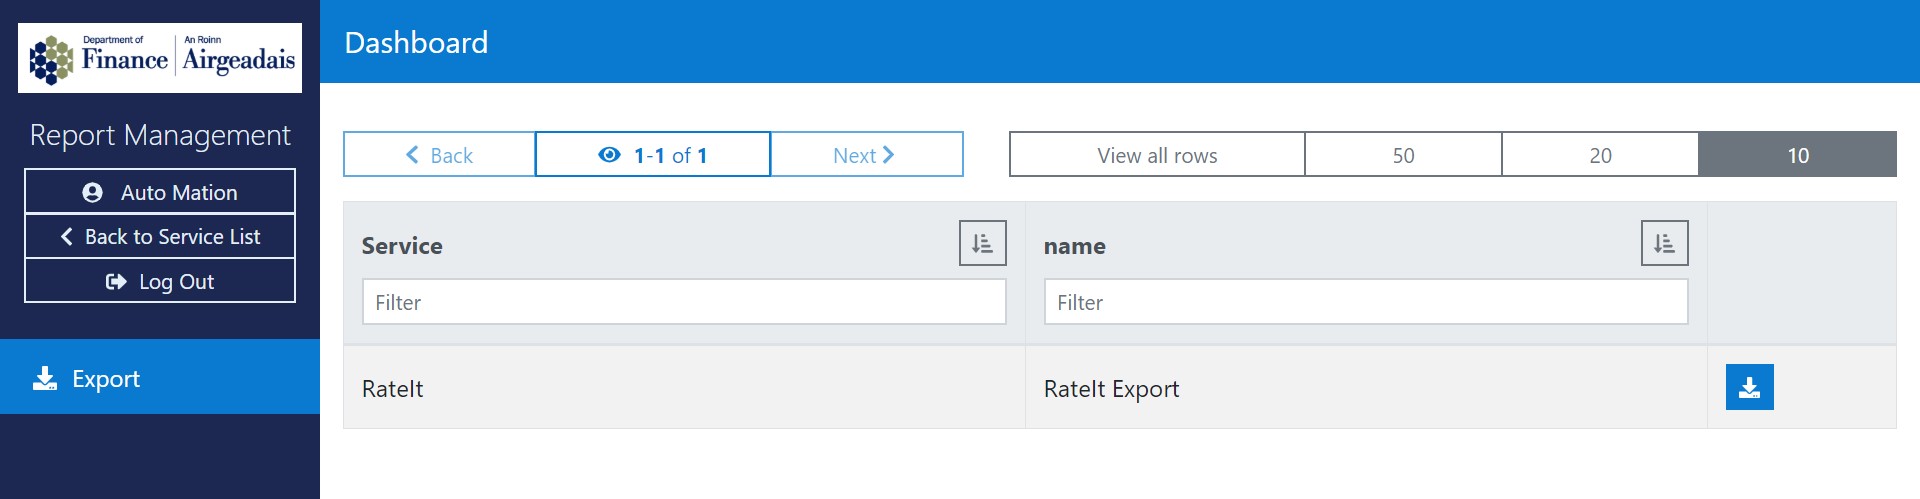
Selecting a service to export prompts the user to enter the following details, after which a .csv file is generated with the appropriate records.
