Processing Transactions
For information on roles please reference the Service Administration section.
Finding & Accessing a Transaction
As a TellUs Admin you can access a particular transaction in 3 ways:
- Access one of the core Transaction lists via the left hang menu, Filter the table using key data and then select "View",
- Complete a search for a transaction, filter the table using key data and then select "View",
- If the transaction has been allocated to you, access your "My Transaction" table via the left hand menu, Filter the table using key data and then select "View".
CLICK FOR EXAMPLE
Note:
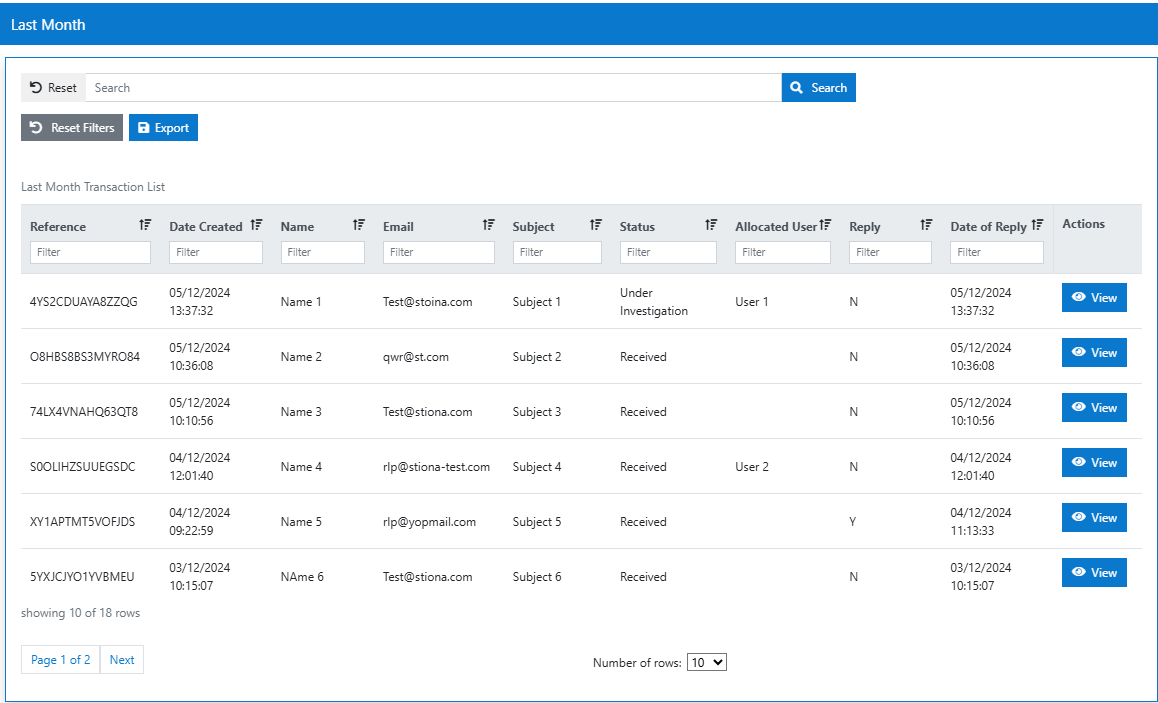
- You can view all received Tell Us Service transactions.
- You can filter & download existing Tell Us Service transactions.
- You can use navigation filters to view groups of Tell Us Service transactions.
- You can view the history and edit the row of an individual Tell Us Service transaction.
- You can view any files attached to the Tell Us transaction.
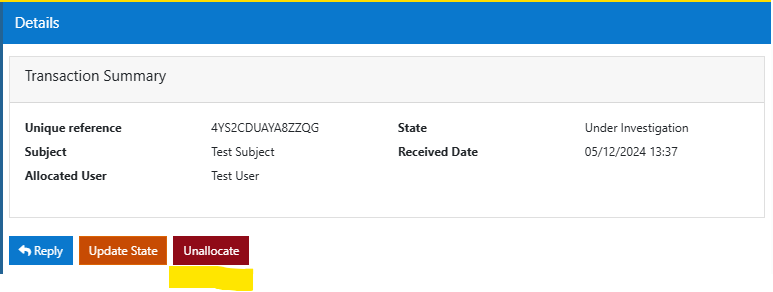
Viewing The Detail
When the transaction you require has been found in the table and you have selected "View" against the desired transaction row you will be presented with a detailed transaction view.
This view presents the transaction:
- Status
- Date received,
- Confirmation if its i allocated to a user & their details,
- The details of the Public User,
- The public users message.
Via the left hand menu you can also view the:
- Full transaction history or messages
- Any files which have been included in the transaction.
CLICK FOR EXAMPLE

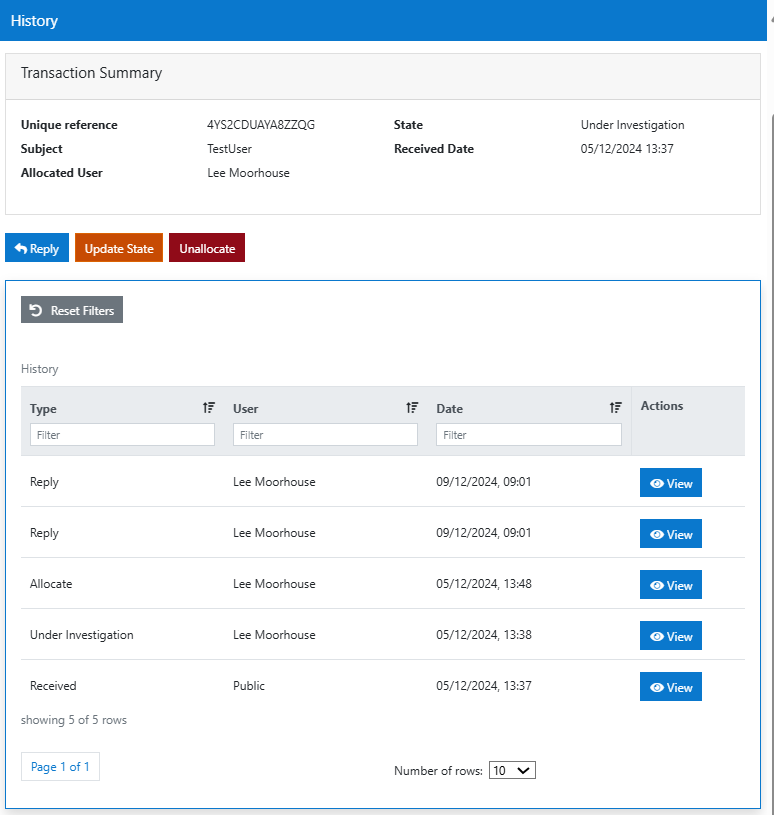
Viewing The History
The full history of a transaction can be viewed by selecting the let hand me option of "History" from within a transactions detailed view.
CLICK FOR EXAMPLE
Process/Respond To Tellus Transactions
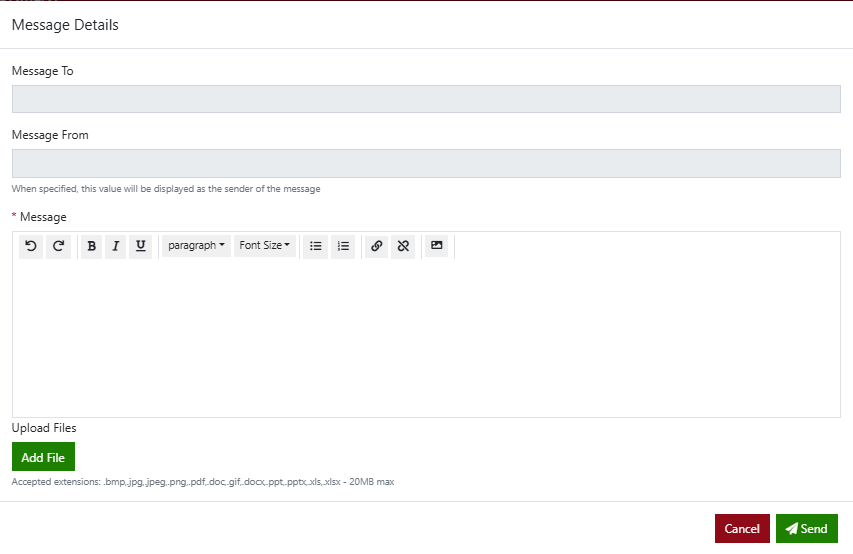
When within a transactions detailed view an admin can reply by email to a users request by:
- Clicking the "Reply" button,
- Enter an appropriate message in the "Message" field.
- Click the "Add Files" button to attach any files you want.
- Click the "Send" button to send the message or the "Close" button to cancel the sending of the message.
CLICK FOR EXAMPLE
Note
The reply and any attachments will now be visible in the transactions History.
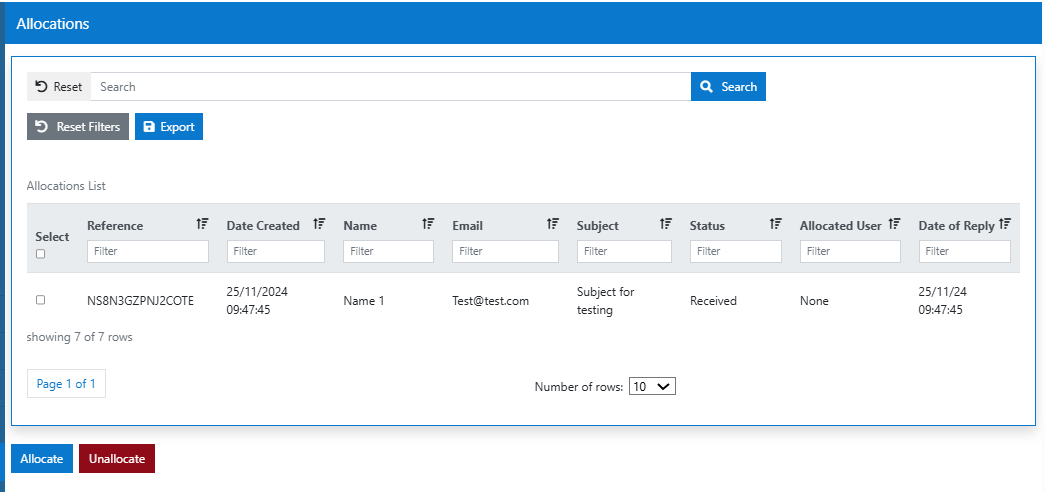
Allocate Customer Queries To Specific Users
Allocation and Unallocation is available to the Service Admin role. It can be done on a singe transaction in the transaction details or from the "Allocations" menu where multiple responses can be allocated / un allocated.
Responses can be allocated to any Admin Service User.
Note
This feature is only available to users with either the Allocator or ServiceAdmin role.
In circumstances where there are:
- a high volume of transactions for a Tell Us or,
- there are long conversations with personal interaction preferred
then allocation can be used.
Allocation allocates a transaction to a Service User.
Note
Allocation does not prevent the transaction being seen or acted upon by another user.
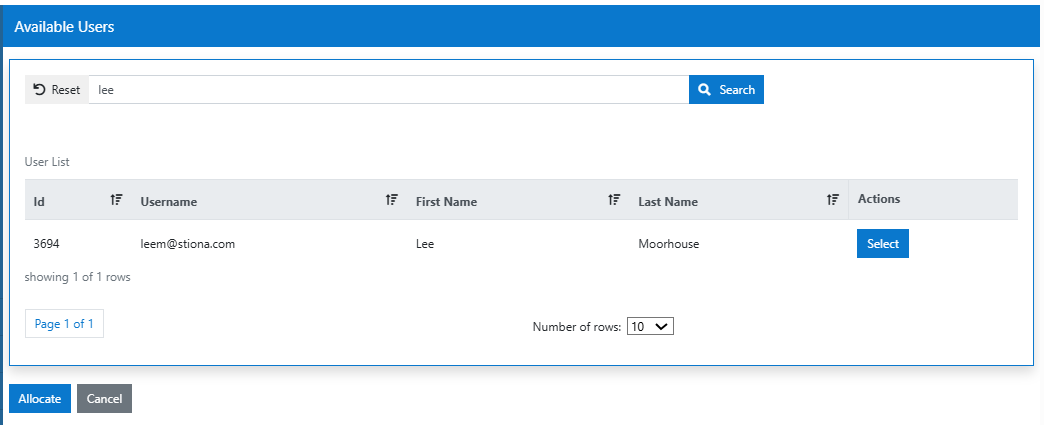
Allocate & Unallocate
To allocate a suitable transaction from within a transaction:
- Open a transactions detailed view,
- Select the "Allocate" button,
- User the table to search for an Admin User,
- Select the check box next to the desired User,
- Select the "Allocate" Button
CLICK FOR EXAMPLE
CLICK FOR EXAMPLE
To allocate a suitable transaction from within the Allocation table:
- Open a "Allocation" table via the left hand menu option,
- Select the check boxes next to the rows which need to be allocated,
- Select the "Allocate" button,
- User the table to search for an Admin User,
- Select the check box next to the desired User,
- Select the "Allocate" Button
CLICK FOR EXAMPLE