Manage Buildings
Note
This feature is only available to users with an Admin role.
As an admin, you will be able to configure and manage all your resources from the Manage Buildings section of the application.
From the left-hand navigation bar, click the Manage Buildings menu item.
From this page you can see and manage all your currently configured buildings, which are displayed with their Name, Description, Availability and action buttons.
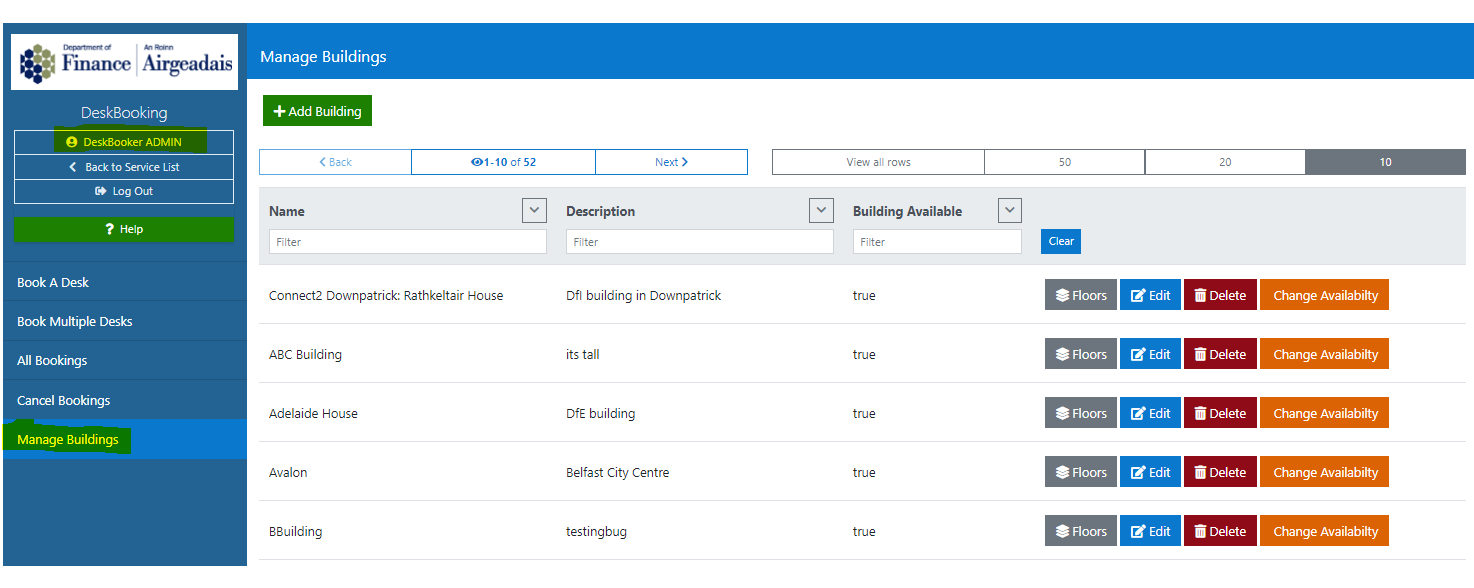
Adding a new building to the service
To add a new building, click the Add Building button at the top of the page.

Fill in the following details about your new building:
enter the Building Name
enter the Building Description
enter the appropriate Email
configure the building's AM/PM Time Slots using the Start Time and End Time fields; this will also essentially configure the building's opening and closing times.
When users come to book desks in this building, on Step 2 of the booking flows, they will be able to book for an AM, PM or All Day time slot and these times will be displayed.
configure Include Weekends to either:
- True - if the building will be available to book at weekends
- False - for Monday to Friday bookings only
configure Allow Multi-day Booking to either:
- True - to allow users to book desks in this building across multiple days
- False - to only allow users to book 1 day at a time
configure Number Of Desks To Return Per Search Day: this allows you to limit the number of results returned when a user searches for available desks. This can be set to prevent the system for example, returning hundreds of options for a large building.
configure Building Available to either:
- True - building is displayed in the Building dropdown list and can be selected by bookers
- False - building is not displayed in the Building dropdown list and therefore, is not available for bookers to select
Clicking Save Building will add the building to the Desk Booking service.
Editing a building
You will be able to edit your building's details at any point by using its associated Edit button, making your changes and clicking the Update button to save.
Enabling/Disabling a Building
As an Admin, you have the abiltity to remove a building from the booking options.
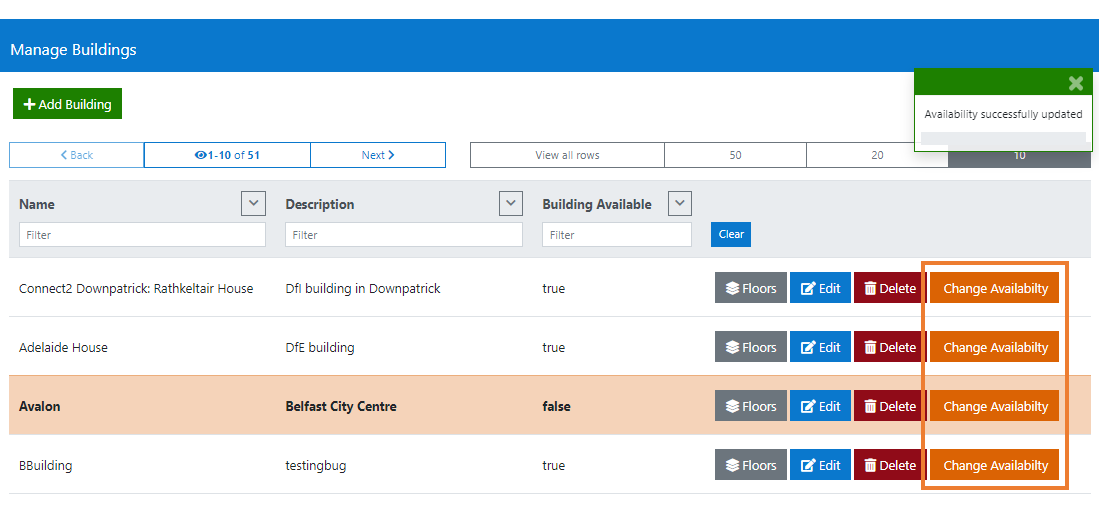
Each building is displayed with a corresponding Change Availability button, and Building Available column showing it current setting.
Clicking the button will immediately reset the building's availability. If it's current Building Available setting is equal to true, it will be set to false, and vice versa.
When a building is
- Enabled (true) - it is displayed in the Building dropdown list and can be selected by bookers.
- Disabled (false) - it is not displayed in the Building dropdown list and therefore, is not available for bookers to select. It will also be highlighted in the Manage Buildings list as shown below.
Note that admins can also change the availability of a building by editing its details page.
Scheduling the unavailability of a building
You can schedule a period of unavailability to occur at a future date or date range. This can be applied to a building, floor or zone.
For full information on this feature, please refer to userguide - Holidays and Breaks.
Deleting a Building
As the admin, you will be able to delete any building which is no longer required or available.
From the left-hand navigation bar, click the Manage Buildings menu item.
Locate your building in the list and click its associated Delete button which will display a confirmation modal:
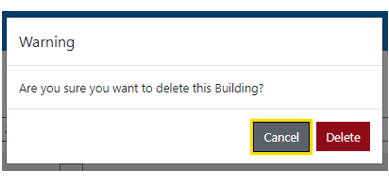
- Clicking Cancel will dismiss the modal
- Clicking Delete will dismiss the modal and delete the building and all of its floors, desks and zones.
However, if there are any current bookings against desks in this building, the following message will be displayed and you will not be able to complete your deletion until all the open bookings have been cancelled.
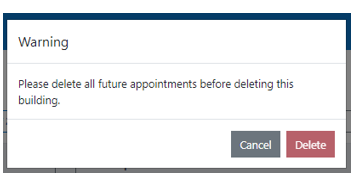
Click the Cancel button to dismiss the modal.