TellUs Admin
Create & Configure Transactions
New TellUs Left Hand Menu
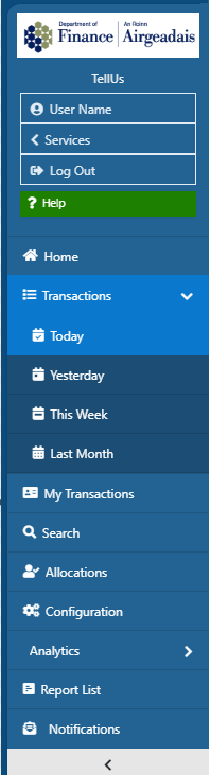
As an Administrator with All permissions when you first launch the TellUs application you are presented with new a new left hand menu navigation bar. The left hand menu can be collapsed this increases Accessability by maximising the usable are in the right hand information panel. This feature can be activated and deactivate by selecting the toggle at the bottom of the left hand navigation bar.
The left hand navigation Options include:
- Home Icon - Selecting this navigates the user to the service`s starting/home page from any location,
- Transactions - This produces a list of public responses to TellUs transactions that have been made available to the public and has has sub menus of:
- Today
- Yesterday
- This Week
- Last Month
- My Transactions - This produces a table of Public transaction requests that have been allocated to you as a user to own and work.
- Search - From here you can find sort and view any transaction that has been submitted by a public user.
- Allocations - Users who are assigned the "SuperUser" role have access to view a table of all Transactions which have been allocated out to other Admin users.
- Configurations - Here a list of Transaction Types can be viewed and if selected Edited.
- Analytics - Users who are assigned the "MIUser" role have access to view Basic MI of all transactions within this TellUs Service.
- Report List - Users who are assigned the "ReportUser" role have access to The service specific reporting features.
- Notifications - Users who are assigned the "TemplateAdmin" role have access to view and edit and create emails used within transactions.
CLICK FOR EXAMPLE
TellUs Transaction Tables
After launching the service, from the left-hand navigation bar click the Transactions menu item and select any of the transaction option timelines: Today; Yesterday; Last Week; Last Month. * This will display a list of Public requests which originate from this Service`s TellUs Transactions.
CLICK FOR EXAMPLE
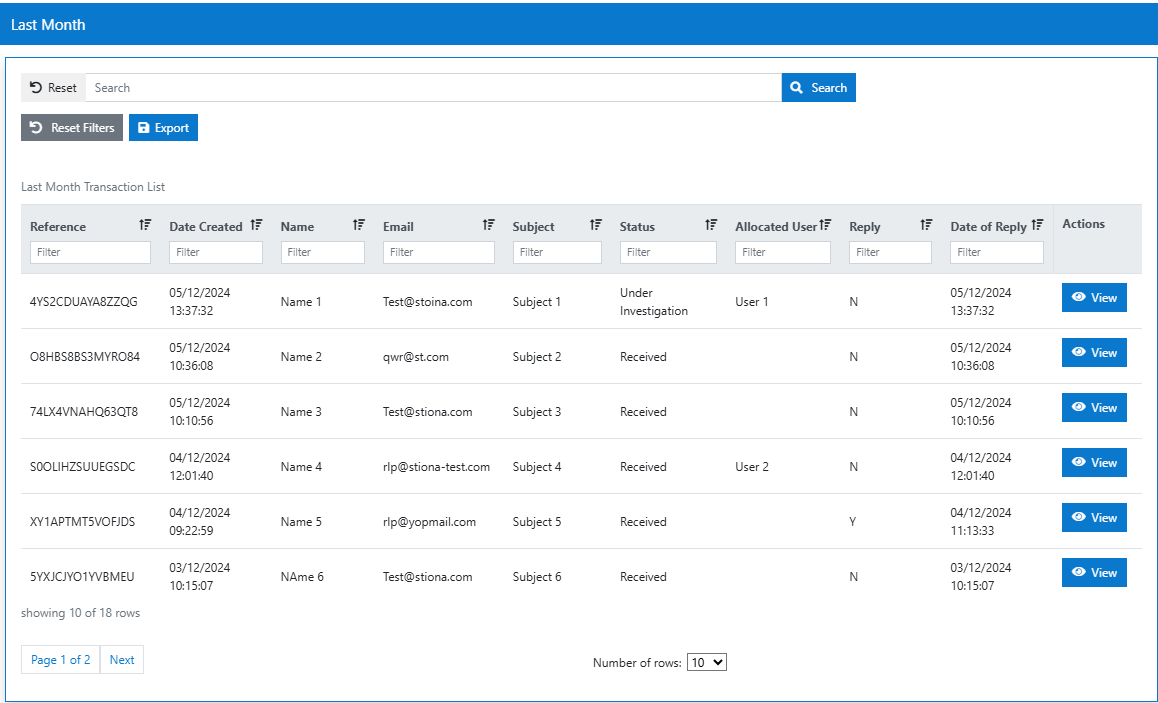
Selecting view against any of the tables rows permits users to see the specific public transaction request details.
TellUs Transaction Details View
After launching the service, from the left-hand navigation bar click the Transactions menu item and select any of the transaction option timelines and select "View" against any of the table rows. * This will display the detailed view of a particular Public transaction request.
CLICK FOR EXAMPLE

Functionality Within The New Detailed View
As part of the accessability upgrade is was necessary to transfer some of the functionality previously present in the table view into the new "contextual" TellUs detailed view.
Functionality available includes:
- Reply - Selecting this action button allows Admin Users to respond to the Public request by email, if configured the amin will be able to include attachments within the response email.
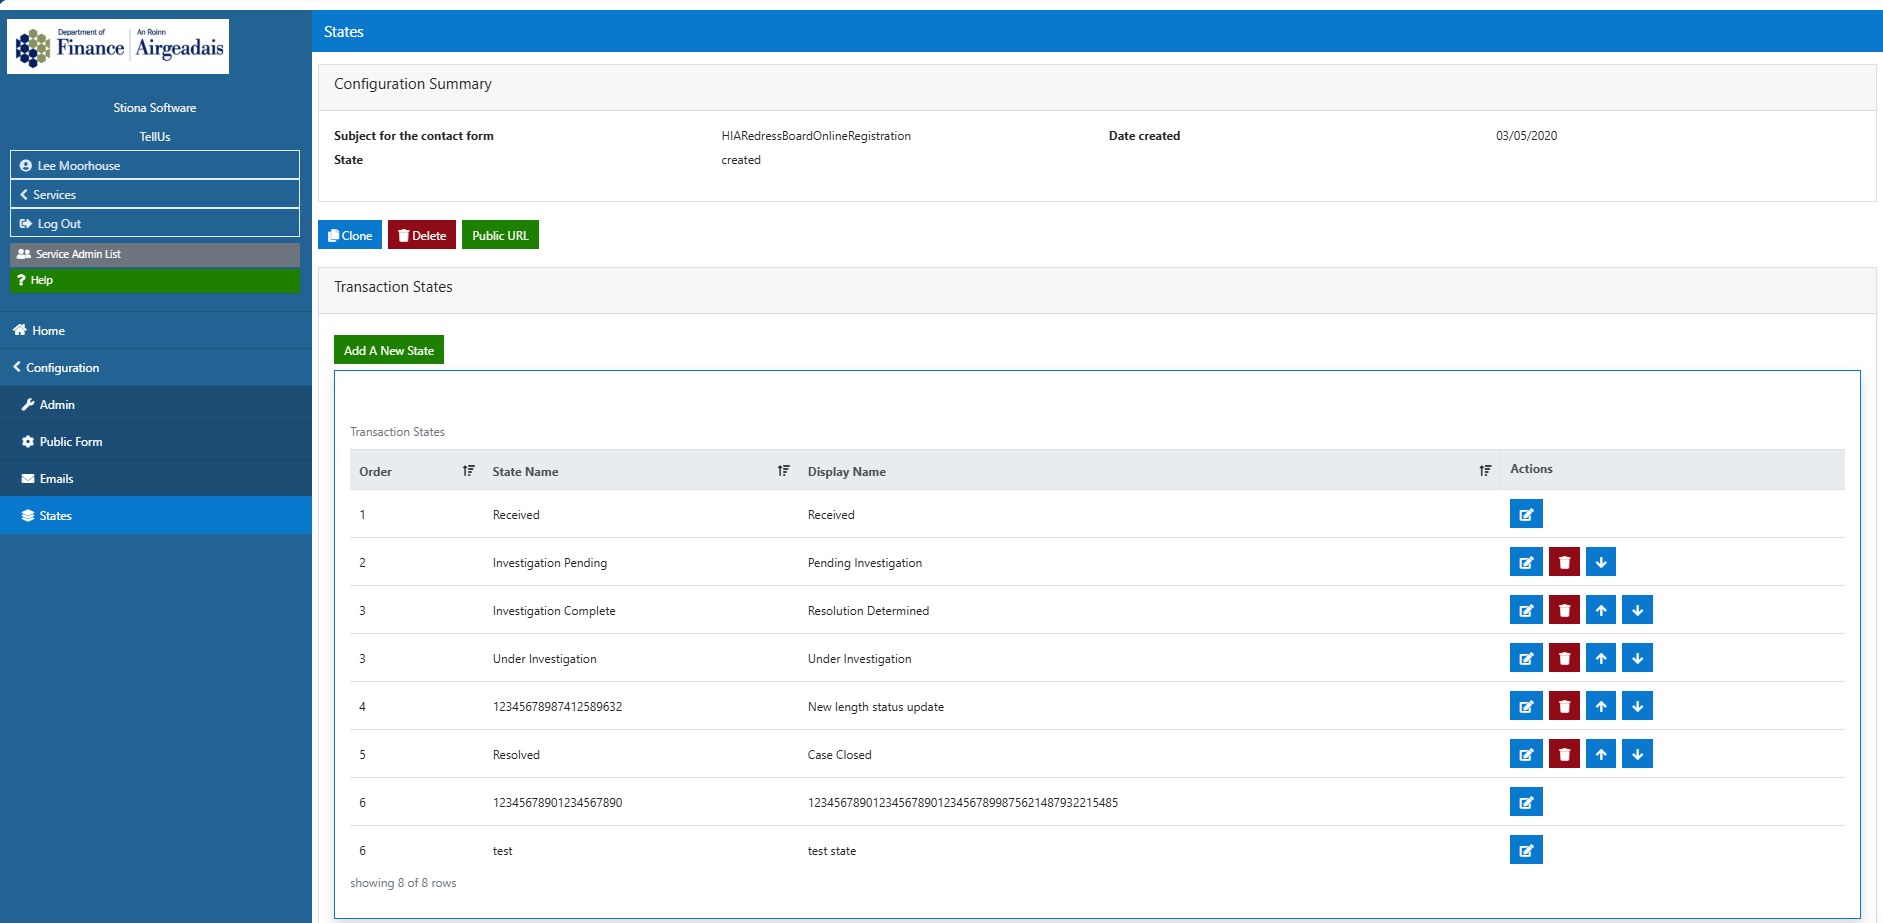
- Update State - The Admin user can update the state and record a comment against the transaction record so that other admin users are aware of investigations and responses to the request. For each new Tell Us page created, the following three states are automatically configured:
- Received: (starting state) all new transactions will enter the admin system in this state.
- Under Investigation: (interim state) admin users can set transactions to this state while being worked on.
- Resolved: (end state) admin users can close out transactions using this state.
- You can use their associated Up and Down arrow buttons to reorder how the interim states are displayed in the Update Status dropdown list.
- Allocate/Unallocate - If the admin has the Allocate SuperUser Role this functionality enables users to associate the specific transaction to a particular Admin user. This way admins can directly own customer requests.
- Details - This is the default transaction landing page accessible by the new contextual menu. This displays the details of the customer request.
- History - This option is available within the new contextual left hand menu and details all Admin and Public interactions.
- Files - This option is available within the new contextual left hand menu and details any files that have been uploaded as part of the request.
Configurations Table
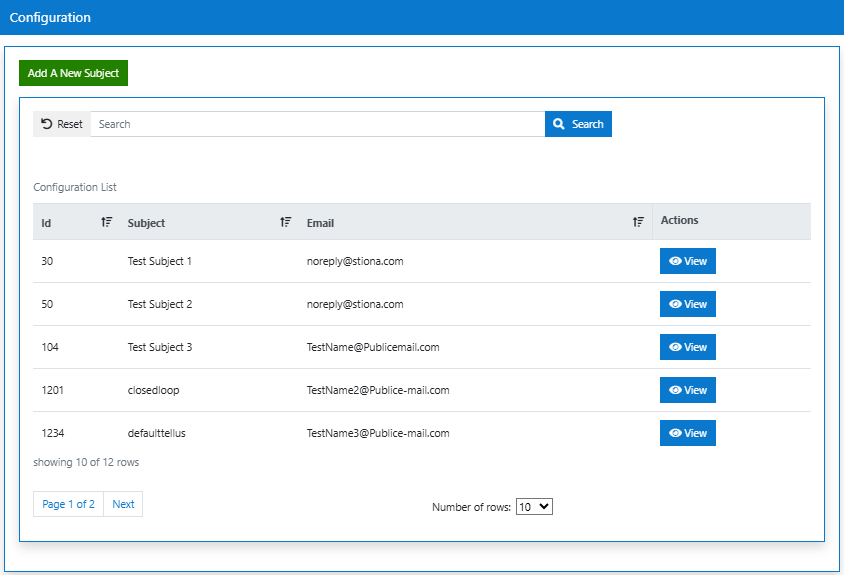
After launching the service,from the left-hand navigation bar click the Service Configuration menu item.
- This will display a list of all the currently configured Tell Us Transactions (as per Transactions page)
- Selecting view against any row navigates admin user to the detailed view and configuration edit functionality.
- The "Add A New Subject" action button launches the create new TellUs transaction function.
CLICK FOR EXAMPLE
Create New Transactions
After launching the service,from the left-hand navigation bar click the Service Configuration menu item. Then select the "Add A New Subject" button.
This launches the new accessible 2 stage transaction creation wizard:
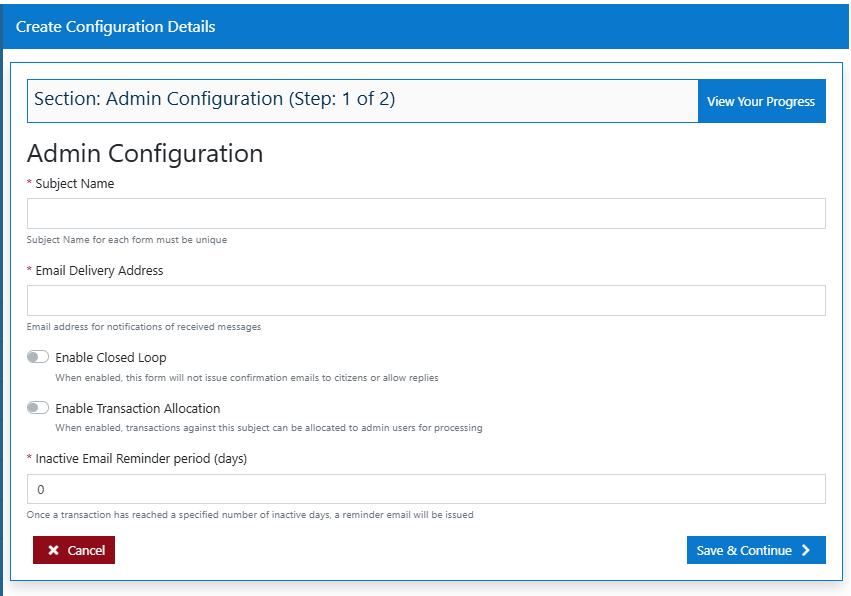
- Stage 1 - Determining subject type and behavior,
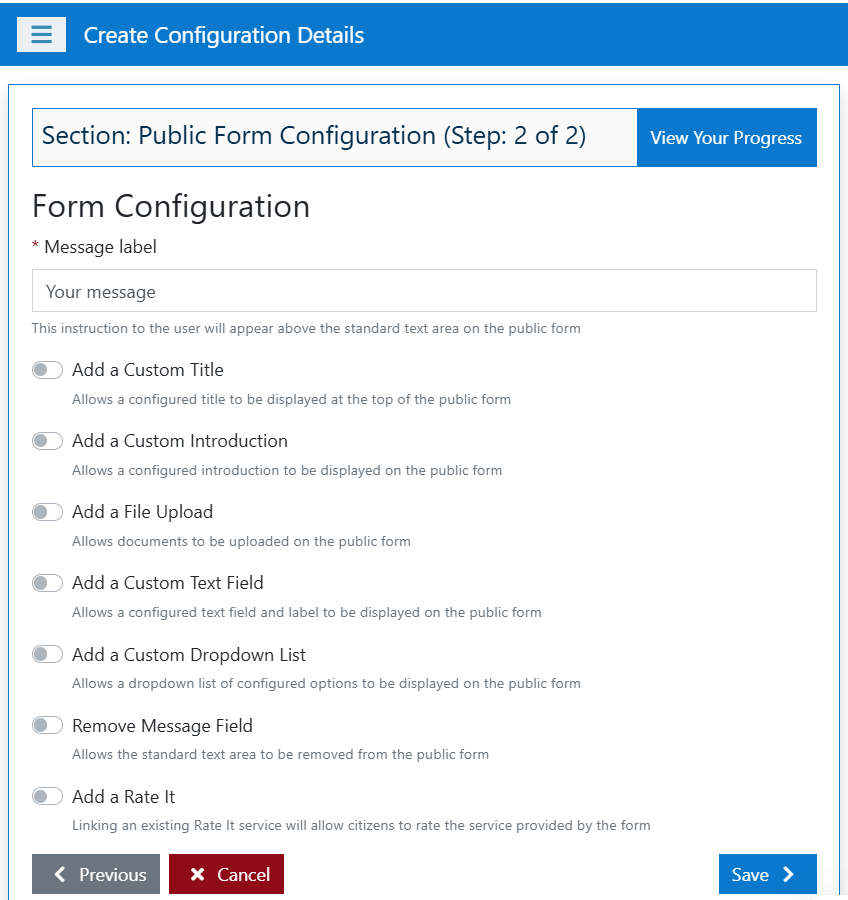
- Stage 2 - Defining the content of the TellUs transaction.
CLICK FOR EXAMPLE
CLICK FOR EXAMPLE
Data collected
The wizard collects the following information:
- Subject for the contact form (mandatory): you must enter a unique subject title;
- this will be the name of your page and will form part of its unique url
- this text will be displayed at the top of your Tell Us form (unless you configure a custom title)
- Note that this text cannot be changed once the page has been created.
- Email delivery address for received messages (mandatory): you must enter a valid email address;
- this will be the email address that receives all contacts submitted through this form.
- enable closed loop: if checked, automated emails will not be sent to the citizen.
- enable allocate service user: if checked, transactions received for this service can be allocated to a service user for processing.
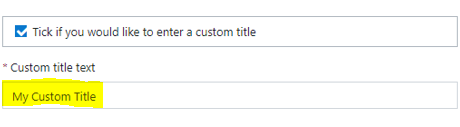
- add custom title: if checked, prompts you to enter a customised title to be displayed on the Tell Us page.
- add custom introduction: if checked, prompts you to enter a customised introduction to be displayed on the Tell Us page.
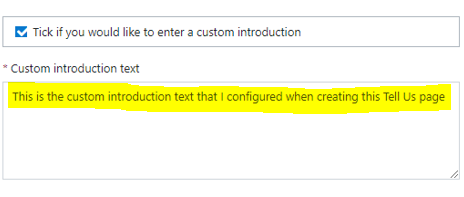
- if you do not configure a custom introduction, then the following default text will be displayed: Complete the fields below and submit the form to send us the information.
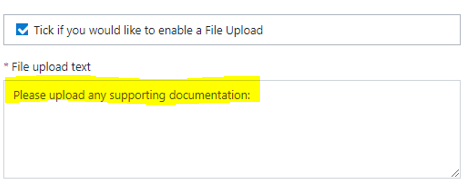
- enable file upload: if checked, prompts you to enter file upload text which will be displayed on the Tell Us page along with an upload button.
- make file upload required: if checked, this makes the file upload mandatory for the citizen; they will have to upload an attachment before they can submit their Tell Us message.
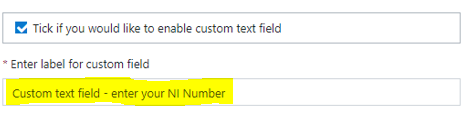
- add custom text field: if checked, prompts you to enter a label to be displayed along with the additional text field on the Tell Us page.
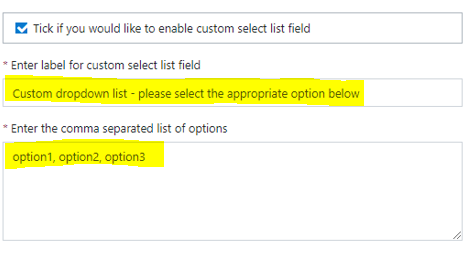
- add custom select list field: if checked, prompts you to enter a label and a list of options to be displayed in the custom dropdown list on the Tell Us page.
- enable Rate It: if checked, prompts you to enter a Rate It subject name.
- disable the message field: if checked, the text area on the Tell Us page to allow citizens to type in information, will NOT be displayed.
- Inactive reminder email notification period: enter the number of days to elapse before the system will send out an automated reminder notification.
Configure Or Change A Transaction`s Configuration
After launching the service,from the left-hand navigation bar click the Service Configuration menu item. Then select the "View" against a transaction row.
This launches the new "Configuration View" from here users can:
- Change settings that were attributed to the transaction through the 2 stage set up wizard.
- "Clone" the transaction for reuse.
- Source the Public URL which can be embedded for use in both internal and external web pages.
- Users can choose to "Delete" the transaction instance.
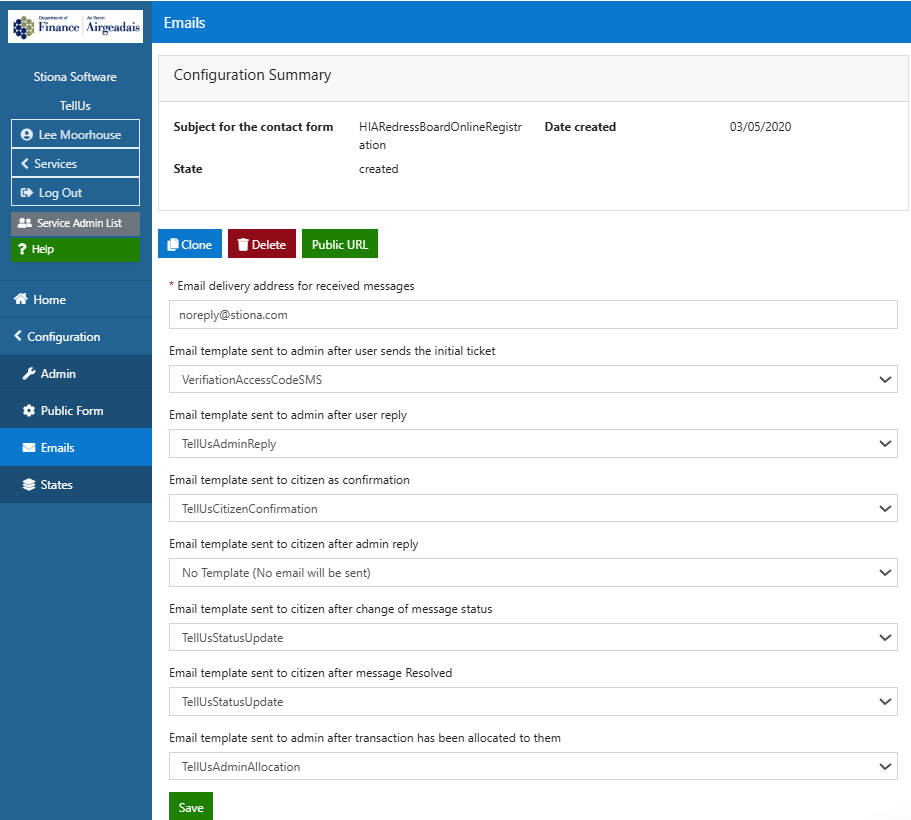
- Within the new left-hand contextual menu the transaction can be configured to use specific "Emails".
- Within the new left-hand contextual menu the transaction can be configured to use specific "States".
CLICK FOR EXAMPLE
CLICK FOR EXAMPLE
Public URL
For each Tell Us page created, the system will automatically generate a unique Public URL; this is the link that citizen's will click to navigate to, fill in and sumbit their Tell Us communications. It is this url which your website provider will display on the appropriate public web page.
To view and use the Public URL:
- Click the Public URL button.
- Click the copy icon button
- Save the output url address to your clipboard for you to share with your website provider.
- clicking the url will navigate you to the public Tell Us page; from here you can
Note
Confirm that it is displaying as expected before making the link available publicly. Test the link by clicking it and fill in a form and submitting to view in the admin system.
Reuse Existing TellUs Transactions By Cloning & Changing Aspects
To create an exact copy of an existing transaction an Admin user should:
- Launch the service,
- Click the "Service Configuration" within the left-hand navigation bar,
- Select the "View" against a transaction row,
- Select the "Clone" button,
- Change any settings via the 2 stage set up wizard,
- Save the transaction
Note
The Subject name cannot be the same as the original source TellUS transaction.
Removing a Tell Us page
You can remove an existing page from your configuration using its associated Delete button and this will:
- remove the page from the list of Existing Tell Us pages
- for any existing transactions which were submitted against it.
Important
It is important to note that the public URL has NOT been deleted so you must ensure to remove the page's link/button from the public website or citizens can continue to submit transactions against it.
Administer/Configure Existing Service Transactions
This section contains information regarding the roles and configuration available to the service administrators.
Note
This service currently employs Service Manager functionality.
Service Configuration
From the left-hand navigation bar:
- click the Service Configuration menu item
- This will display a list of all the currently configured Tell Us Transactions (as per Transactions page).
- Select View against an existing transaction
- This will display the detail of that specific TellUs transaction.
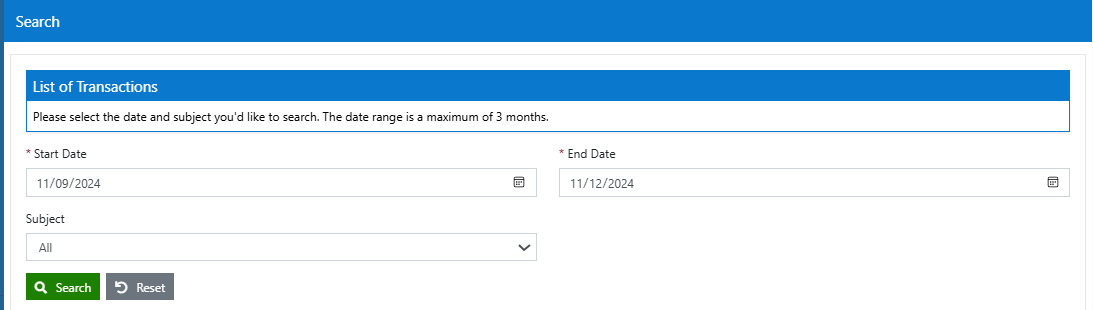
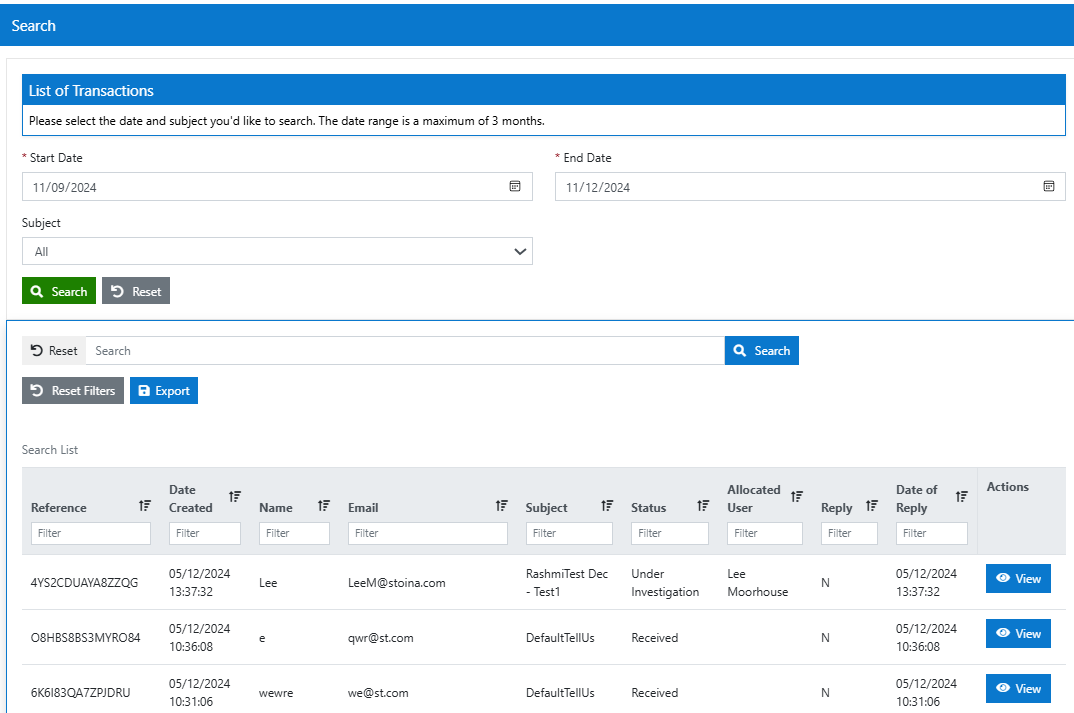
Search
TellUs Admins can complete a search to find both current and historic tell us transactions. The transactions themselves supply a full interaction history from both the Public and Admin users.
- After launching the service, from the left-hand navigation bar click the Search menu item.
- This will produce a Transaction search facility.
- Enter a desired date range for the transaction search
- Because of the large daily volume of incoming TellUs transactions the date range is limited to 3 months,
- The most recent 3 months is populated by default.
- Select the tell us subject the user wished to search within via the drop down,
- User the dynamic results table to further filter the search results on key fields.
CLICK FOR EXAMPLE
CLICK FOR EXAMPLE
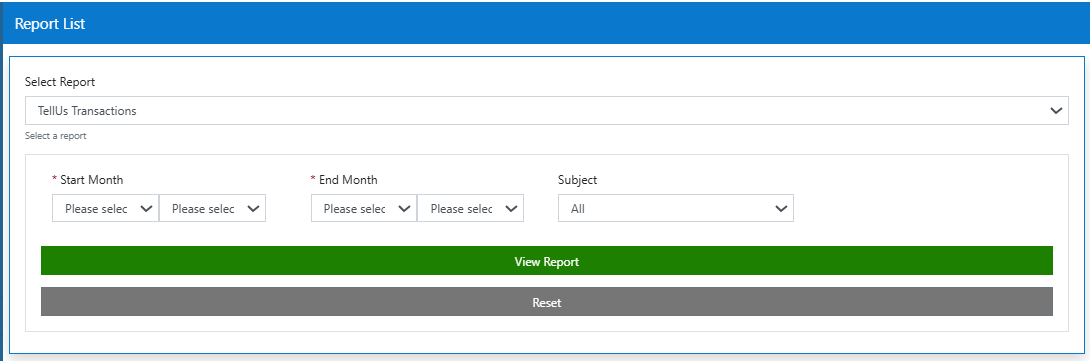
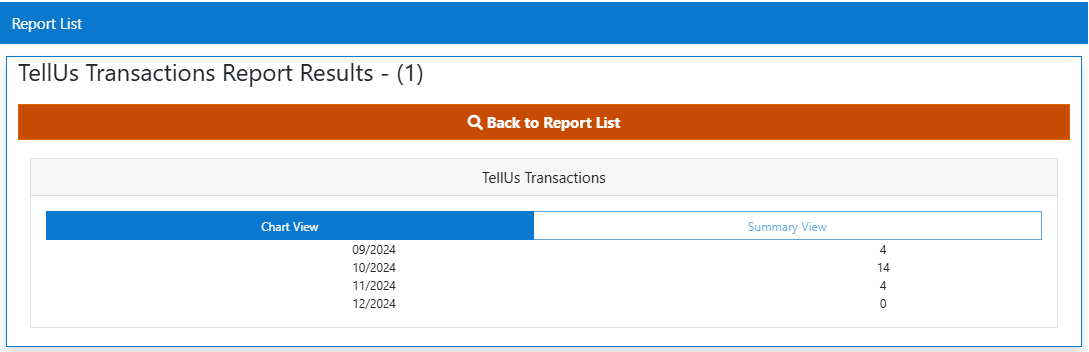
Reports
Reports are only visible to Admins who have the ReportUser role. There are 4 types of reports present:
- Received/Resolved MI
- Received/Resolved Daily MI
- Transactions
- History
To access reports:
- After launching the service, from the left-hand navigation bar click the Reports menu item.
- This will produce a reports facility.
- Select the report type required via the drop down,
- Enter a desired date range required,
- Select the tell us subject the user wished to search within via the drop down,
- Select View Report
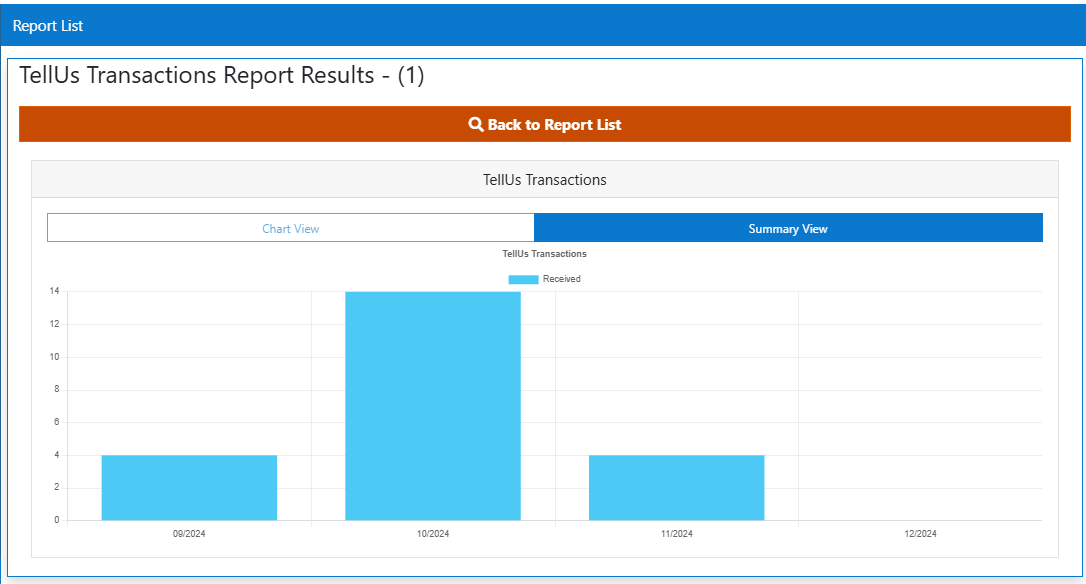
The outputs can be viewed in both a table and a chart view.
CLICK FOR EXAMPLE
CLICK FOR EXAMPLE
CLICK FOR EXAMPLE
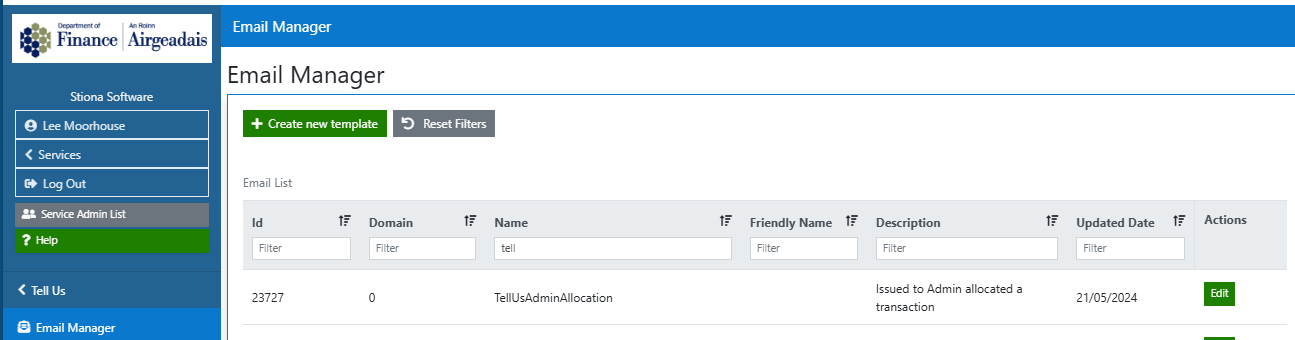
Notification
The Notification Function is only visible to Admins who have the TemplateAdmin role.
Accessing Notifications:
- After launching the service, from the left-hand navigation bar click the Notifications menu item.
- This will produce a dynamic table of all TellUs Service Notifications.
CLICK FOR EXAMPLE
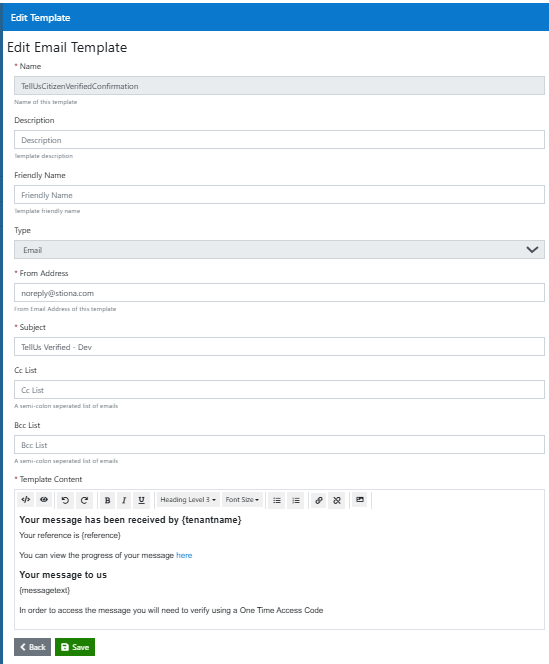
Editing Notifications
- After launching the service, from the left-hand navigation bar click the Notifications menu item.
- This will produce a dynamic table of all TellUs Service Notifications.
- Select Edit on the desired table row
- This will produce a list of communications fields that can be changed/edited
- Select Save to confirm the changes.
CLICK FOR EXAMPLE
Note
The Editing notifications should only be completed by the TellUs transaction owners as communications may be issued to public and admin end users.
Important
These are automatically set to the correct templates and although they can be changed, we advise that you do not as this may result in the wrong email template being sent to the recipient at the wrong time.
For information about making changes to the contents of Email templates, please see Template Administration
Analytics
Analytics are only visible to Admins who have the MIUser role. There are 3 types:
- Service
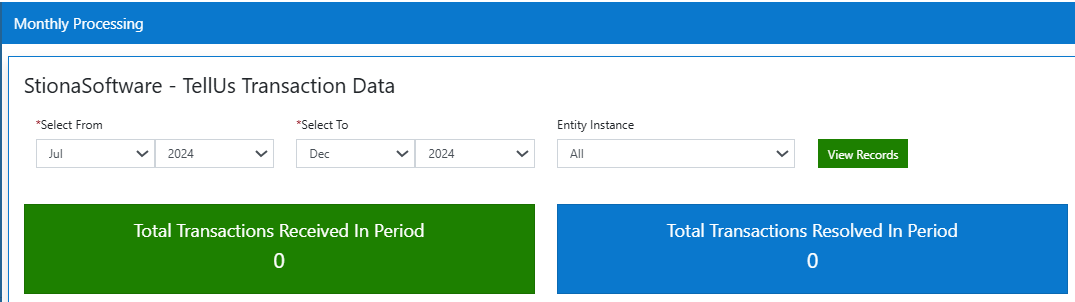
- Monthly Processing
- Recent Processing
To access Analytics:
- After launching the service, from the left-hand navigation bar click the Analytics menu item.
- This will produce a child list of the three types.
- Select the type of Analysis option from the left hand menu,
- Enter a desired date range required,
- Select the tell us subject/Instance the user wished to search within via the drop down,
- Select View Records
The outputs can be viewed in both a table and a chart view.
CLICK FOR EXAMPLE